
Introduction
Panel lining is an easy way to make your Gunpla kit more detailed and awesome! Don’t be afraid that you’ll ruin your kit because it is easy to do and I will show you two easy methods that I personally use:
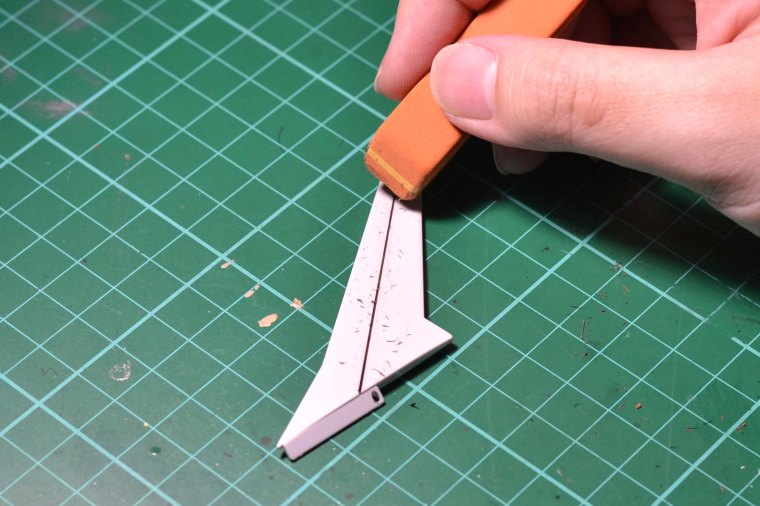
1st Method: Marker (of your choice) Panel Lining with Rubber Eraser
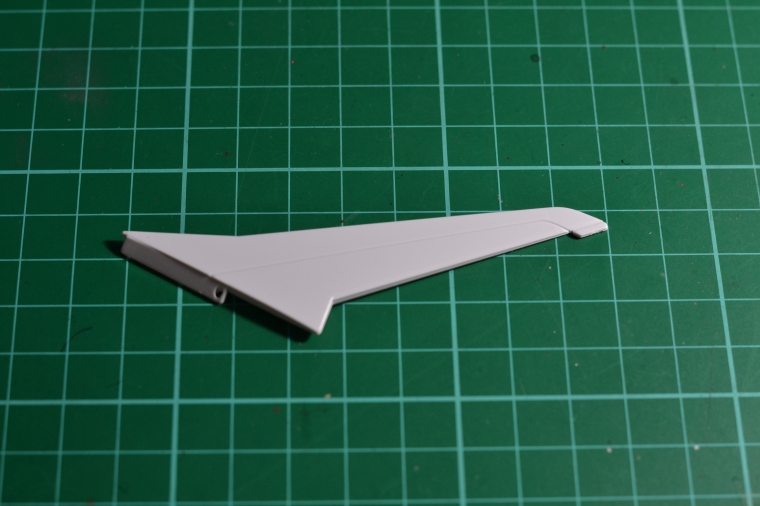
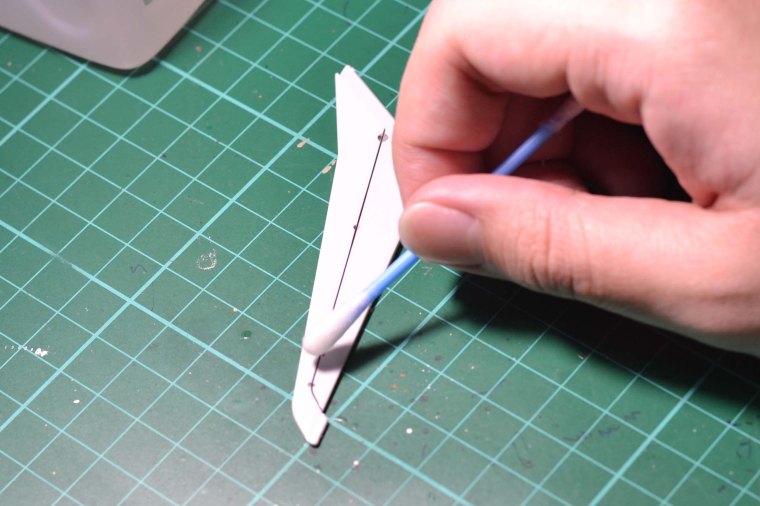
1st thing to do is of-course find a part that we need to panel line:
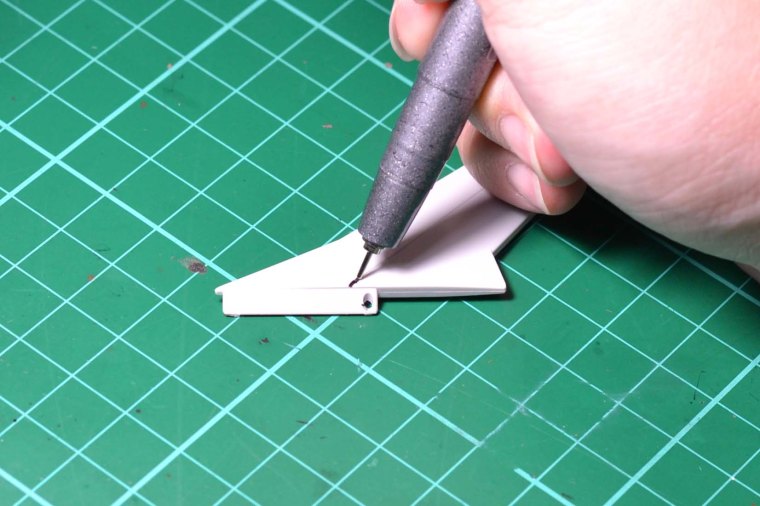
Materials that will be used are the marker of your choice and a rubber eraser, my personal favorite is the COPIC Multiliner. For the rubber eraser, I like the red rough ones being sold in National Bookstore.

This method is pretty easy, just ink on the panel lines like shown in the photos below, don’t worry about excess ink or lines that go out of the panel lines. The rubber eraser will fix that.
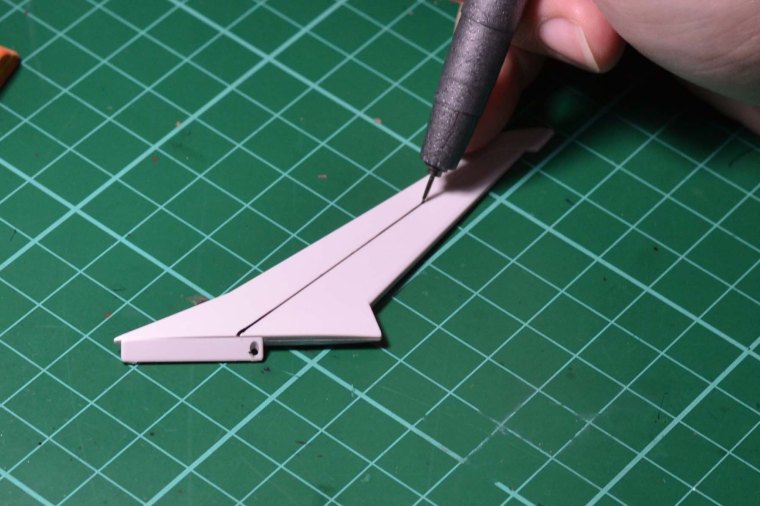

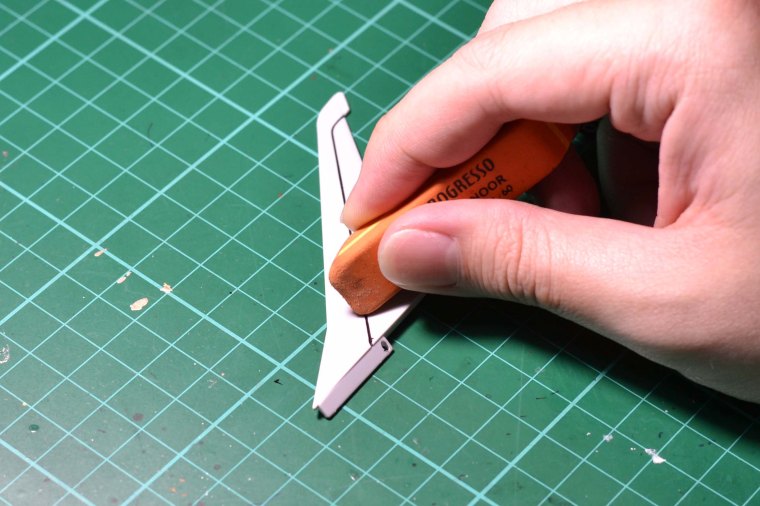
As you can notice, the panel lining is a bit thick and there’s a little smudge at the bottom of this part. Rubbing the lines using the rubber eraser can quickly clean your panel lining neatly.
Extra tip: Rub the panel line using your rubber eraser perpendicular to the line being cleaned. COPIC Multiliners are not quick to dry, so it’s easy to clean mistakes.
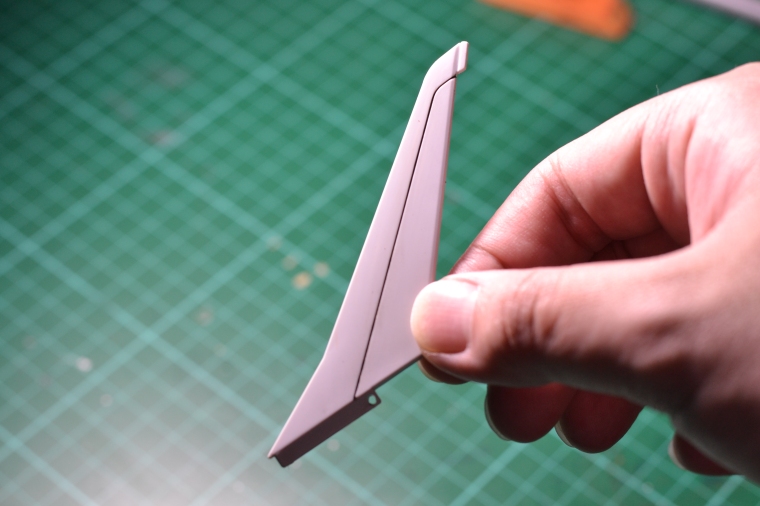
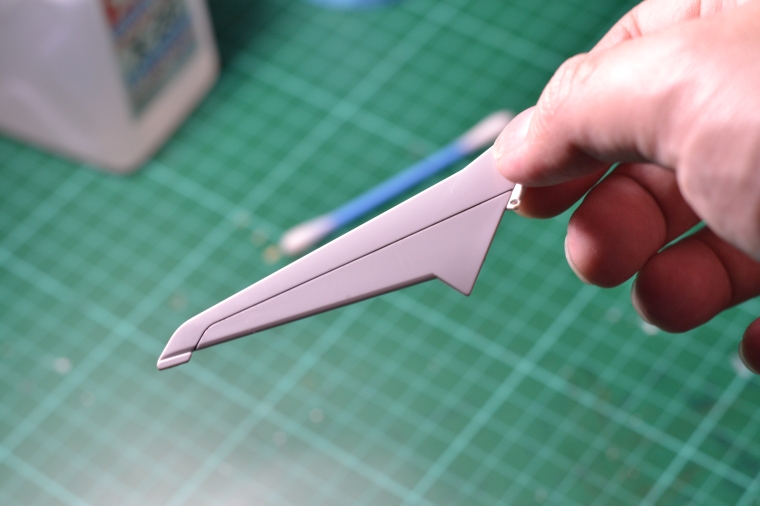
And viola! A nice thin panel line! =3 Easy right?
Method 2: Panel Line Accent Color + Enamel Thinner
This method is also known as enamel wash as it involves thinned out enamel paint as the panel lining tool. Before Tamiya produced these Panel Line Accent Color bottles(which are enamel based), hobbyists resort to the original Tamiya enamel paints and thin it with lighter fluid or enamel thinner. Anyway, good thing they made these Panel Line Accent Color so that you don’t need to thin your own enamel paint and these bottles come with a handy applicator.
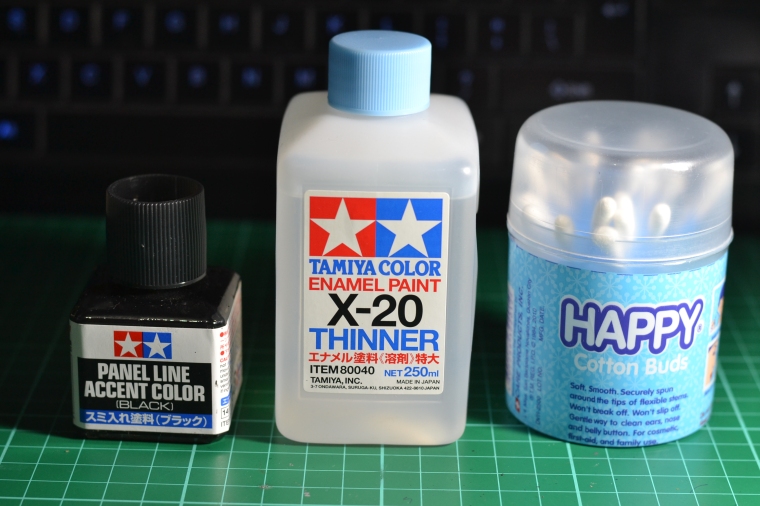
Materials that will be used are the following: Tamiya Panel Line Accent Color, Tamiya X-20 Enamel Paint Thinner, cotton swabs.
Extra info: Tamiya Panel Line Accent Color comes in different colors like grey and brown. I still like black.
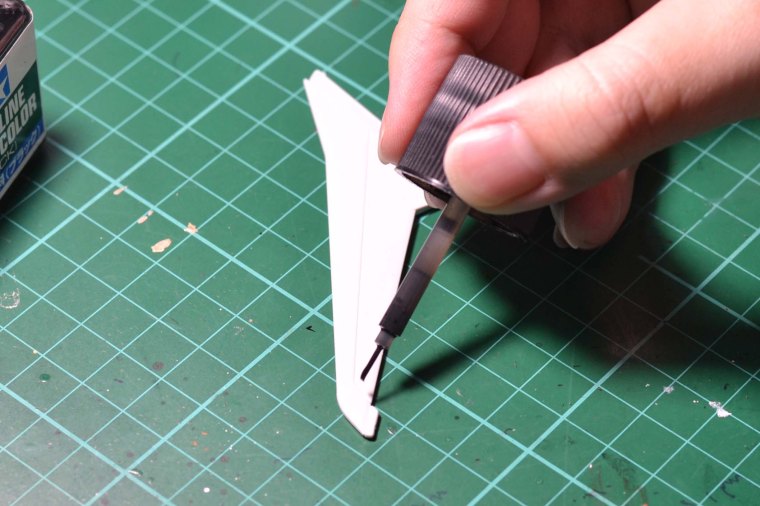
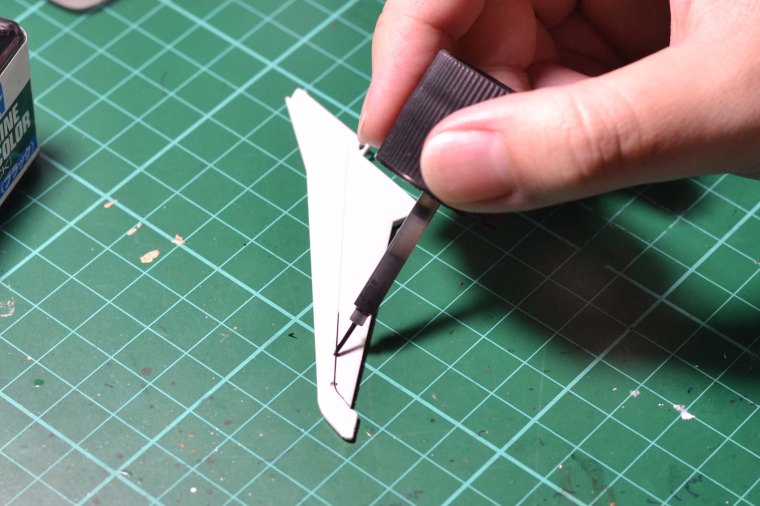
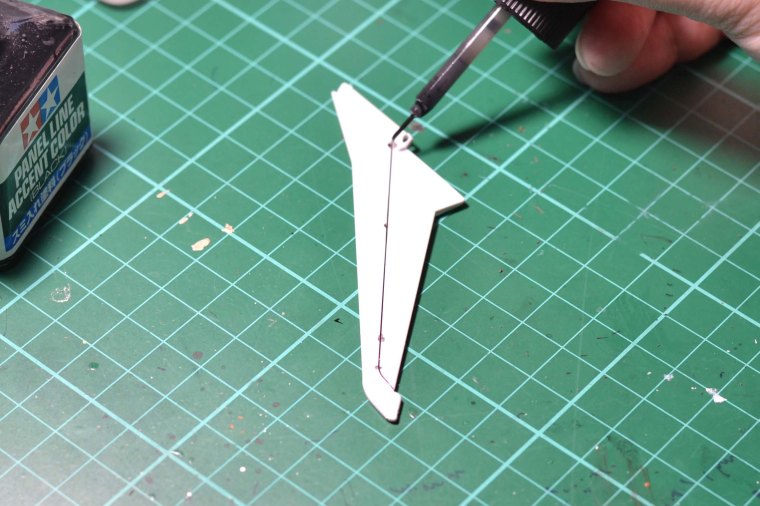
This method is also easy! You just have to use the applicator that is attached to the bottle cap and dab it to the panel lining. The concept is that the enamel paint is thinned enough that it will run itself through the lines, all you have to do is dab a small amount of Panel Line Accent Color on any part of the panel line.
WARNING: Do not overdo and put too much enamel paint on the piece! Before dabbing it on the piece, you can remove excess ink from the applicator by just skidding it by the bottle’s opening. If there’s too much ink on the piece, you can quickly clean it using some swabs, don’t worry about smudges as we can clean it later. The reason behind this is because too much enamel paint on the Gunpla’s plastic material can make it brittle and crack. So be careful okay?
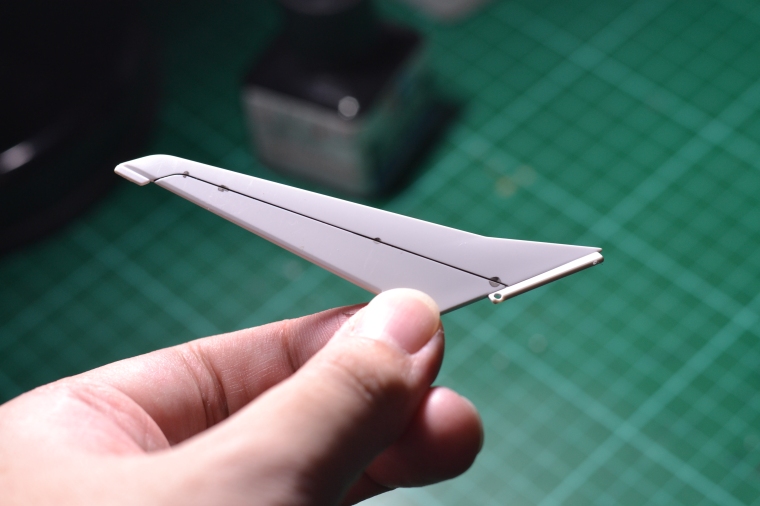
The piece will look something like this after Panel Line Accent Color application:
Now we can clean the smudges and ink blots using a small amount of enamel paint thinner on a cotton swab.
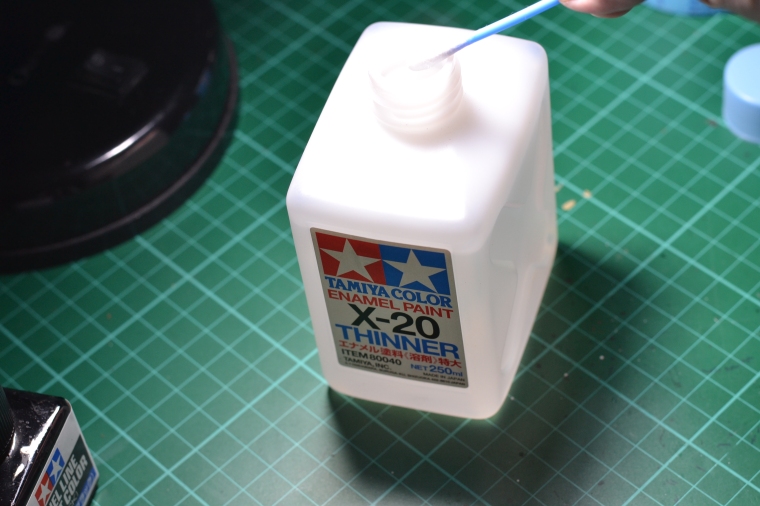
Just dab the cotton swab with the enamel paint thinner lightly on the excess ink, don’t press too hard as you can remove the underlying panel lining.

And viola! Beautiful clean panel lining!
That’s it for this tutorial! I hope fellow hobbyists and Gunpla beginners will find it useful. You can ask questions in the comment section below and I’ll glady answer it. 🙂

where can i buy those markers for panel lining?
LikeLike
wasabi toys has some, but there are also markers from other hobby shops around Vmall, Green hills.
LikeLiked by 2 people
How can i remove the white stress marks left when cutting the sprue?
LikeLiked by 1 person
Refer to my removing nib marks tutorial https://gunbies.com/how-tos-tips-and-tricks-tutorials/removing-nib-marks/ 🙂
LikeLike
How much is the tamiya panel line and also the thinner? Thank you in advance
LikeLike
Sorry I can’t remember the exact price but I believe the panel line is around 150php? And the thinner, the large one is I think 200+? I’m not really sure anymore because it’s been a long time since I visited Lils. XD
LikeLike
Nice…I have few things to ask…
Will acrylic thinner x20A work instead of enamel thinner x20?
Second is I like to paint the gunpla with airbrush acrylics..how do I apply the panel lines after painting…I am not able to remove the excess paint using thinner as it messes up the paint job badly..panel lines on plain plastic seems easy…need help with panel lines after painting ..thank you
LikeLike
acrylic thinner will only work with acrylic paints. if you use enamel paint, you need to use enamel thinner. Note that enamel paint can thin acrylic paint. What I do is coat the airbrushed acrylic with lacquer clear gloss, then do panel lining. Sorry for the late reply. 😀
LikeLike
Do I need to let the marker dry first before I use the eraser or does it need to be wet still.
LikeLike
Good question! You can use it while the marker is still wet, the thing is, markers like copic multiliner takes a very looong time to dry, usually more than 24 hours. Sometimes I’m still able to erase excess lines days after. That’s why the use of topcoat is recommended to seal in the panel lines. Note that in my experience, Gundam Markers dry faster and are harder to erase when dry. 🙂
LikeLike
1. Which goes first, the top coat or the panel lining?
2. If i use the Tamiya Panel Accent Color, how long do i have to wait before cleaning the smudges?
3. Would 70% rubbing alcohol do in cleaning?
Thankyou very much!
https://web.facebook.com/ChimPAO
LikeLike
1. If you haven’t painted your kit, you can do panel lining first before top coat.
2. If you use accent color, maybe 20 minutes or so? the longer the better, maybe watch a netflix tv show an episode or two.
3. I’m not sure if alcohol can be used for accent color, I know that accent color is enamel based. You can test on an extra runner sprue.
LikeLike
Usig panel line much detail compare to marker, still with little more touch up you can detail more the line, good job providing this usefull trick,
LikeLike
Yes thank you! 🙂
LikeLike
do i need to use a gloss coat before using the tamiya panel line accents?
LikeLike
You only need gloss coat if you painted your kit. For non-painted ones, you don’t need to apply gloss coat. 😀
LikeLike
I used tamiya panel line accent in a painted surface. The painted surface was coated with vallejo polyurethane varnish. Is there a problem if I use that kind of varnish, apply tamiya line accent and then clean with X-20? Some days ago I used standard thinner and the coat was badly damaged and I don’t know if I will avoid this using X-20.
LikeLike
The problem is x-20 thinner is very strong. The precedence goes like this lacquer -> enamel -> acrylic, which means enamel thinner will damage acrylic paint but will not affect lacquer paint. The vallejo varnish might be closer to acrylic paint such that x-20 can damage it. That’s is why its highly recommended to coat with clear gloss lacquer before using Tamiya Panel Line accent, since it is enamel based and won’t affect your lacquer coat. Hope this helps. 😀
LikeLike
Hey, did the gray one look’s good compare on that black panel line accent? Thanks.
LikeLike
it really depends on your taste, sometimes the gray one looks better on colored parts, while the black one is best on white parts. The brown one also looks nice on some colors like yellow and red.
LikeLike
Hi, according to some website that i have read, a black one on white part may sometimes the contrast overwhelms the entire piece and makes it seems to dark. However, I am more to the black one as you do. Thanks for a quick reply.
LikeLike
Yeah, it really depends on your preference. Some people like it anime like and have dark black lines. Some people like it lighter. It’s your choice. 🙂
LikeLike
Hello,
Thanks for this brilliant tutorial. It’s simple yet helps so much.
I plan to do panel lining (as per your second method above) on a model AFTER I have primed (e.g. Tamiya Fine Surface Primer) and painted a layer of acrylic paint on it (e.g. Tamiya AS-20). But based on your advice above, it seems that the enamel thinner would damage acrylic paints hence the need for a lacquer layer.
My question is that what if I needed my acrylic paints to stay matte. Do I then use the Tamiya TS-80 Spray Lacquer Flat instead of the gloss lacquer? Also will the spray lacquer be a problem if I want to do weathering later or should I do weathering first?
If TS-80 is the right choice, is the order then =>
Primer -> Acrylic Paint -> TS-80 -> Panel Liner/Washes -> X-20 thinner to clean up -> Weathering.
OR
Primer -> Acrylic Paint -> Weathering -> TS-80 -> Panel Liner/Washes -> X-20 thinner to clean up
Sorry in advance for this long winded questions! 🙂
LikeLike
This is my shortest method: Primer -> Acrylic Coats and details -> Lacquer Clear Gloss -> Panel line -> water slide decals -> Lacquer clear matte (optional, but in my experience, weathering on matte surface produces better weathering effects) -> weathering using acrylics -> Lacquer clear matte to achieve matte final look.
LikeLike
Thanks for the advice. Much appreciated!
LikeLike
Very welcome! 😀 Remember to go light on the enamel thinner and paint because it can really crack gunpla material if it is used too much. Tip is to really just let it flow, if it won’t flow, it means you have to use a pen on that area instead.
LikeLike
Oops I forgot to ask … when you say Lacquer Clear Gloss, are you referring to => TS-79 Semi-Gloss Clear Synthetic Lacquer Paint?
Can the clear gloss lacquer stage (step 3) be replaced with matte if I am not putting on water decals?
Thanks again for your help.
LikeLike
I haven’t tried TS-79 though, I use industrial spray cans like RJ London and Bosny. You can’t do panel lining on a matte surface so it’s not recommended. The lines will blot and will be impossible to erase on a matte surface.
LikeLike
Thanks so much darkandchoco!!! ^_^
I did not know that panel lining was not recommended on a matte surface.
I’m more comfortable painting figures. Vehicle model kit/bandai kit/gundam painting is completely new to me. It’s great to see experienced modellers like you sharing simple yet important tips for newbies like me. 🙂
LikeLiked by 1 person
No problem! And you’re very much welcome! Mostly I just learn from my mistakes and experimentation. XD
LikeLike
Question: Are signing pens good for panel lining? Cuz I can’t find these anywhere.
LikeLike
From my experience, no. They don’t really stick to the plastic surface. Some technical pen for architects might work though.
LikeLike
Will a regular isopropyl alcohol work as a thinner for clean up when you use tamiya accent panel wash or is it better to use lighter fluid as an alternative instead? Thanks!
LikeLike
Alcohol doesn’t work well with plastic surfaces, sometimes it creates undesirable white coating or just smears the enamel paint around. To be sure, use enamel paint thinner for maximum cleanup. Lighter fluid can also be used but be careful as it is flammable.
LikeLike
Thanks! How about painting white over colored plastics? E.g. red parts. Thewhite color doesn’t seem to apply well. Any tips on how? Or will sanding the colored plastic help? The white comes out with an orangy hue. Doesn’t look white just whitish.
LikeLike
I think you have to use a white primer for that. 🙂 Have you tried using a white primer? Or you can maybe use grey primer then paint white over it after it cures. 🙂
LikeLike
can I use normal thinner as enamel thinner?
LikeLike
What do you mean by normal thinner? There a lot of kinds of thinner and not all thinners can thin enamel. I’m not sure if the “normal” paint thinner that can be bought in stores can thin enamel.
LikeLike
First, thanks a lot for sharing your methods in panel lining. I’m new & just finished my very first kit, and your tips helped a lot!
Just want to ask, do you still have to paint over a primer of the same color?
i mean, say…
white primer > white acrylic? > clear gloss > panel line…
will skipping the acrylic part change the final outcome? thanks in advance!
LikeLike
You can do without the white acrylic as long as you are happy with the color of the white acrylic, sometimes the white darkens if the base color of the plastic is dark so you have to watch out for that and observe the paint color as it drys.
LikeLike
Thanks for sharing this… it helps me very much
LikeLike
Welcome!
LikeLike
Thanks a lot for the tutorial you have done 🙂
Now I have been seeing that you can use the acrylic clear gloss like the Tamiya X22 Acrylic to protect the base coat to do panel lining with the Tamiya Panel Line Accent.
What are your thoughts on this?
LikeLike
Well the problem with that is the Panel Line Accent is enamel based paint which will melt the underlying acrylic clear gloss. You should use lacquer clear gloss before using Tamiya panel line accent.
LikeLike
Hi there,
Great detailed tutorial. I tried using panel wash on unpainted white pieces and when I tried to do the clean up with thinner, the wash got smudged into the plastic making it really difficult to clean up while brittling the plastic. Is it recommended to put a layer of lacquer gloss coat on top before panel lining to prevent smudging?
LikeLike
Yes, that’s the recommended method, lacquer clear first, before panel wash using enamel paint or acrylic.
LikeLike
Good day,
This tutorial has been helpful! however, i faced some difficulties in removing the excess ink from the gundam marker I’ve used for panel lining on a painted surface. Gloss coat has already been applied, but when it comes to cleaning up the excess ink, I’ve used cotton swabs damped with lighter fluid but the ink still could not be removed. So my question is as follows, is it okay to use gundam marker on a painted surface or is it much better to use tamiya accent color?
LikeLike
Gundam marker are inherently harder to remove compared to third party markers like copic multiliner. Tamiya accent color is easier to use as long as lacquer gloss is used as the coating for protection.
LikeLike
I tried using the second option, but then my parts has cracks and even breaks. What did i do wrong? Too much panel liner or thinner ?
Also is it better to apply top coat before or after panel lining? Will it help with my problems?
If so what type of top coat should I use?
LikeLike
Hello, sorry for the late reply, probably too much thinner or enamel panel liner. Might be better to apply gloss topcoat first before panel lining.
LikeLike
I need to thin the panel line but i have to do it after the panel line is dry or whenis still wet?
LikeLike
How are you going to thin it? What method are you using to panel line?
LikeLike
I heard that panel lining on flat paint is hard to remove if there is a mistake is that true? and if so is there any other way than using a gloss coat then a flat coat after panel lining?
LikeLike