

I present to you MG 1/100 RX-75 Guntank! I won this MG kit last year in a raffle during a Gunpla competition. I did not win the competition but I was lucky enough to be a raffle winner of an MG kit, it’s a better prize than winning the consolation prizes. I procrastinated at building him since I wanted to build more HG kits first before venturing into MGs. Now that he’s been in the box art-less box far too long, I decided it’s time to start building him and apply what I’ve learned from the past year in experimenting with my HG kits, and also with that, I’ll start building more MG kits. Though there are a lot of HG kits that I want to have and build.
I was quite excited when I started opening the plastic bags containing the runners, It has been a long while since I’ve built an original Bandai MG kit. The most recent original MG kit I’ve built was Rick-Dom. Let’s start with the review! First off some photos of the individual parts:
These are the core fighter parts, there are a lot of small pieces, one must be careful in handling them, they can get easily lost in the hustle and bustle of your work area.

These are the body unit parts, not that many parts:

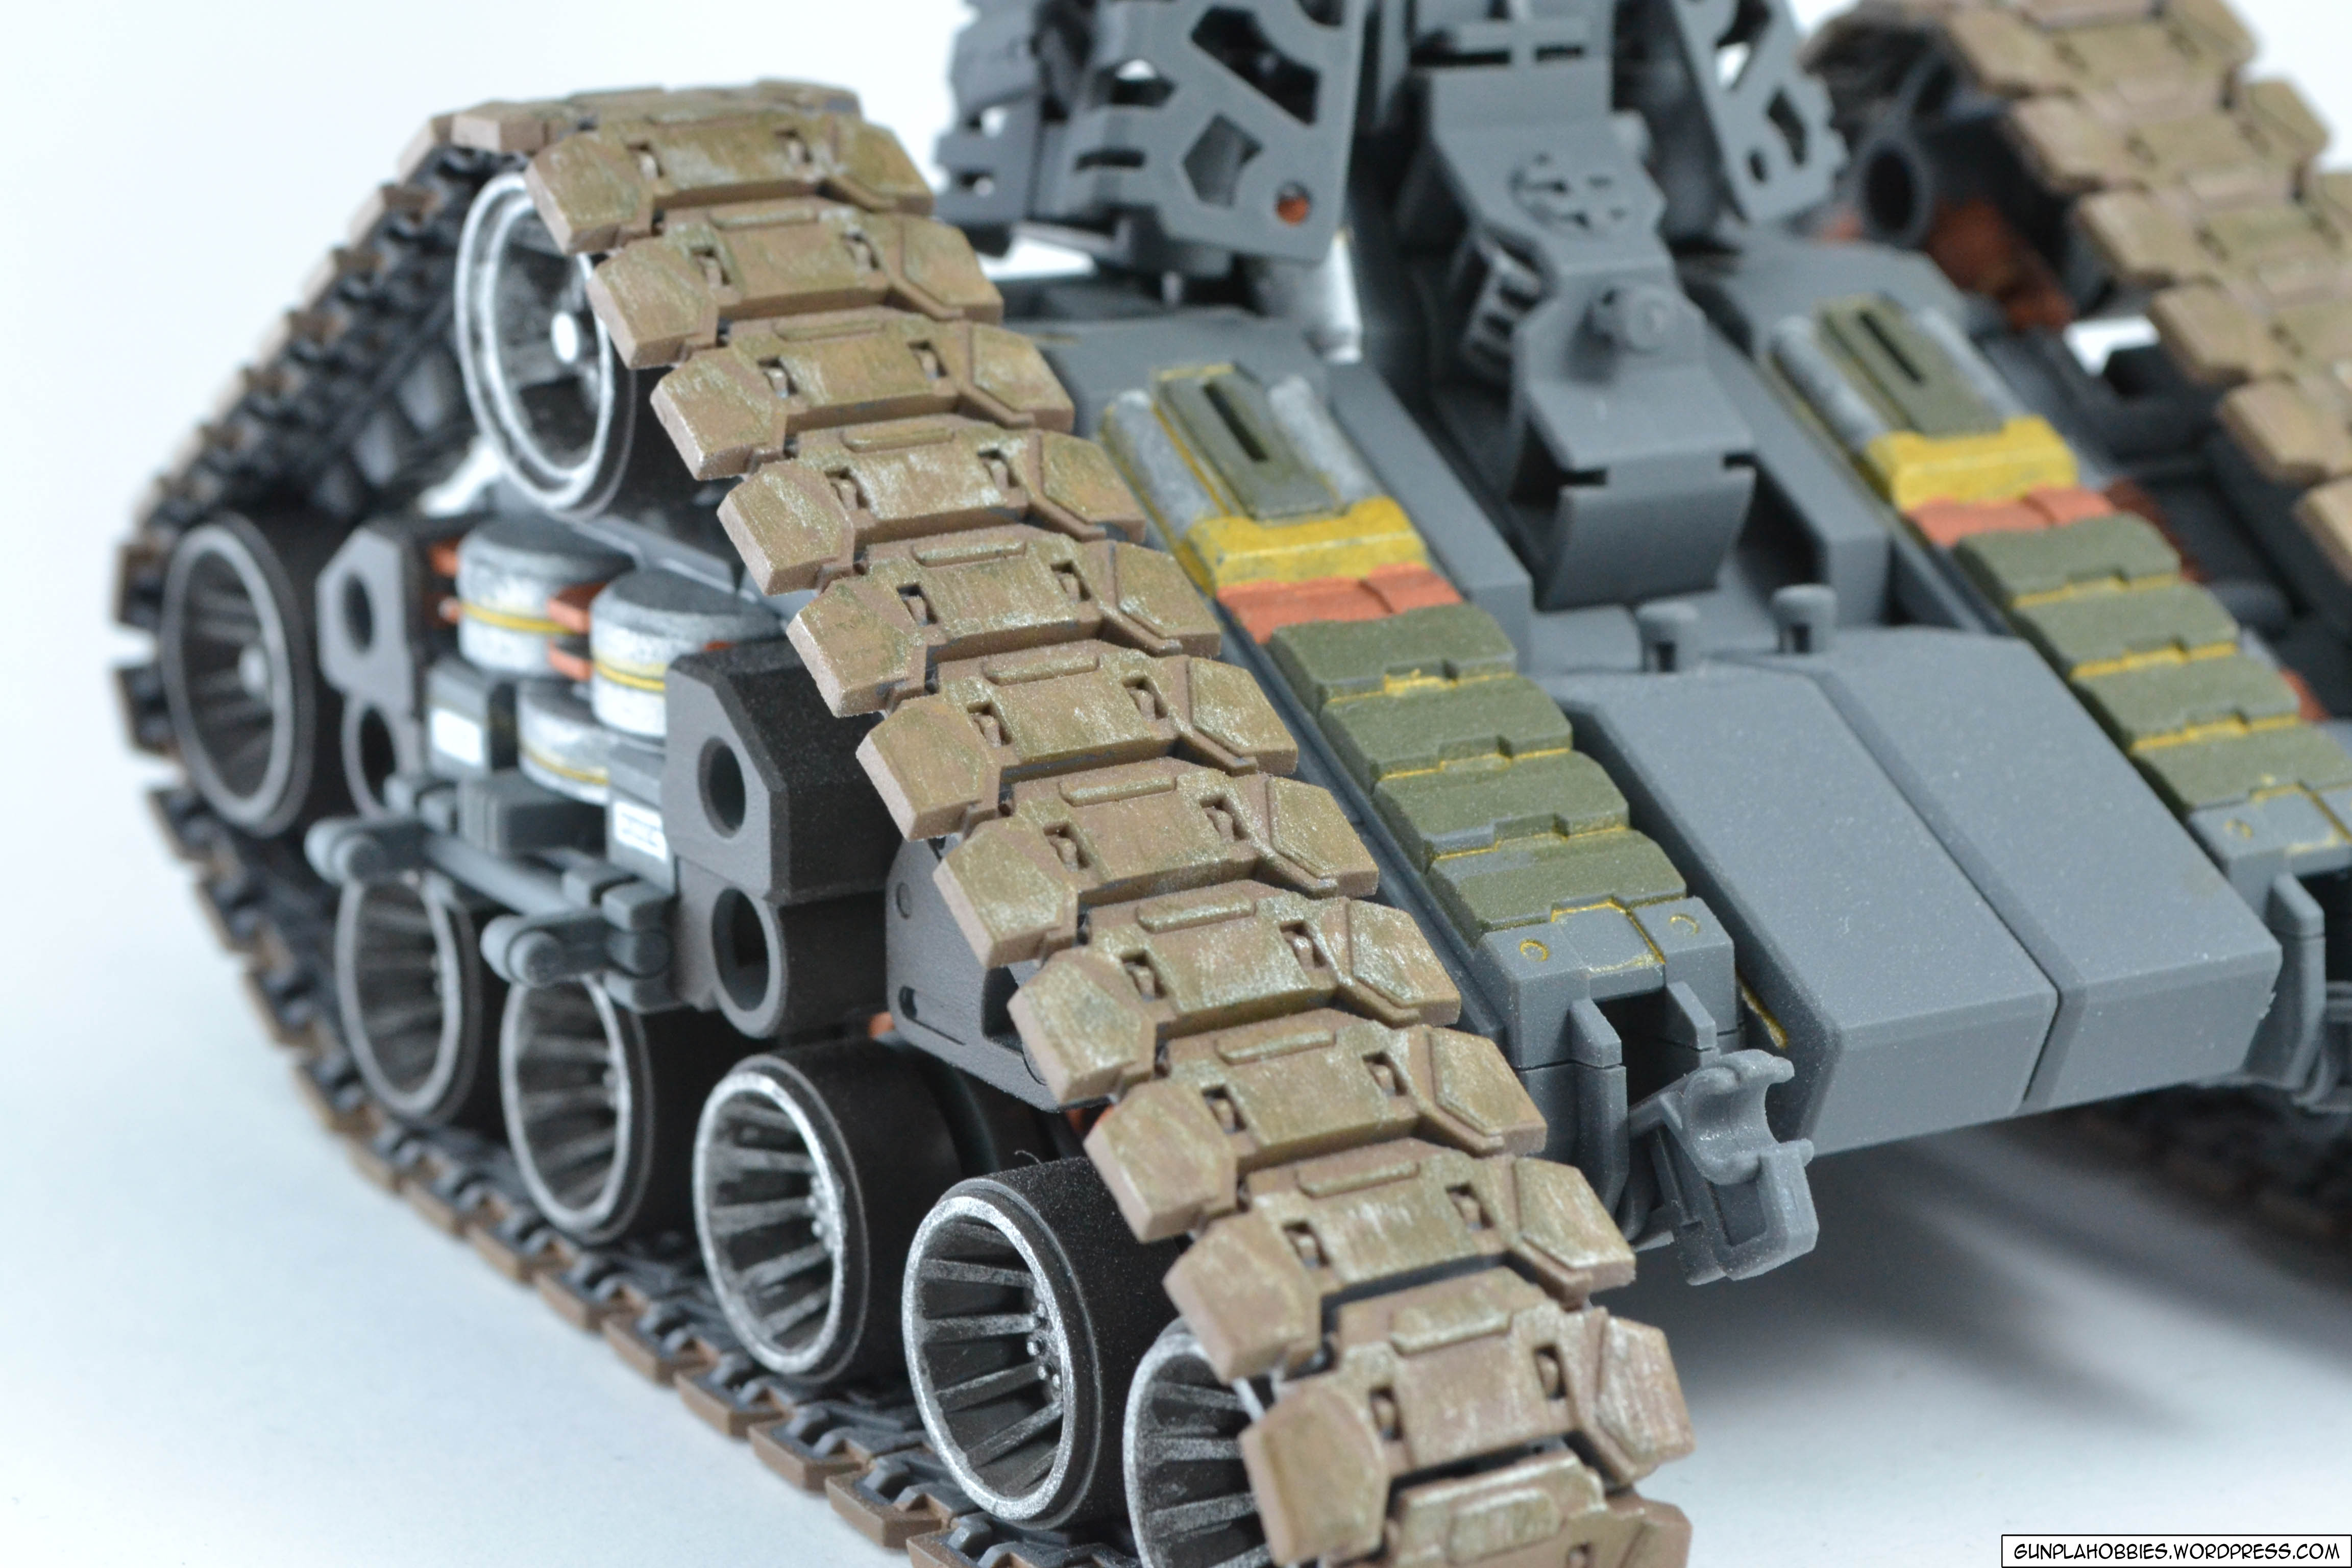
It’s really bothersome to cut off parts that are the same and are in multiple counts like these tank thread pieces:

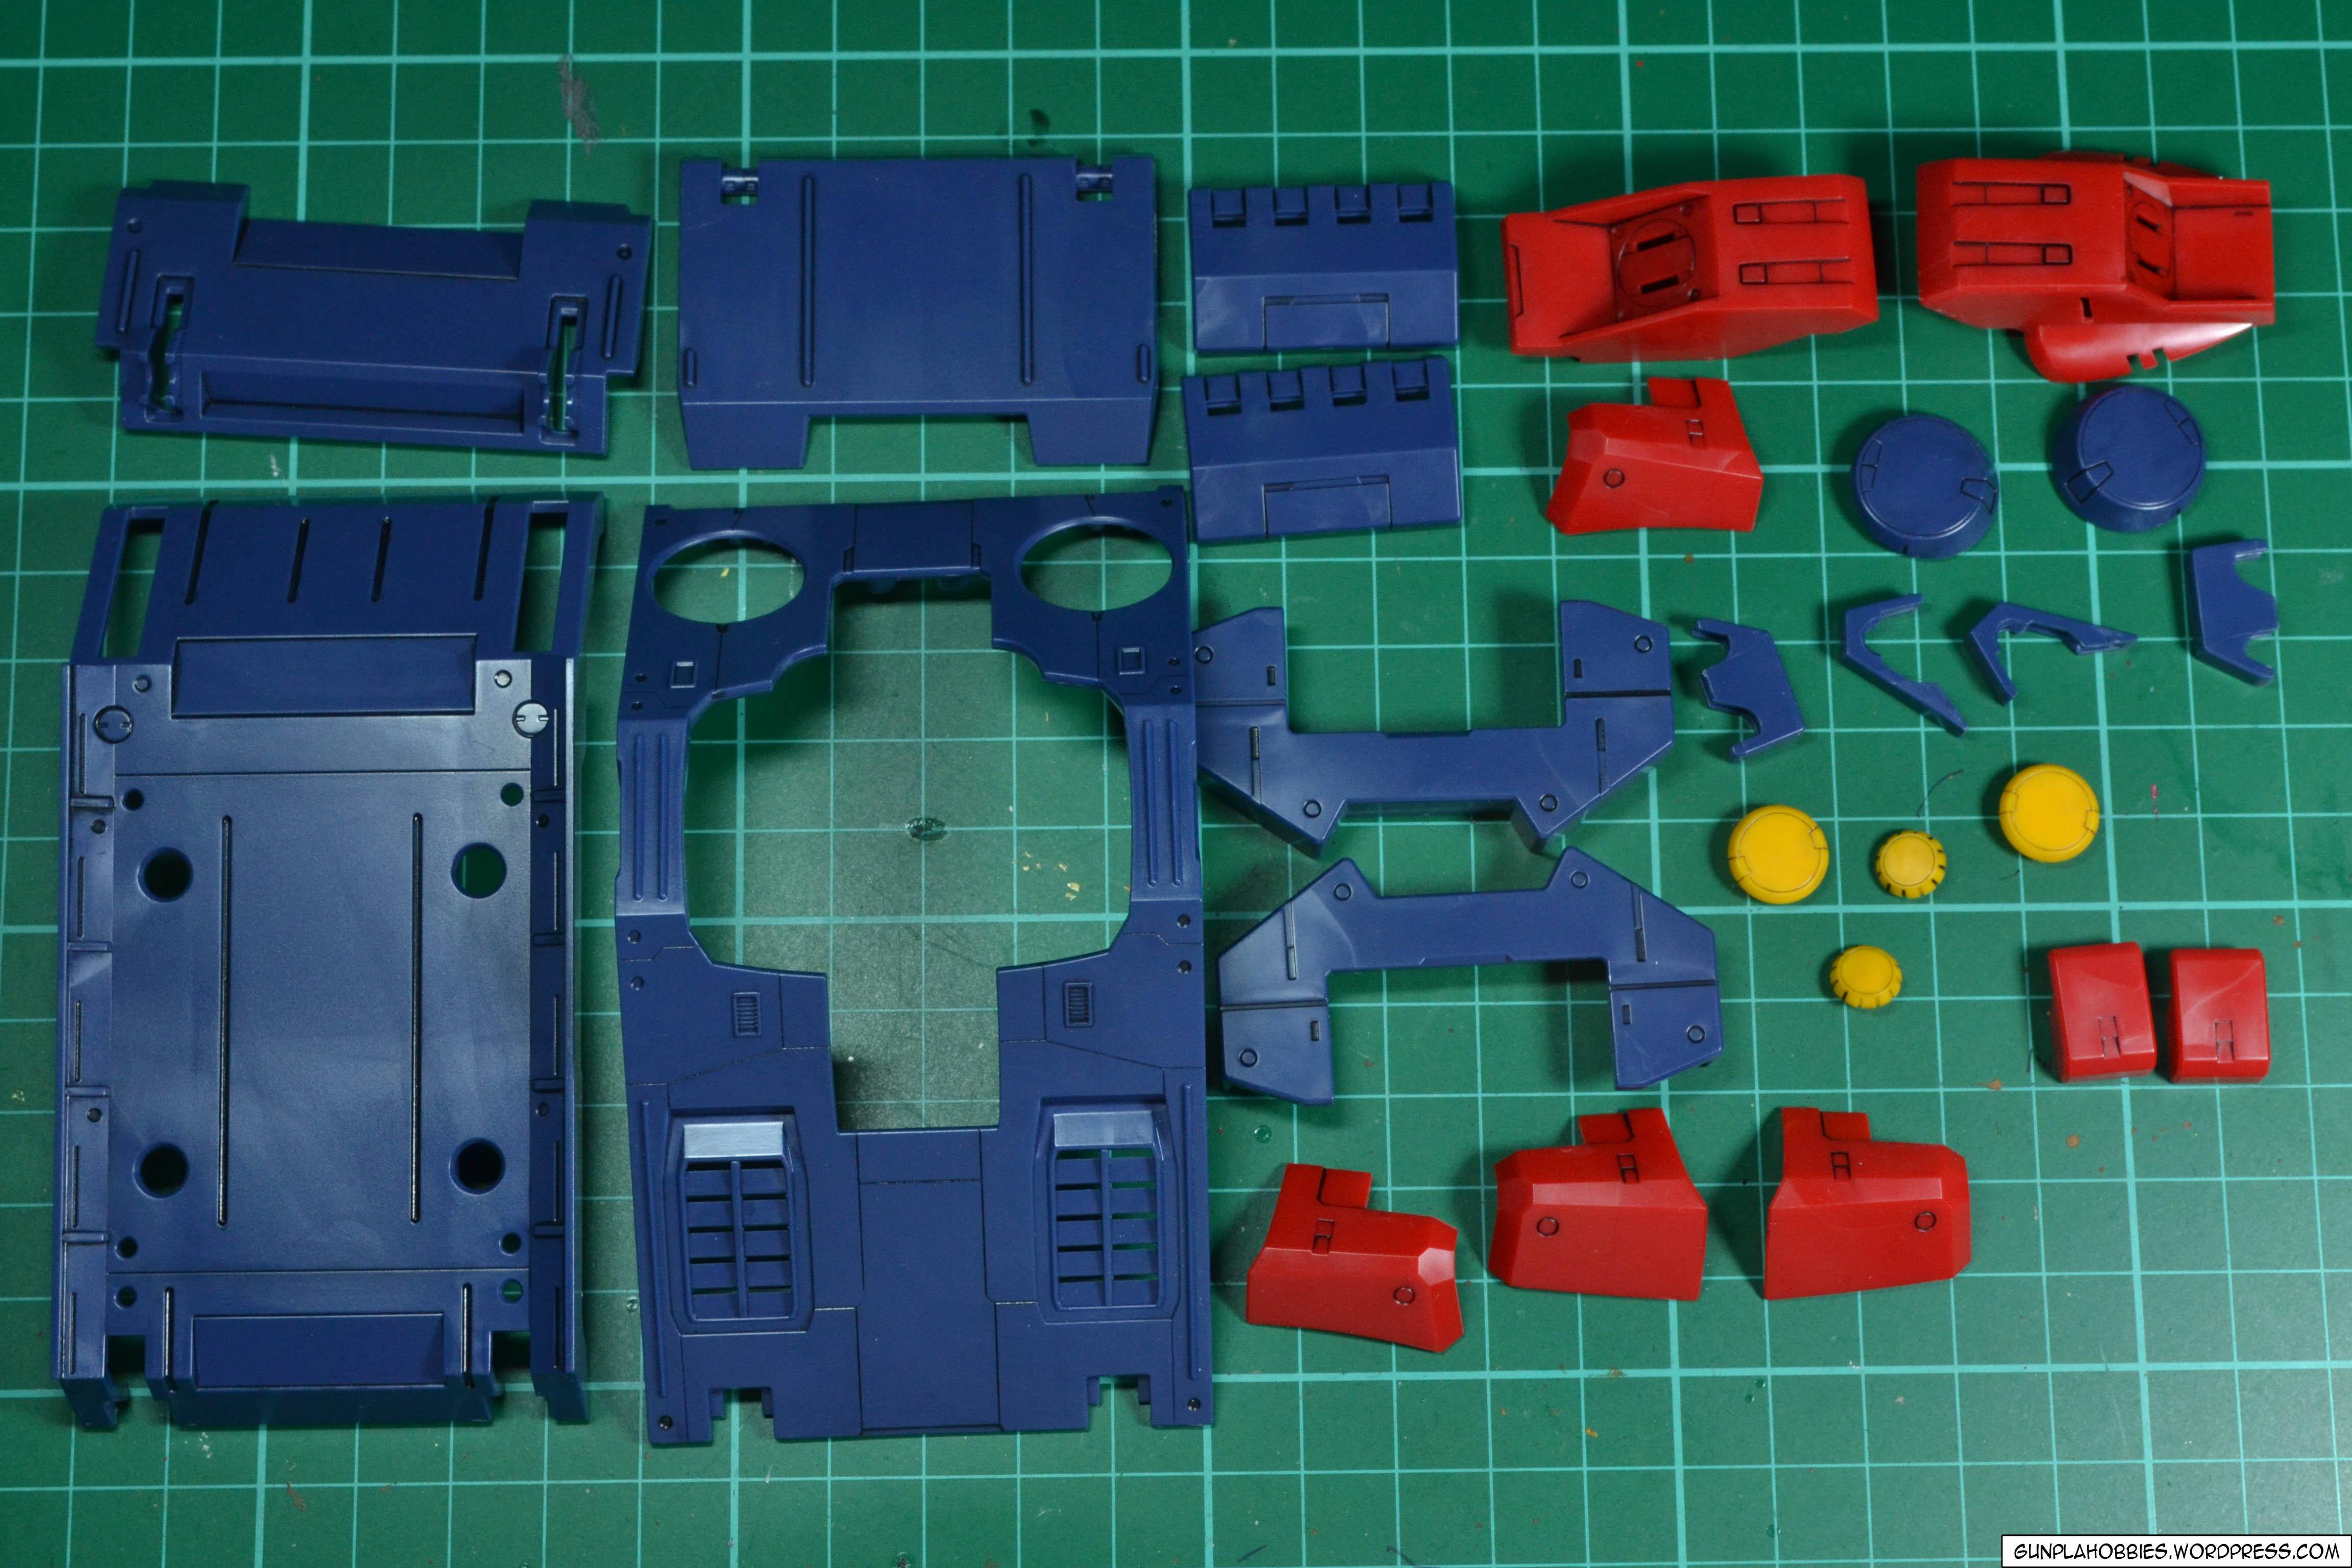
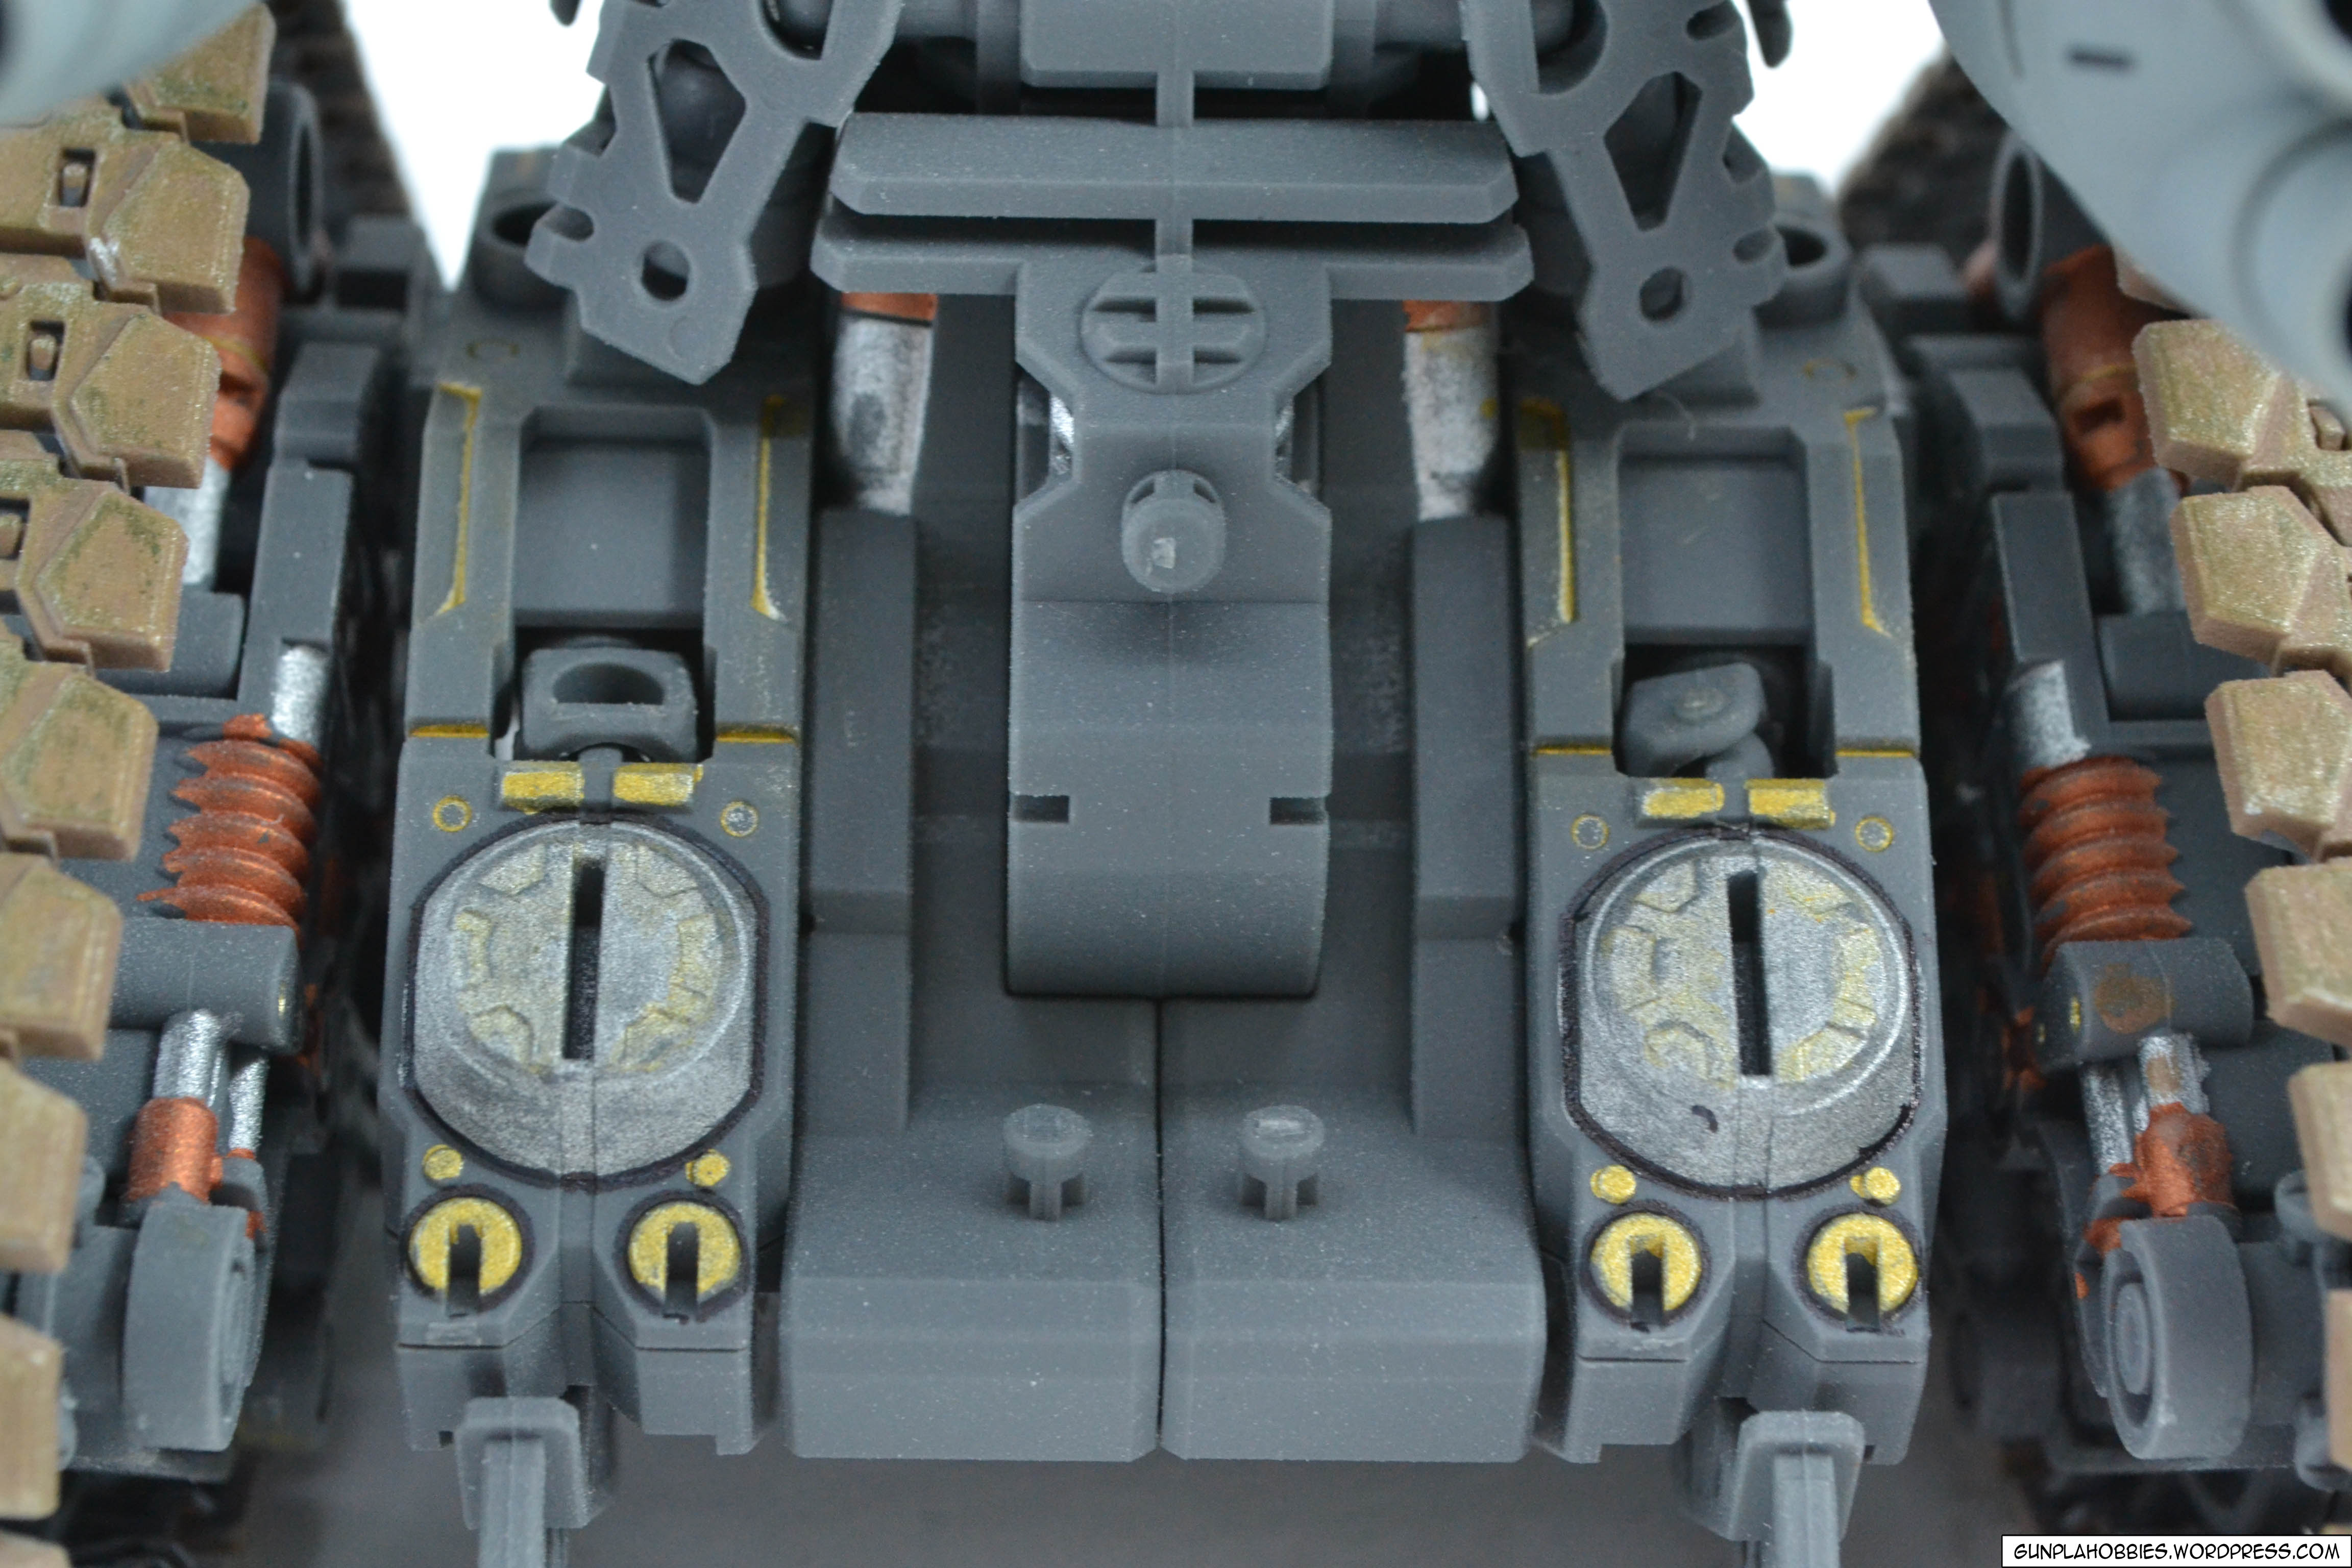
Now these are the lower body unit inner frame parts. A lot of parts!

These are the armor parts for the lower body unit:
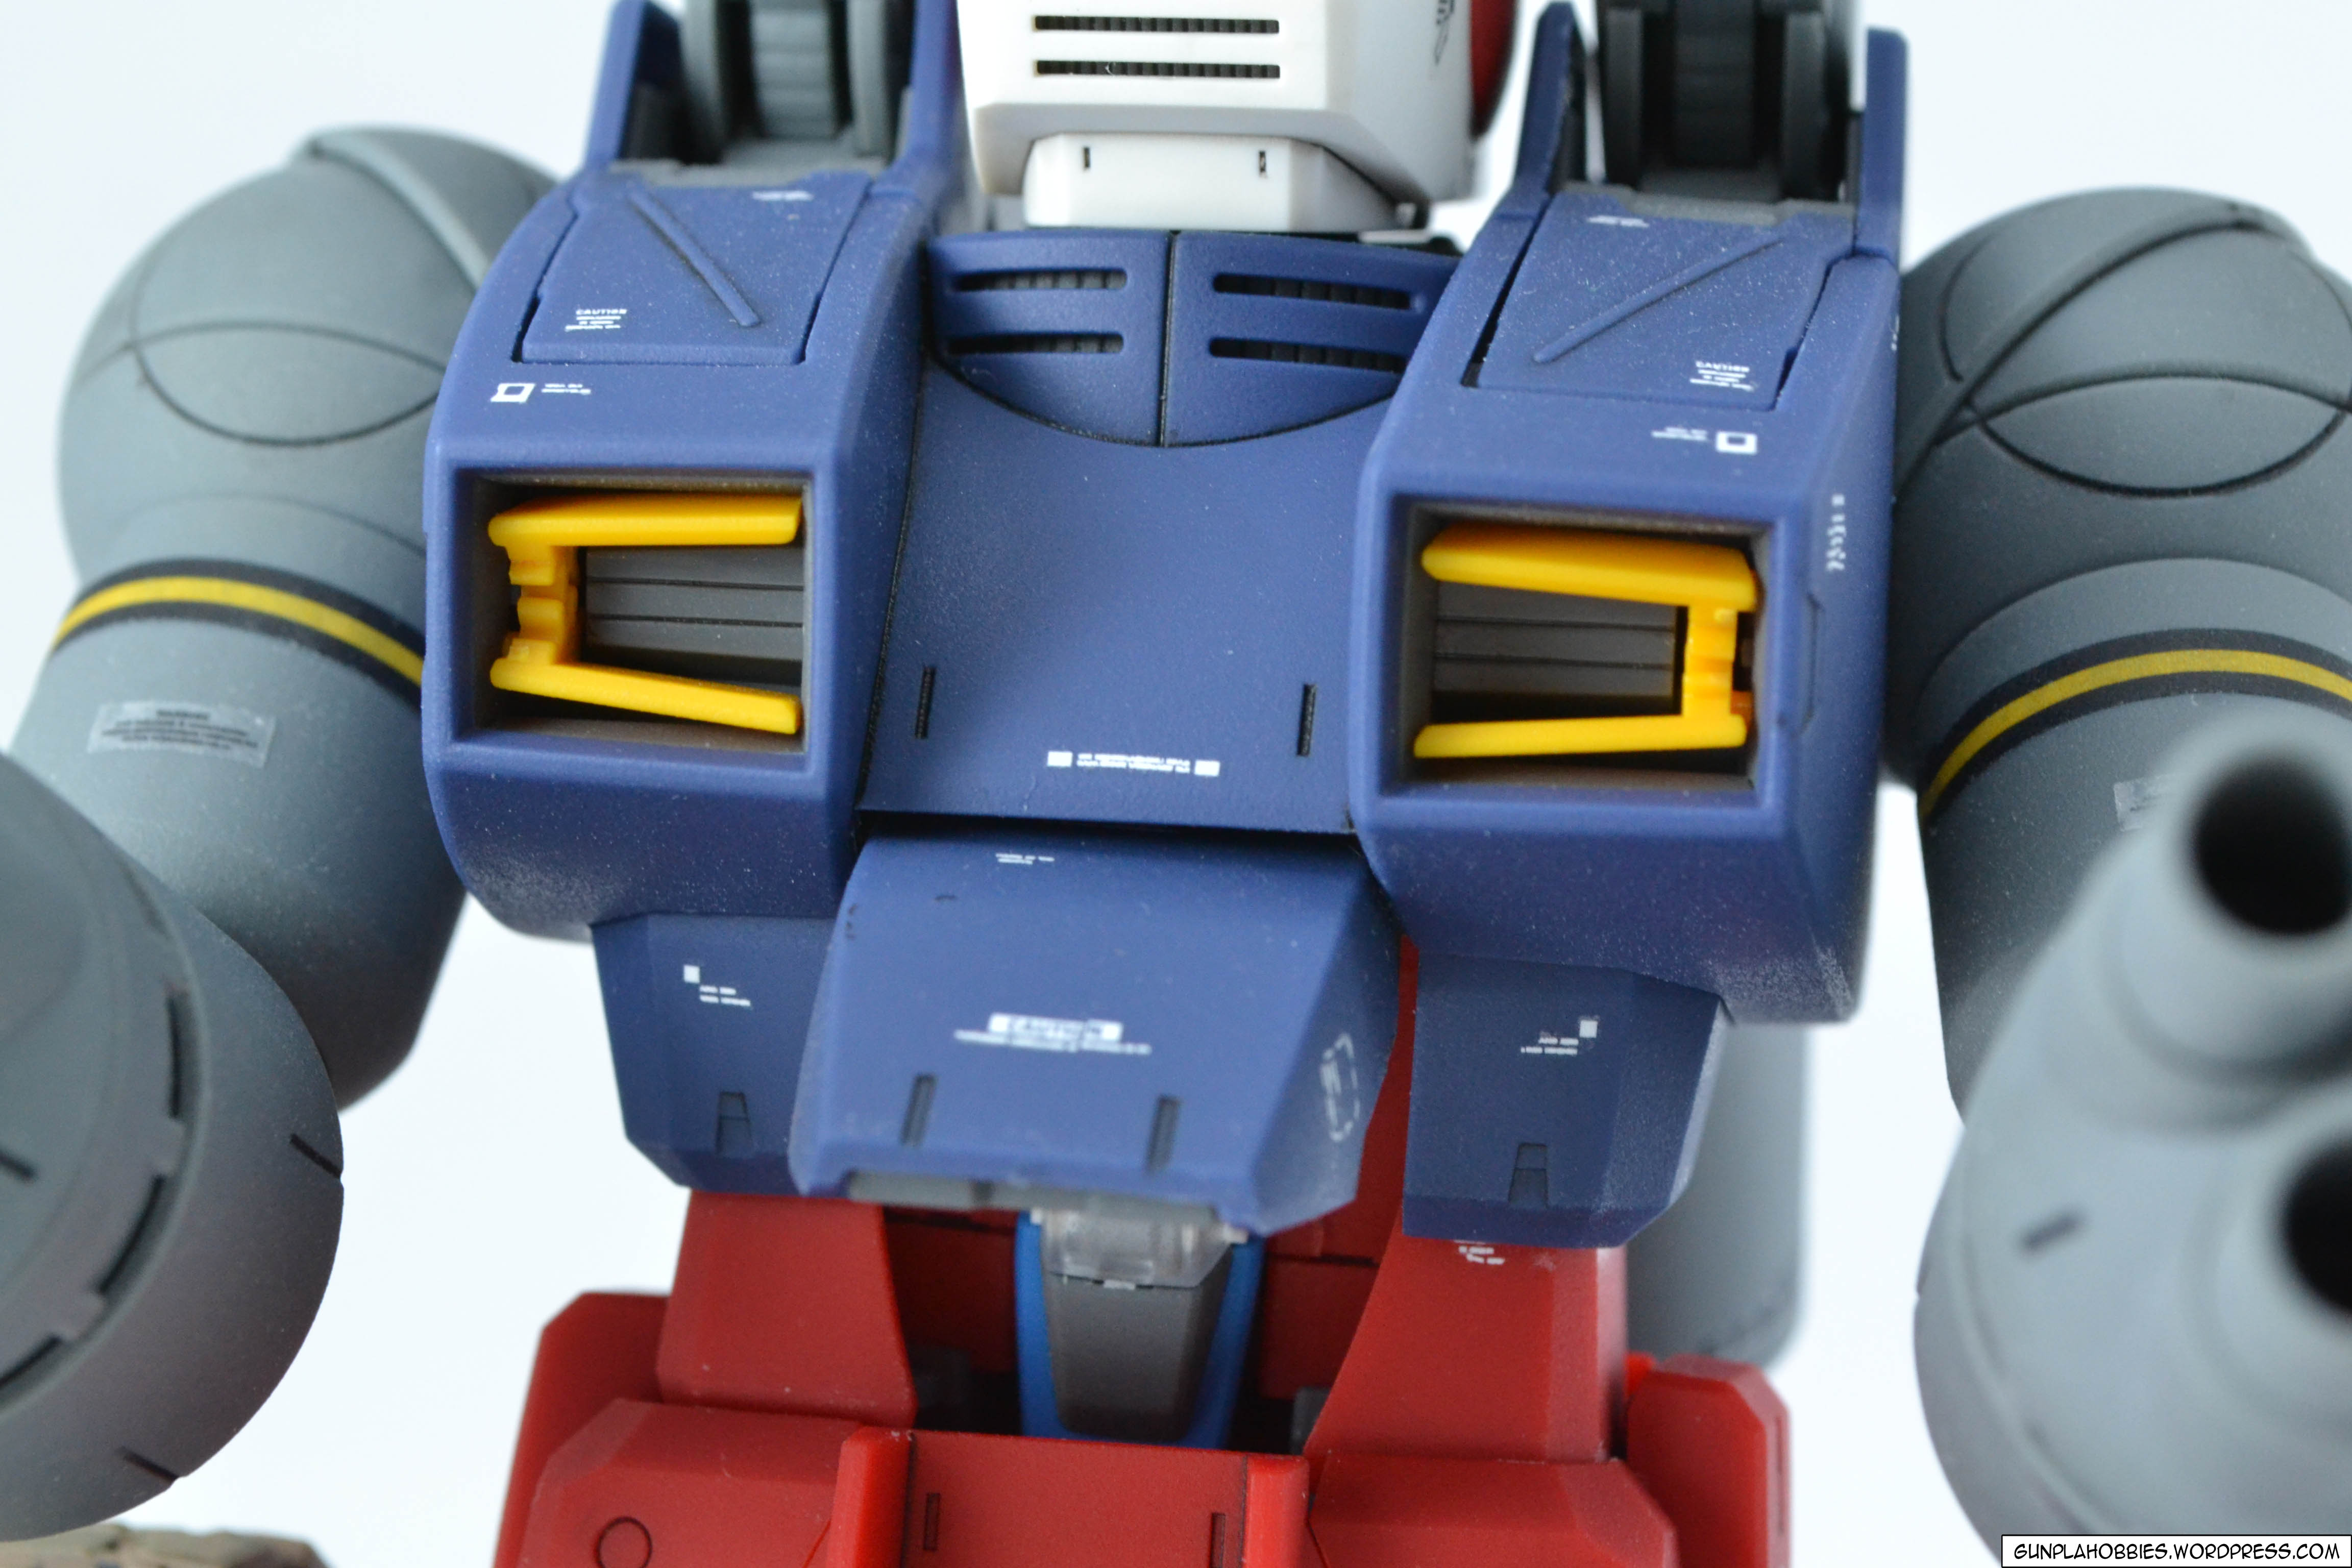
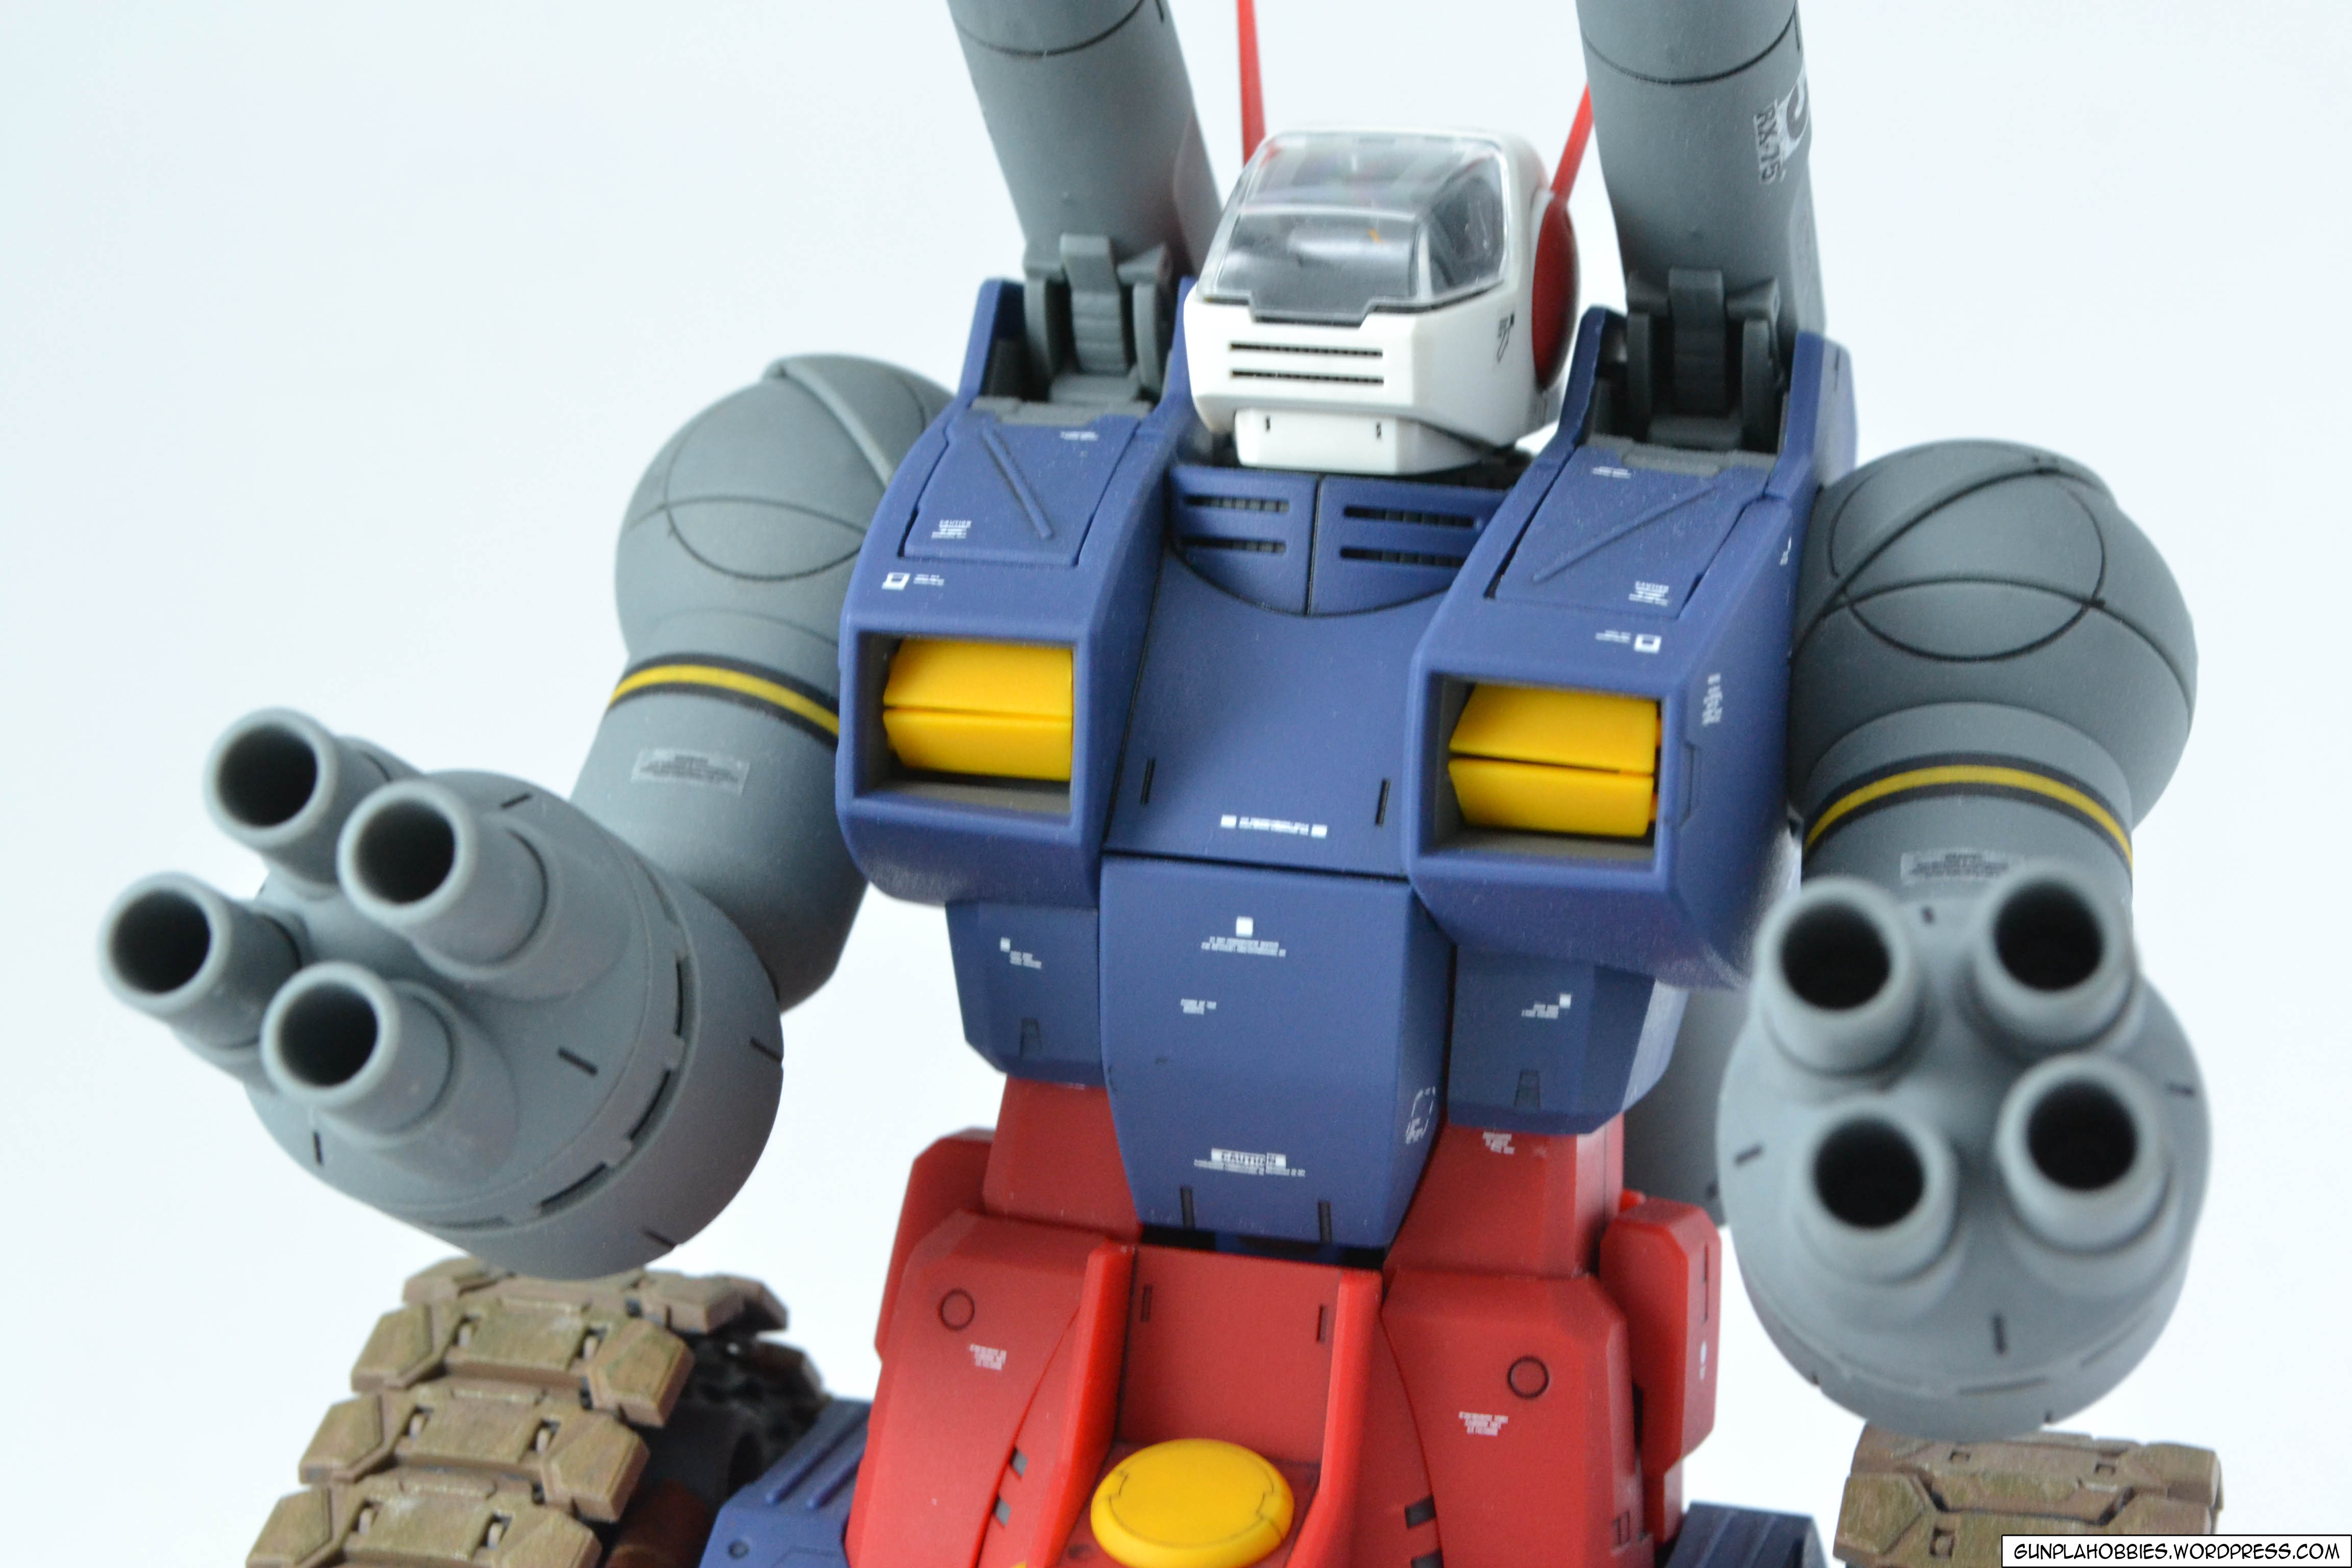
These are the cannon parts that will be mounted on his shoulders once assembled:

These are the left and right arm cannon parts, though I already assembled some of the pieces in this photo:

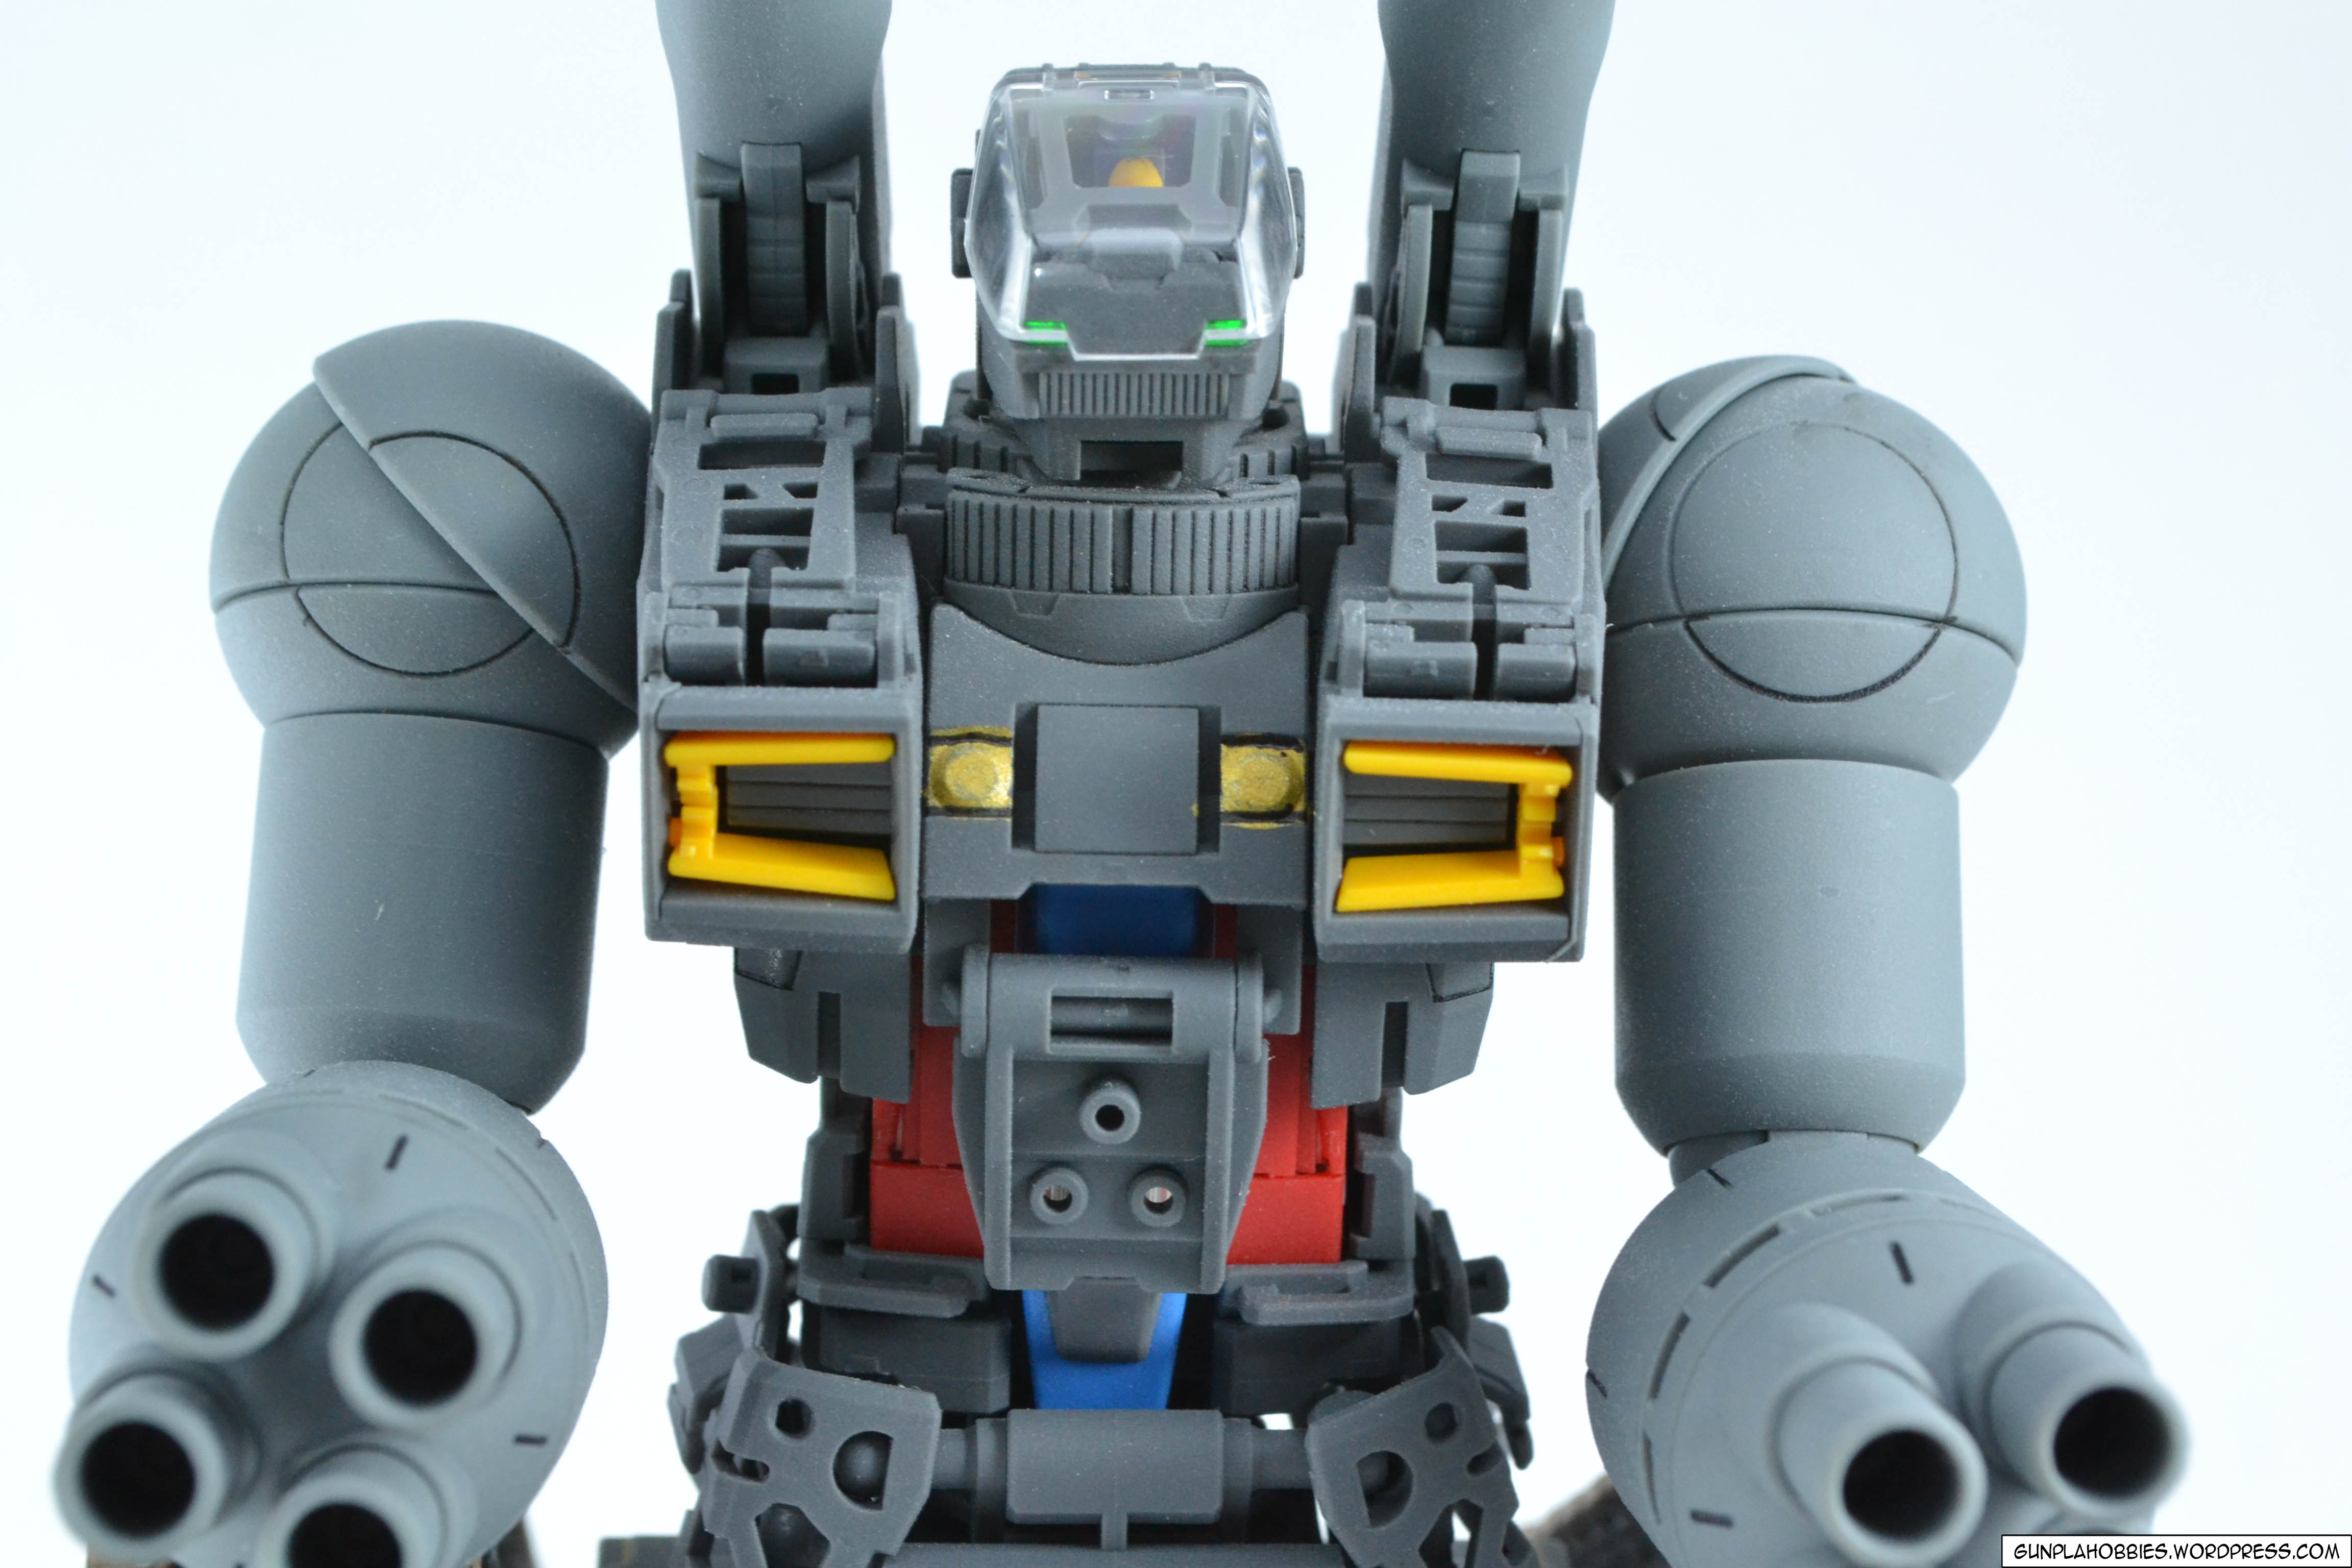
The head unit parts:

The head unit comes with an LED light up unit that will light up the dashboard. I will show this later on.
I’ll show first the whole unit without the armor, he looks cool without the armor:

No decals yet, to be applied later on in the succeeding photos. I painted some details on the inner frame.
Paints used (all acrylic):
Tamiya Gold Leaf
Tamiya Copper
Tamiya Gun Metal
Tamiya Chrome Silver
Tamiya Dark Iron
Tamiya Flat Earth
Tamiya Metallic Grey
Tamiya Titanium Gold
Tamiya Dark Green 2
I used Tamiya Black enamel paint in doing the black panel lines using the enamel wash method.
What I need to improve or maybe ask advice from other people is my choice of colors in detailing or color combinations, sometimes my brain is stagnant of ideas when it comes to color combinations and detail colors.
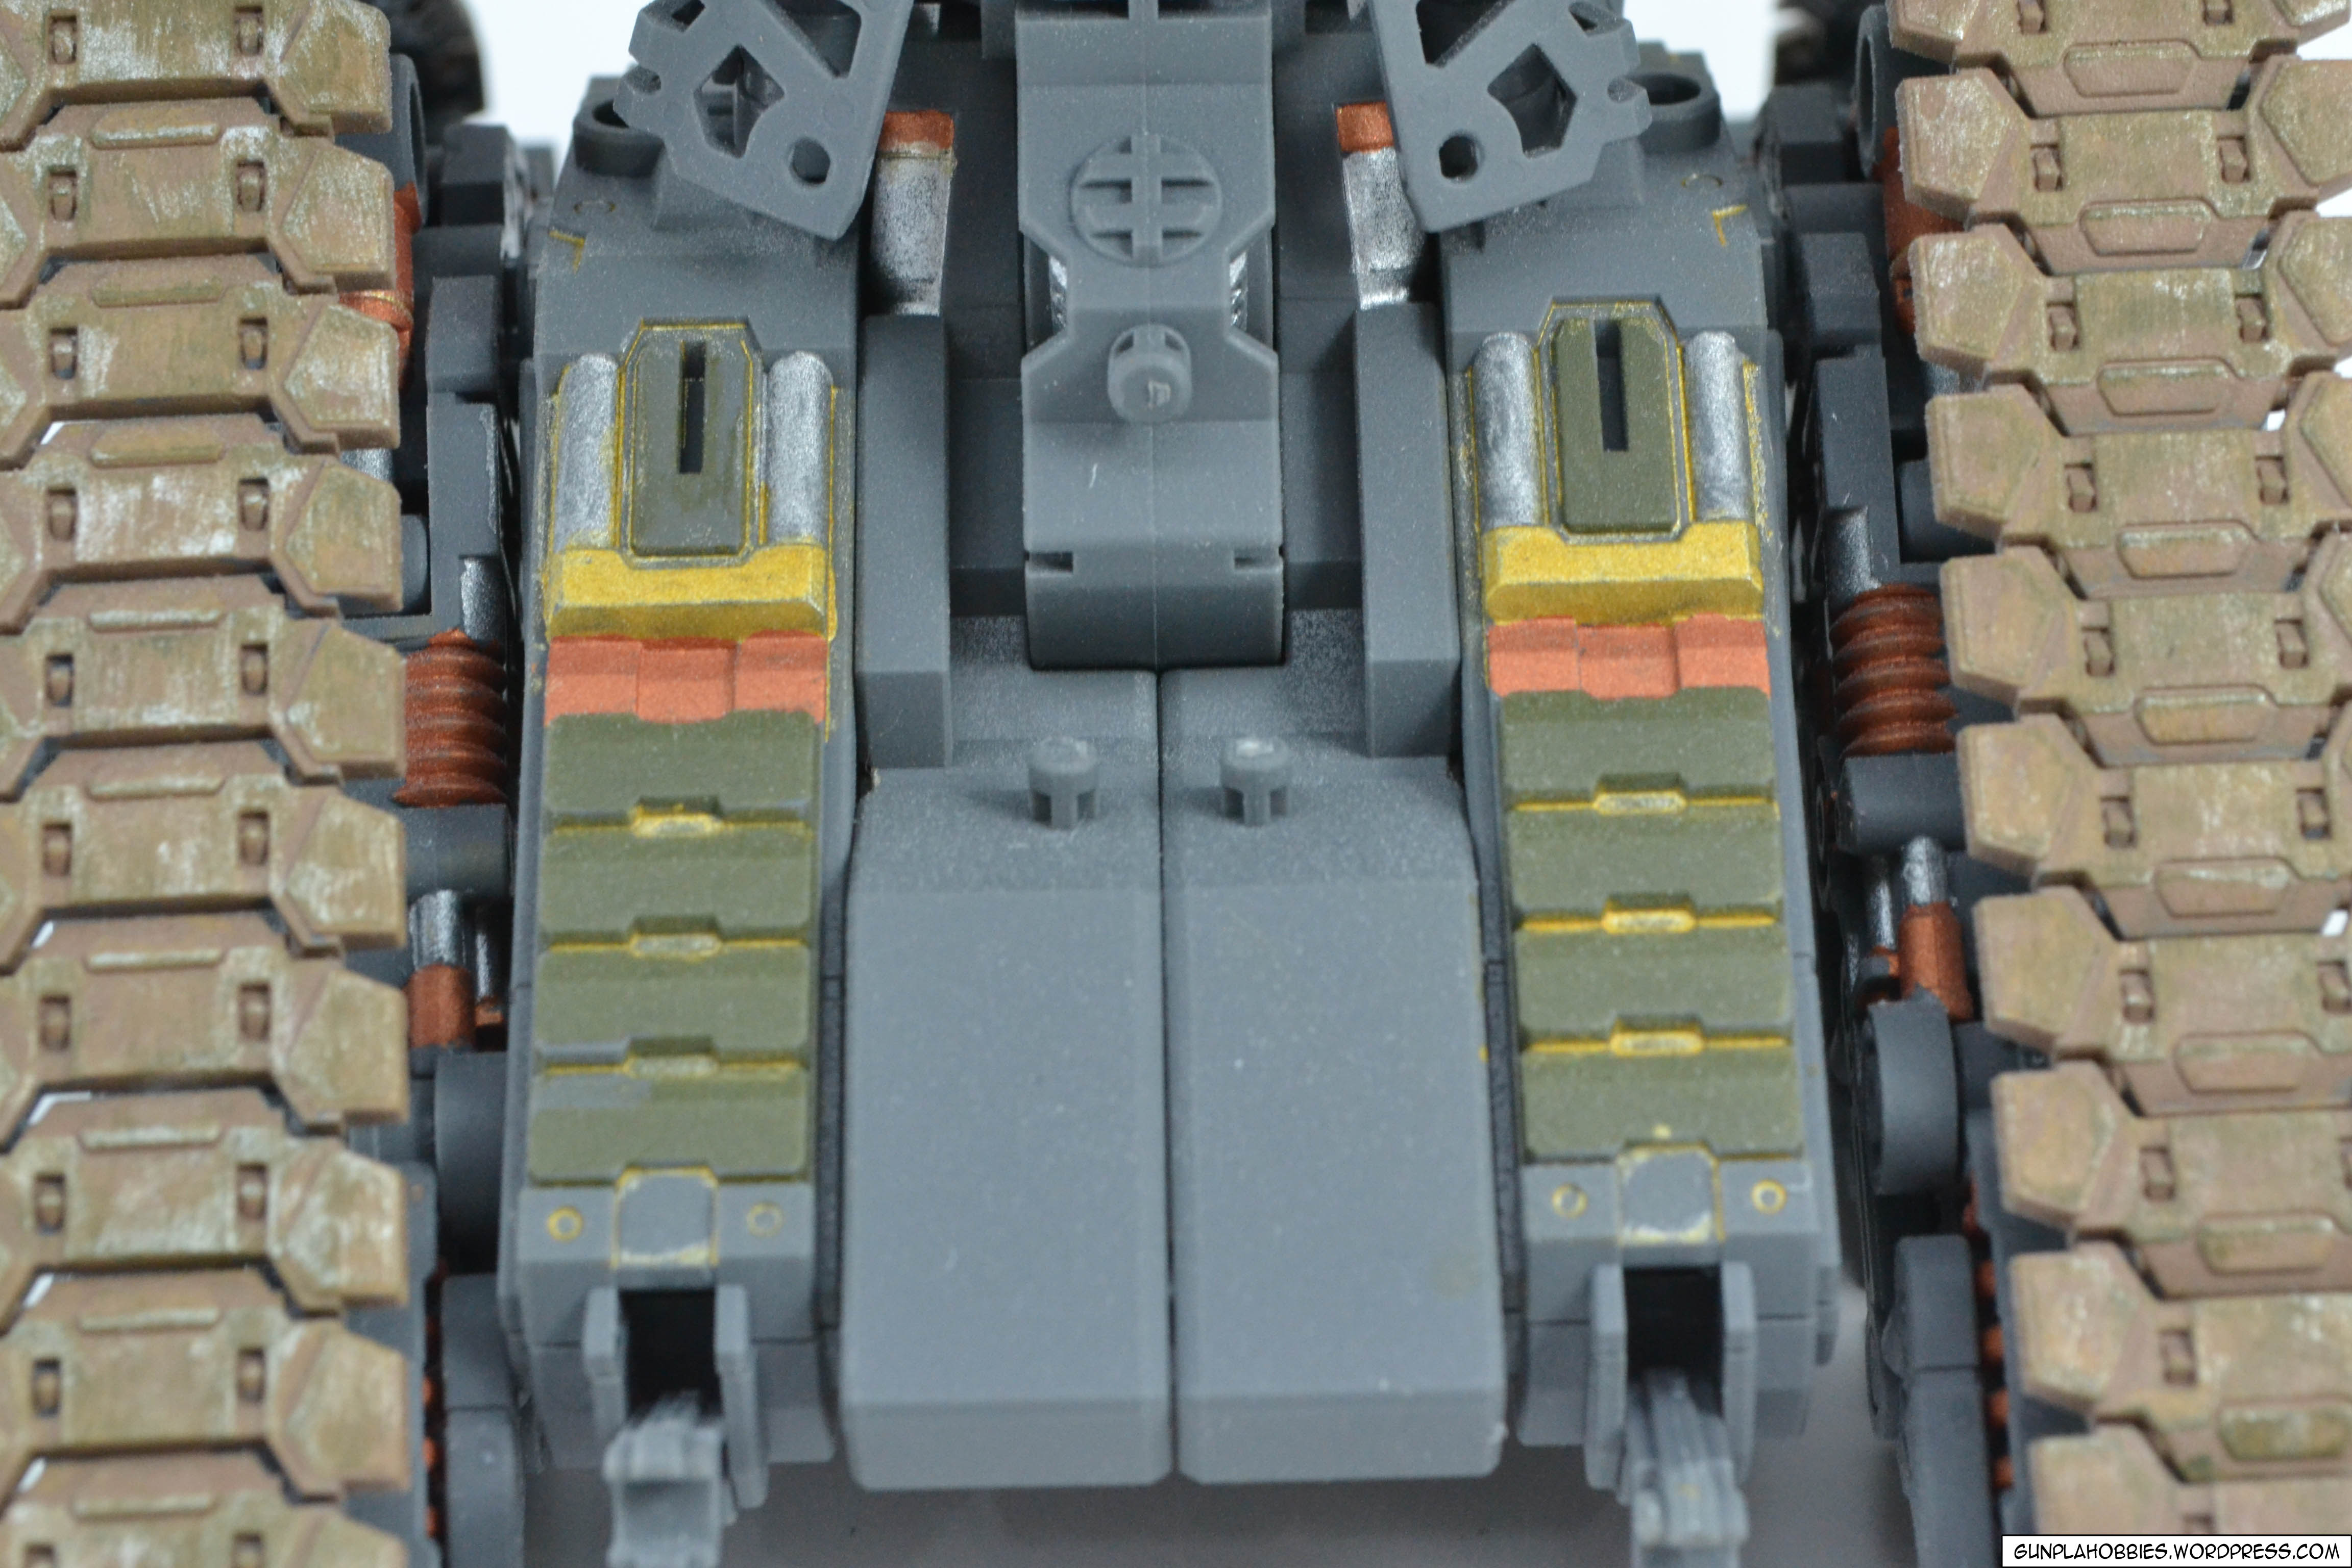
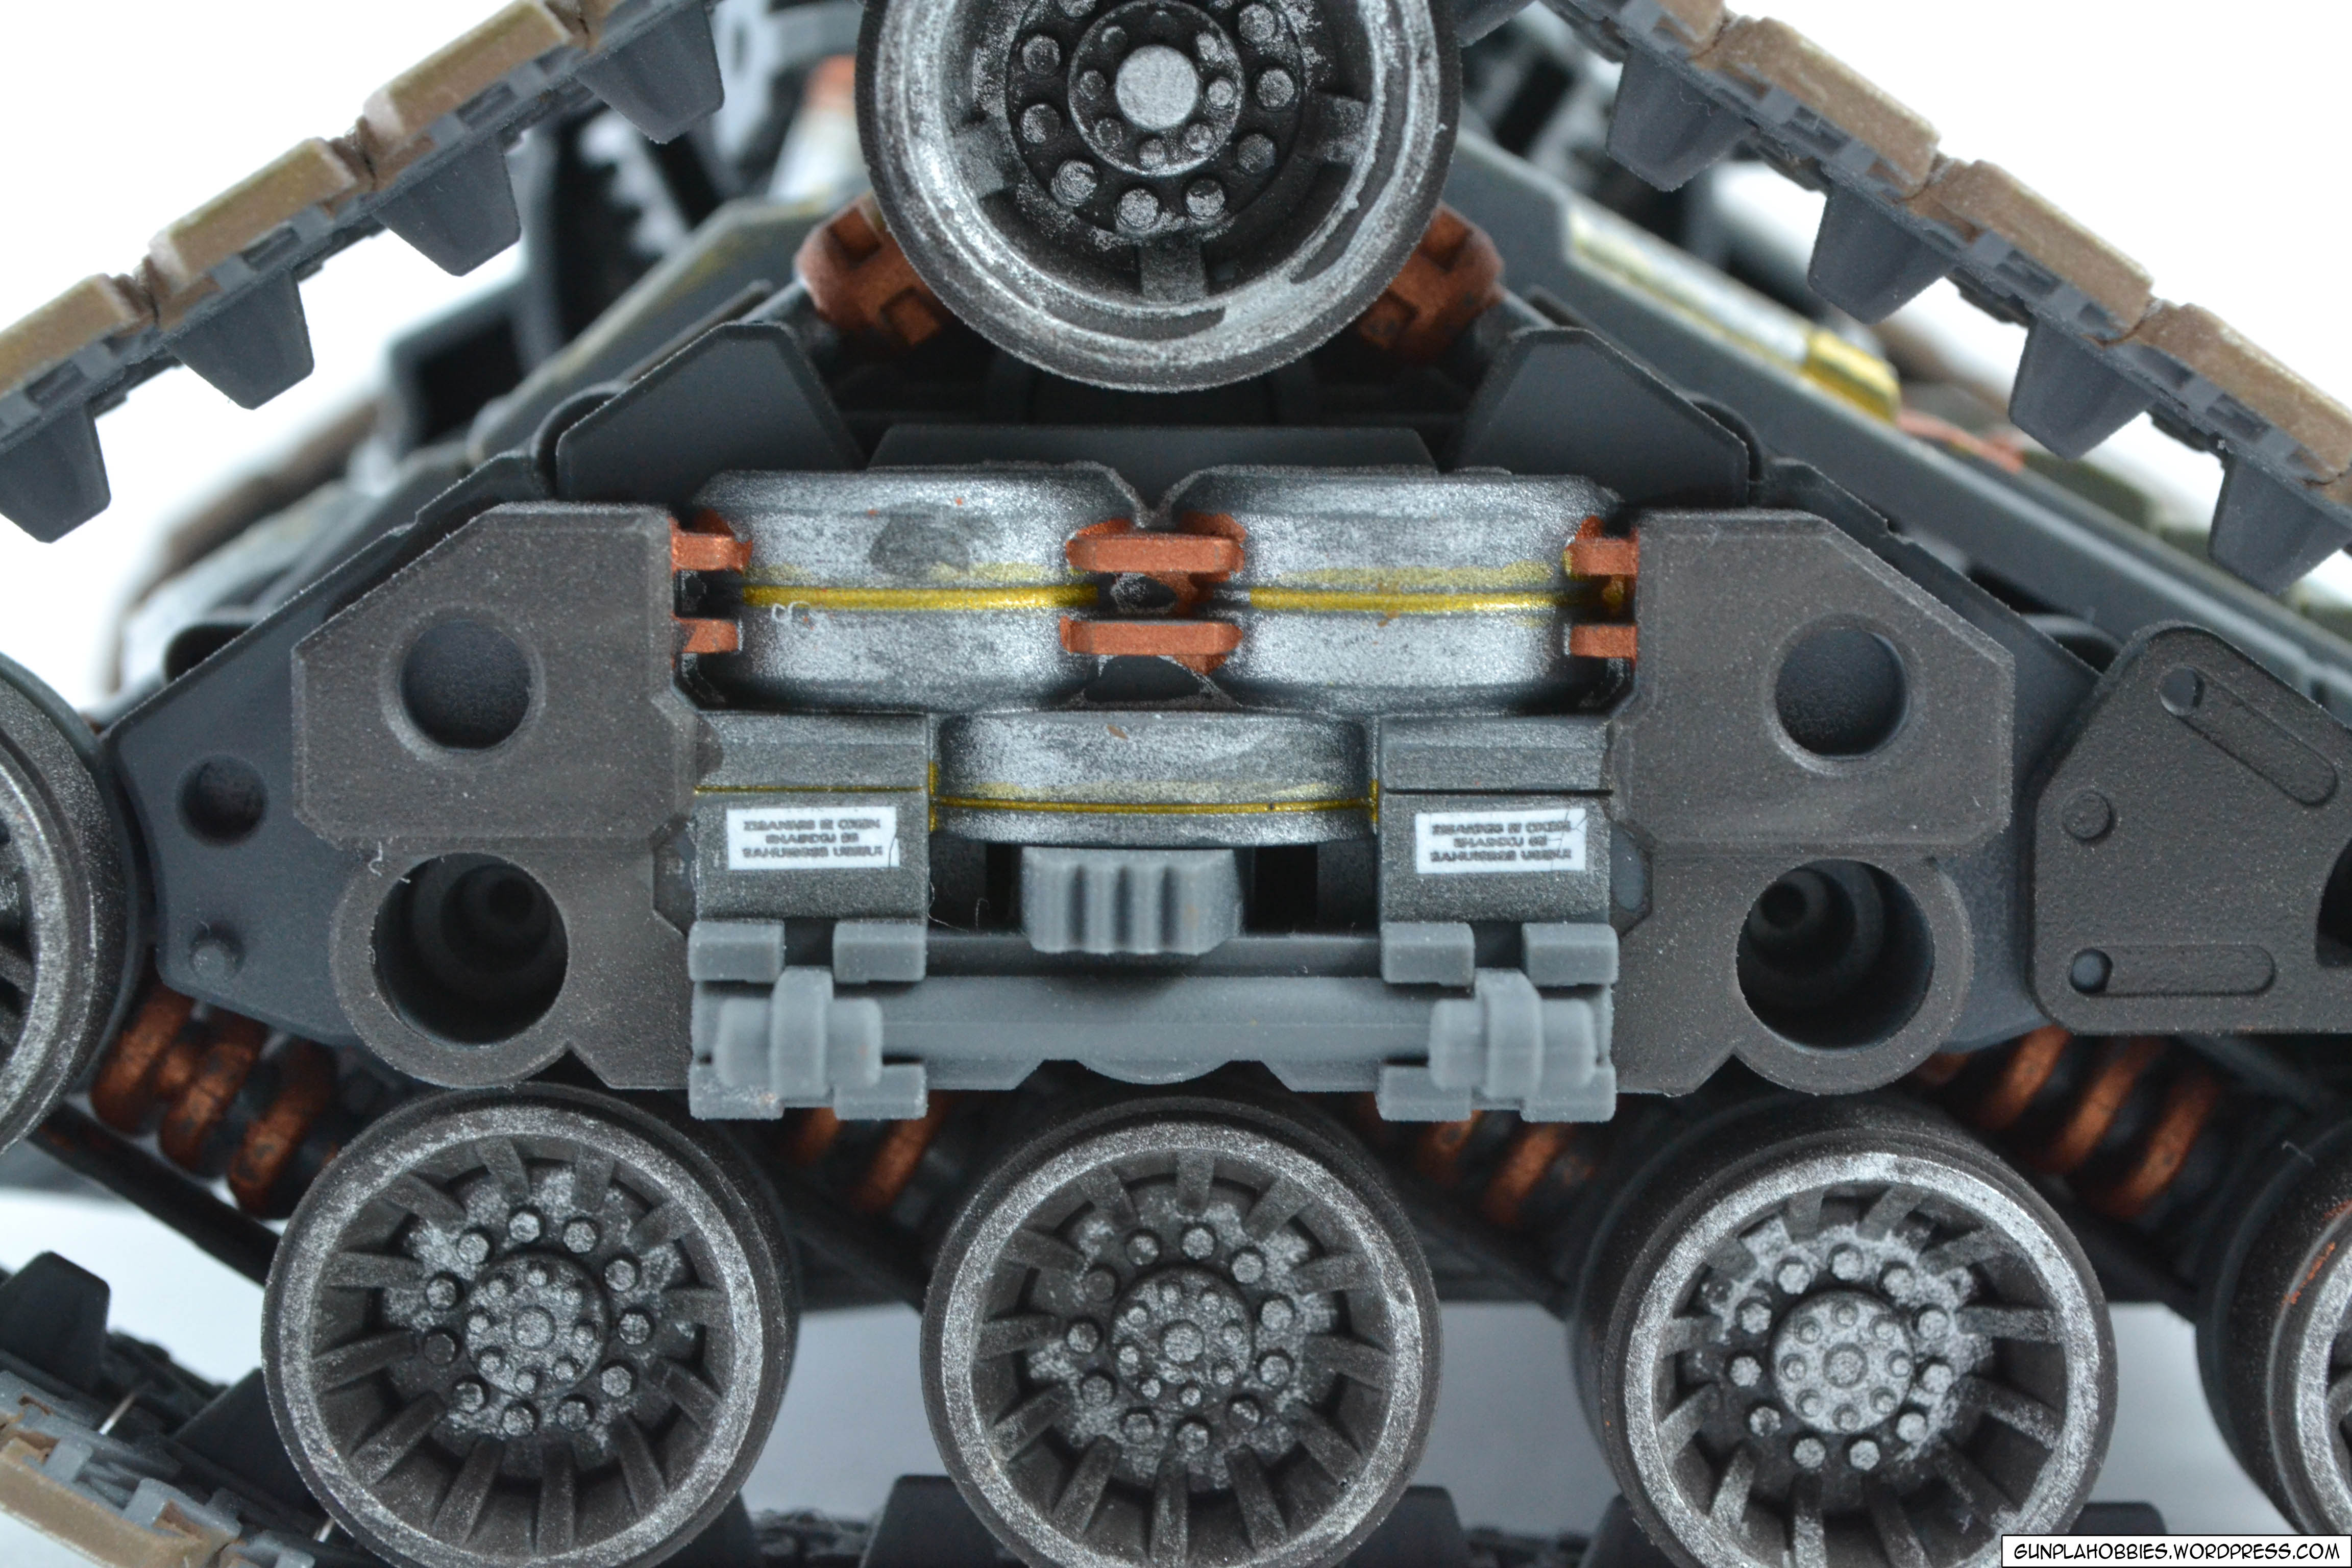
I used the mentioned paints above in detailing the different inner frame parts randomly as I see fit.


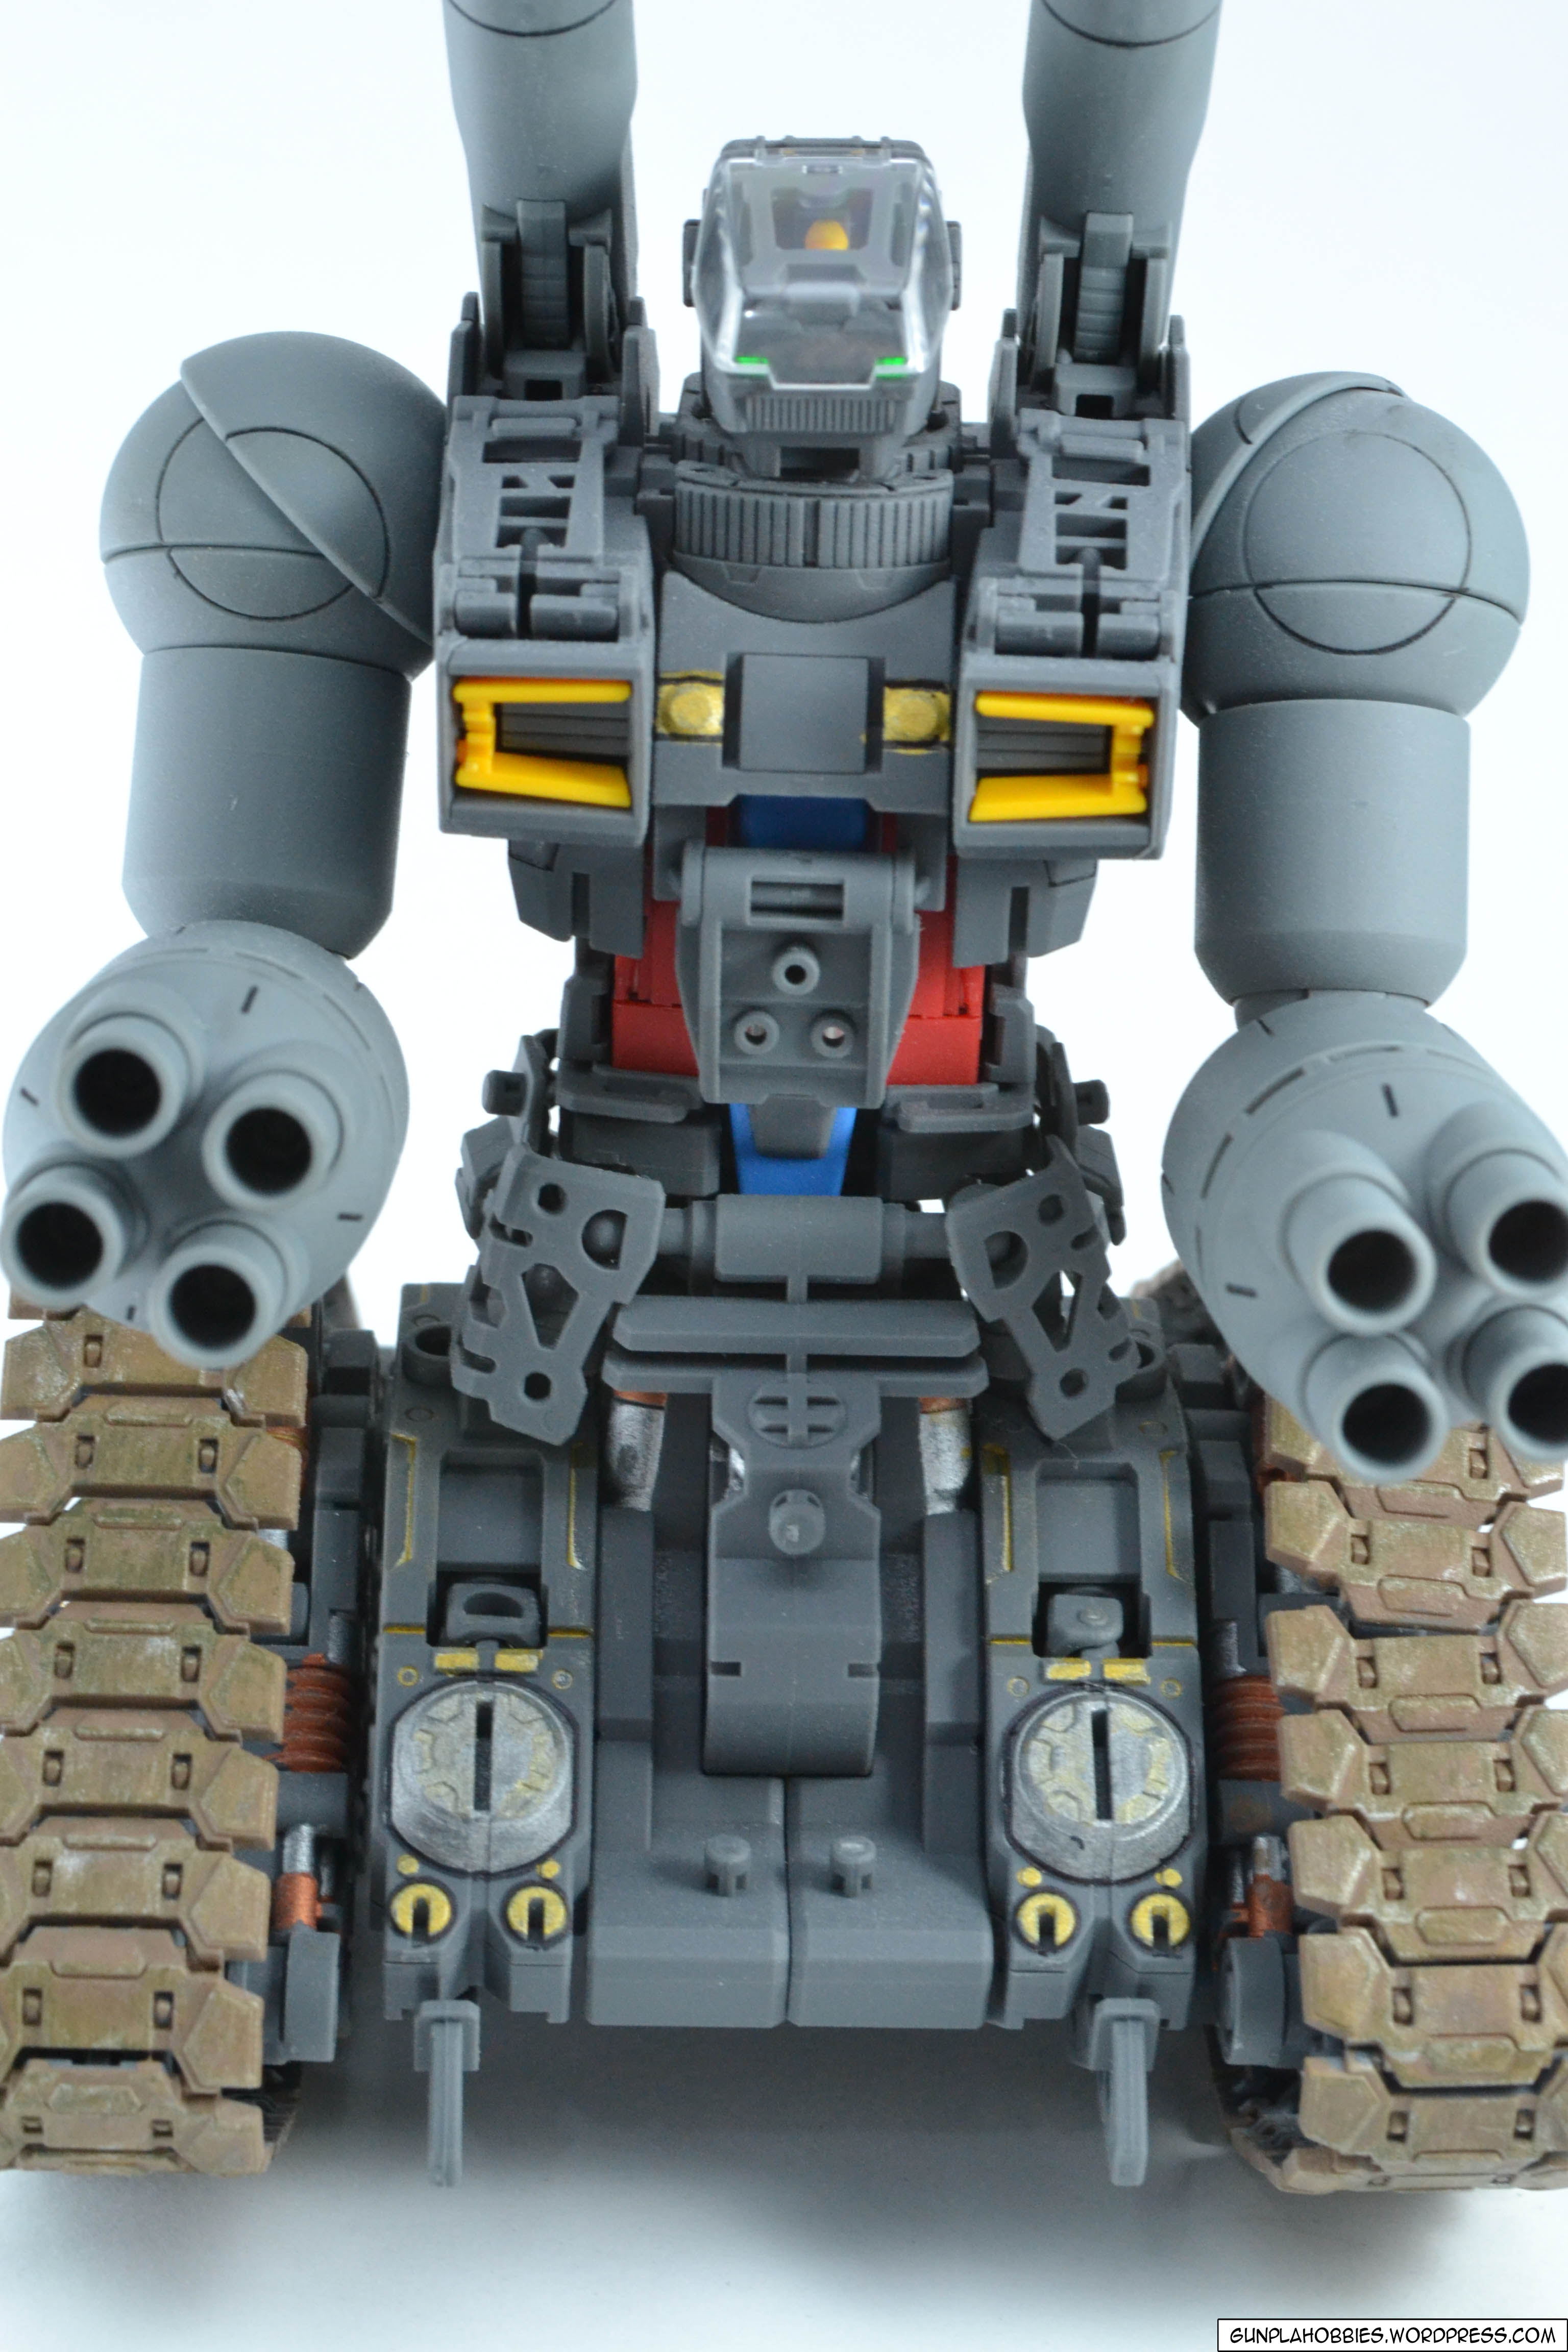
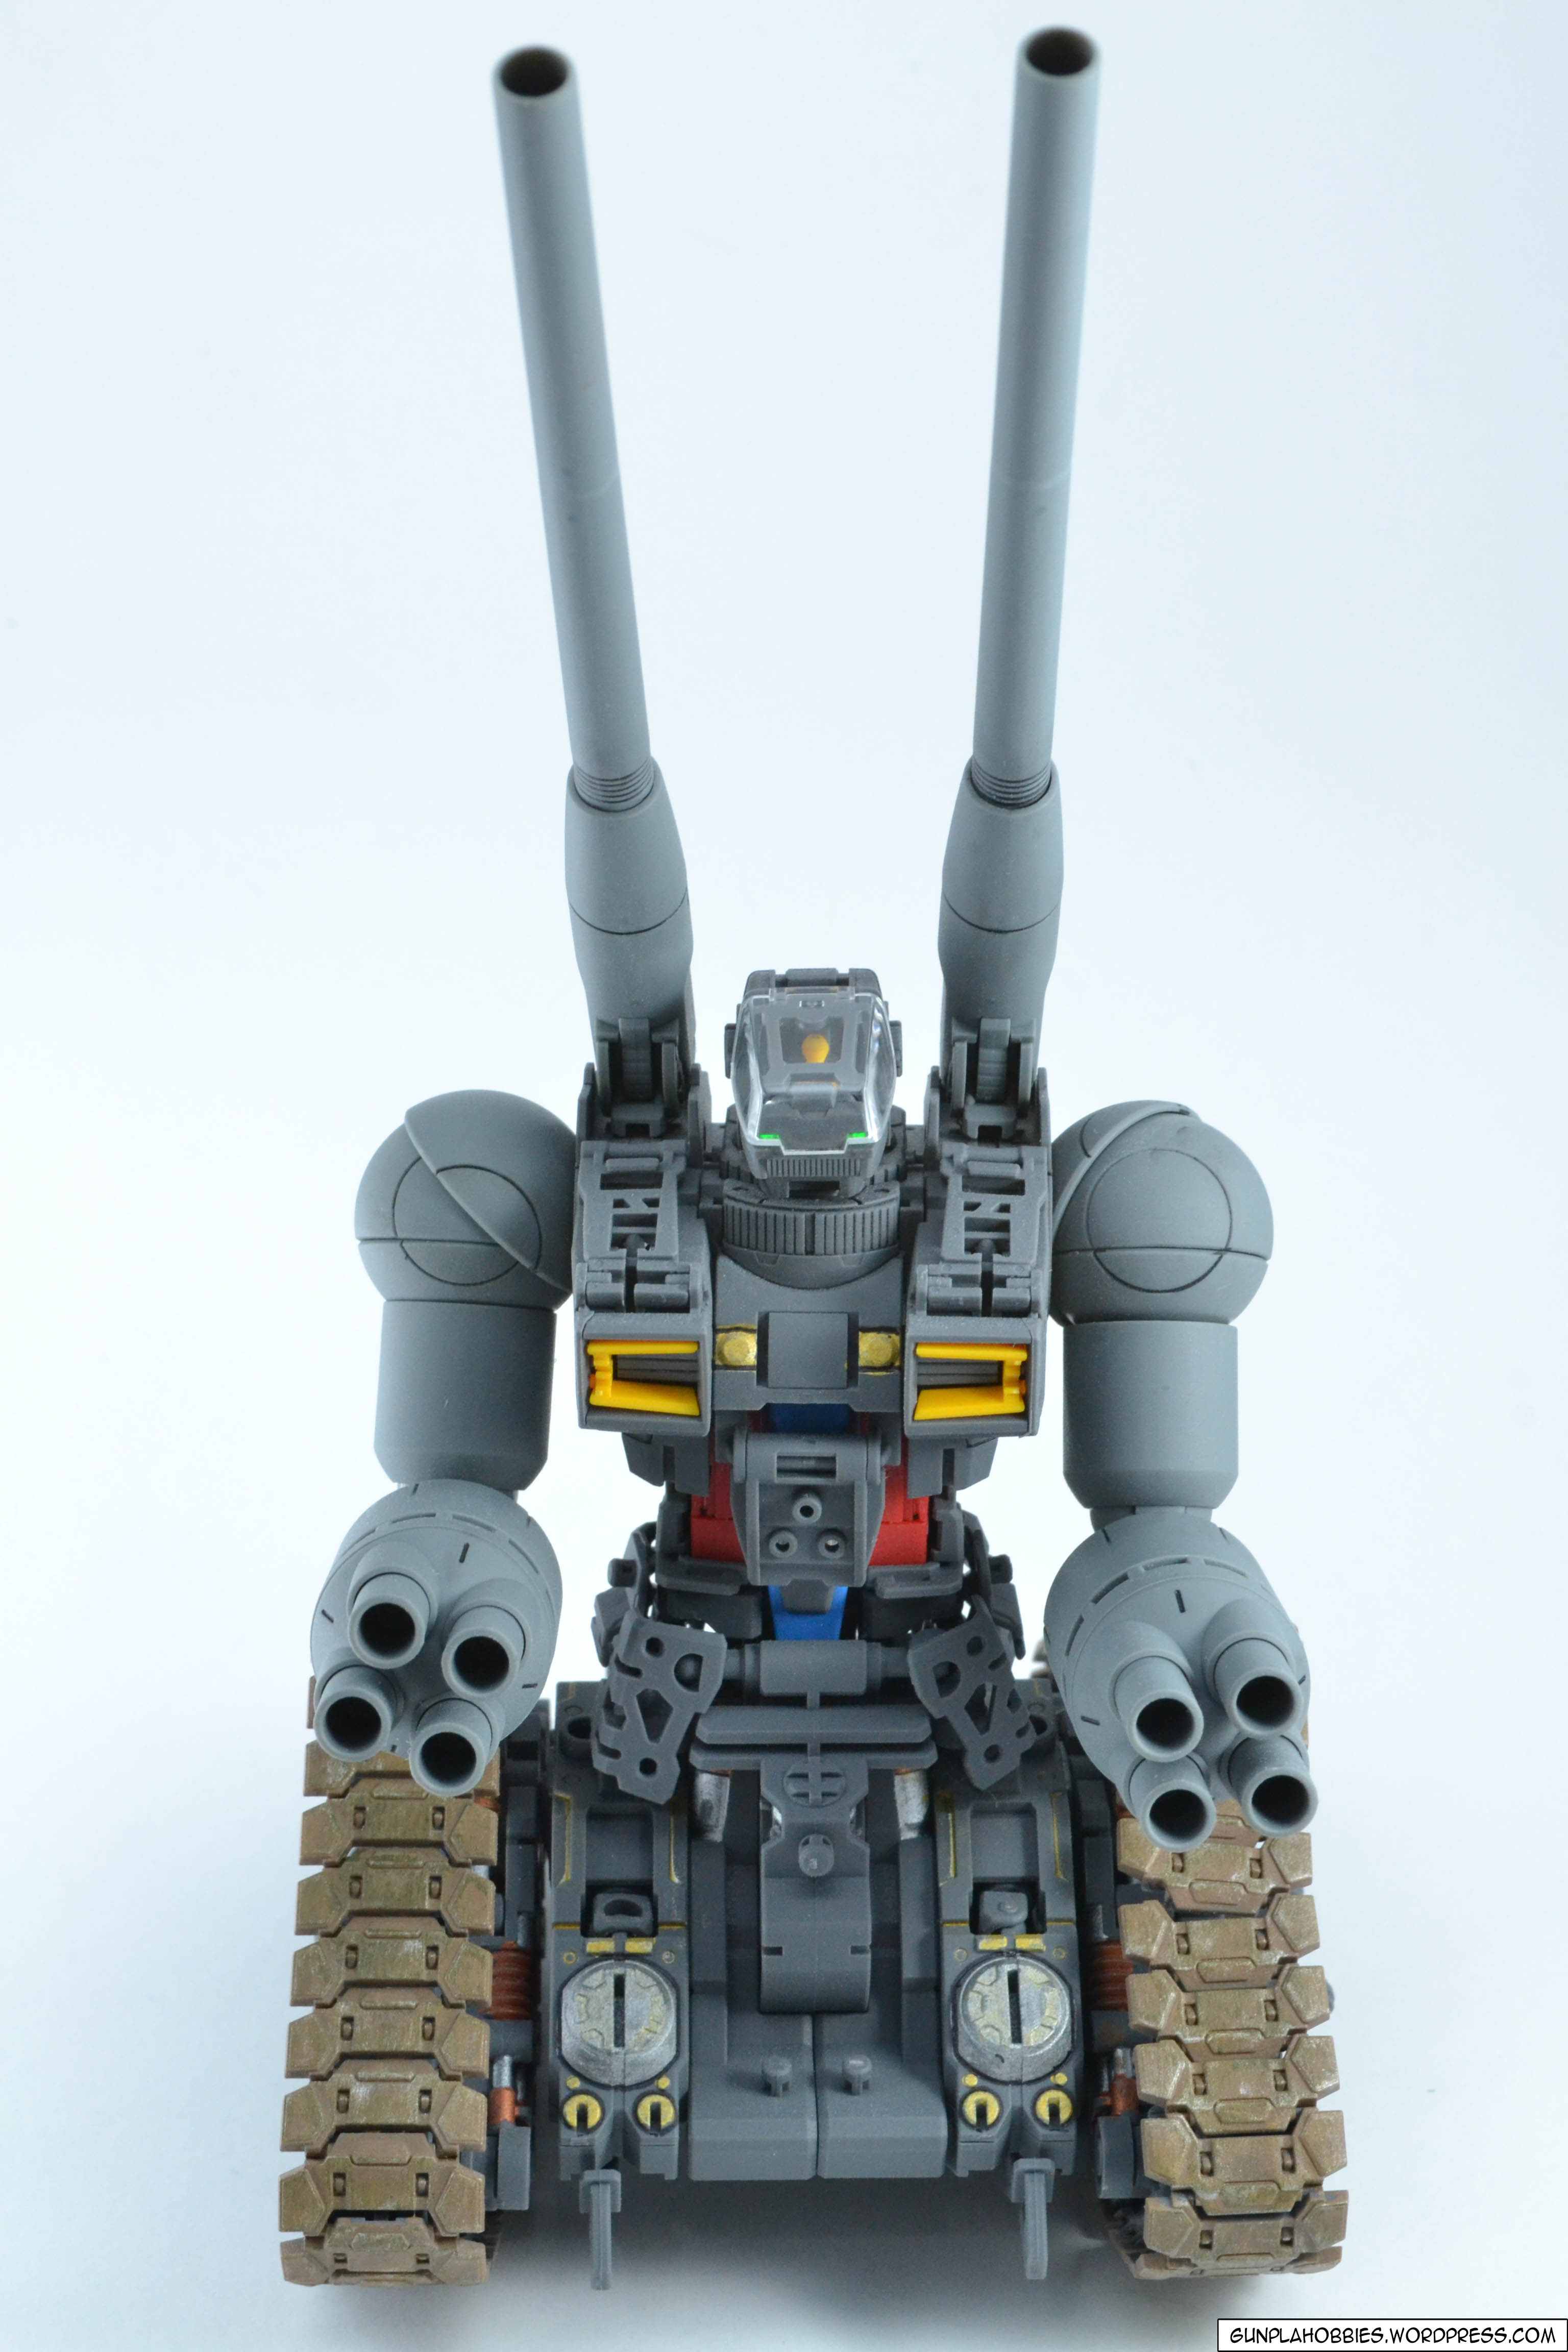
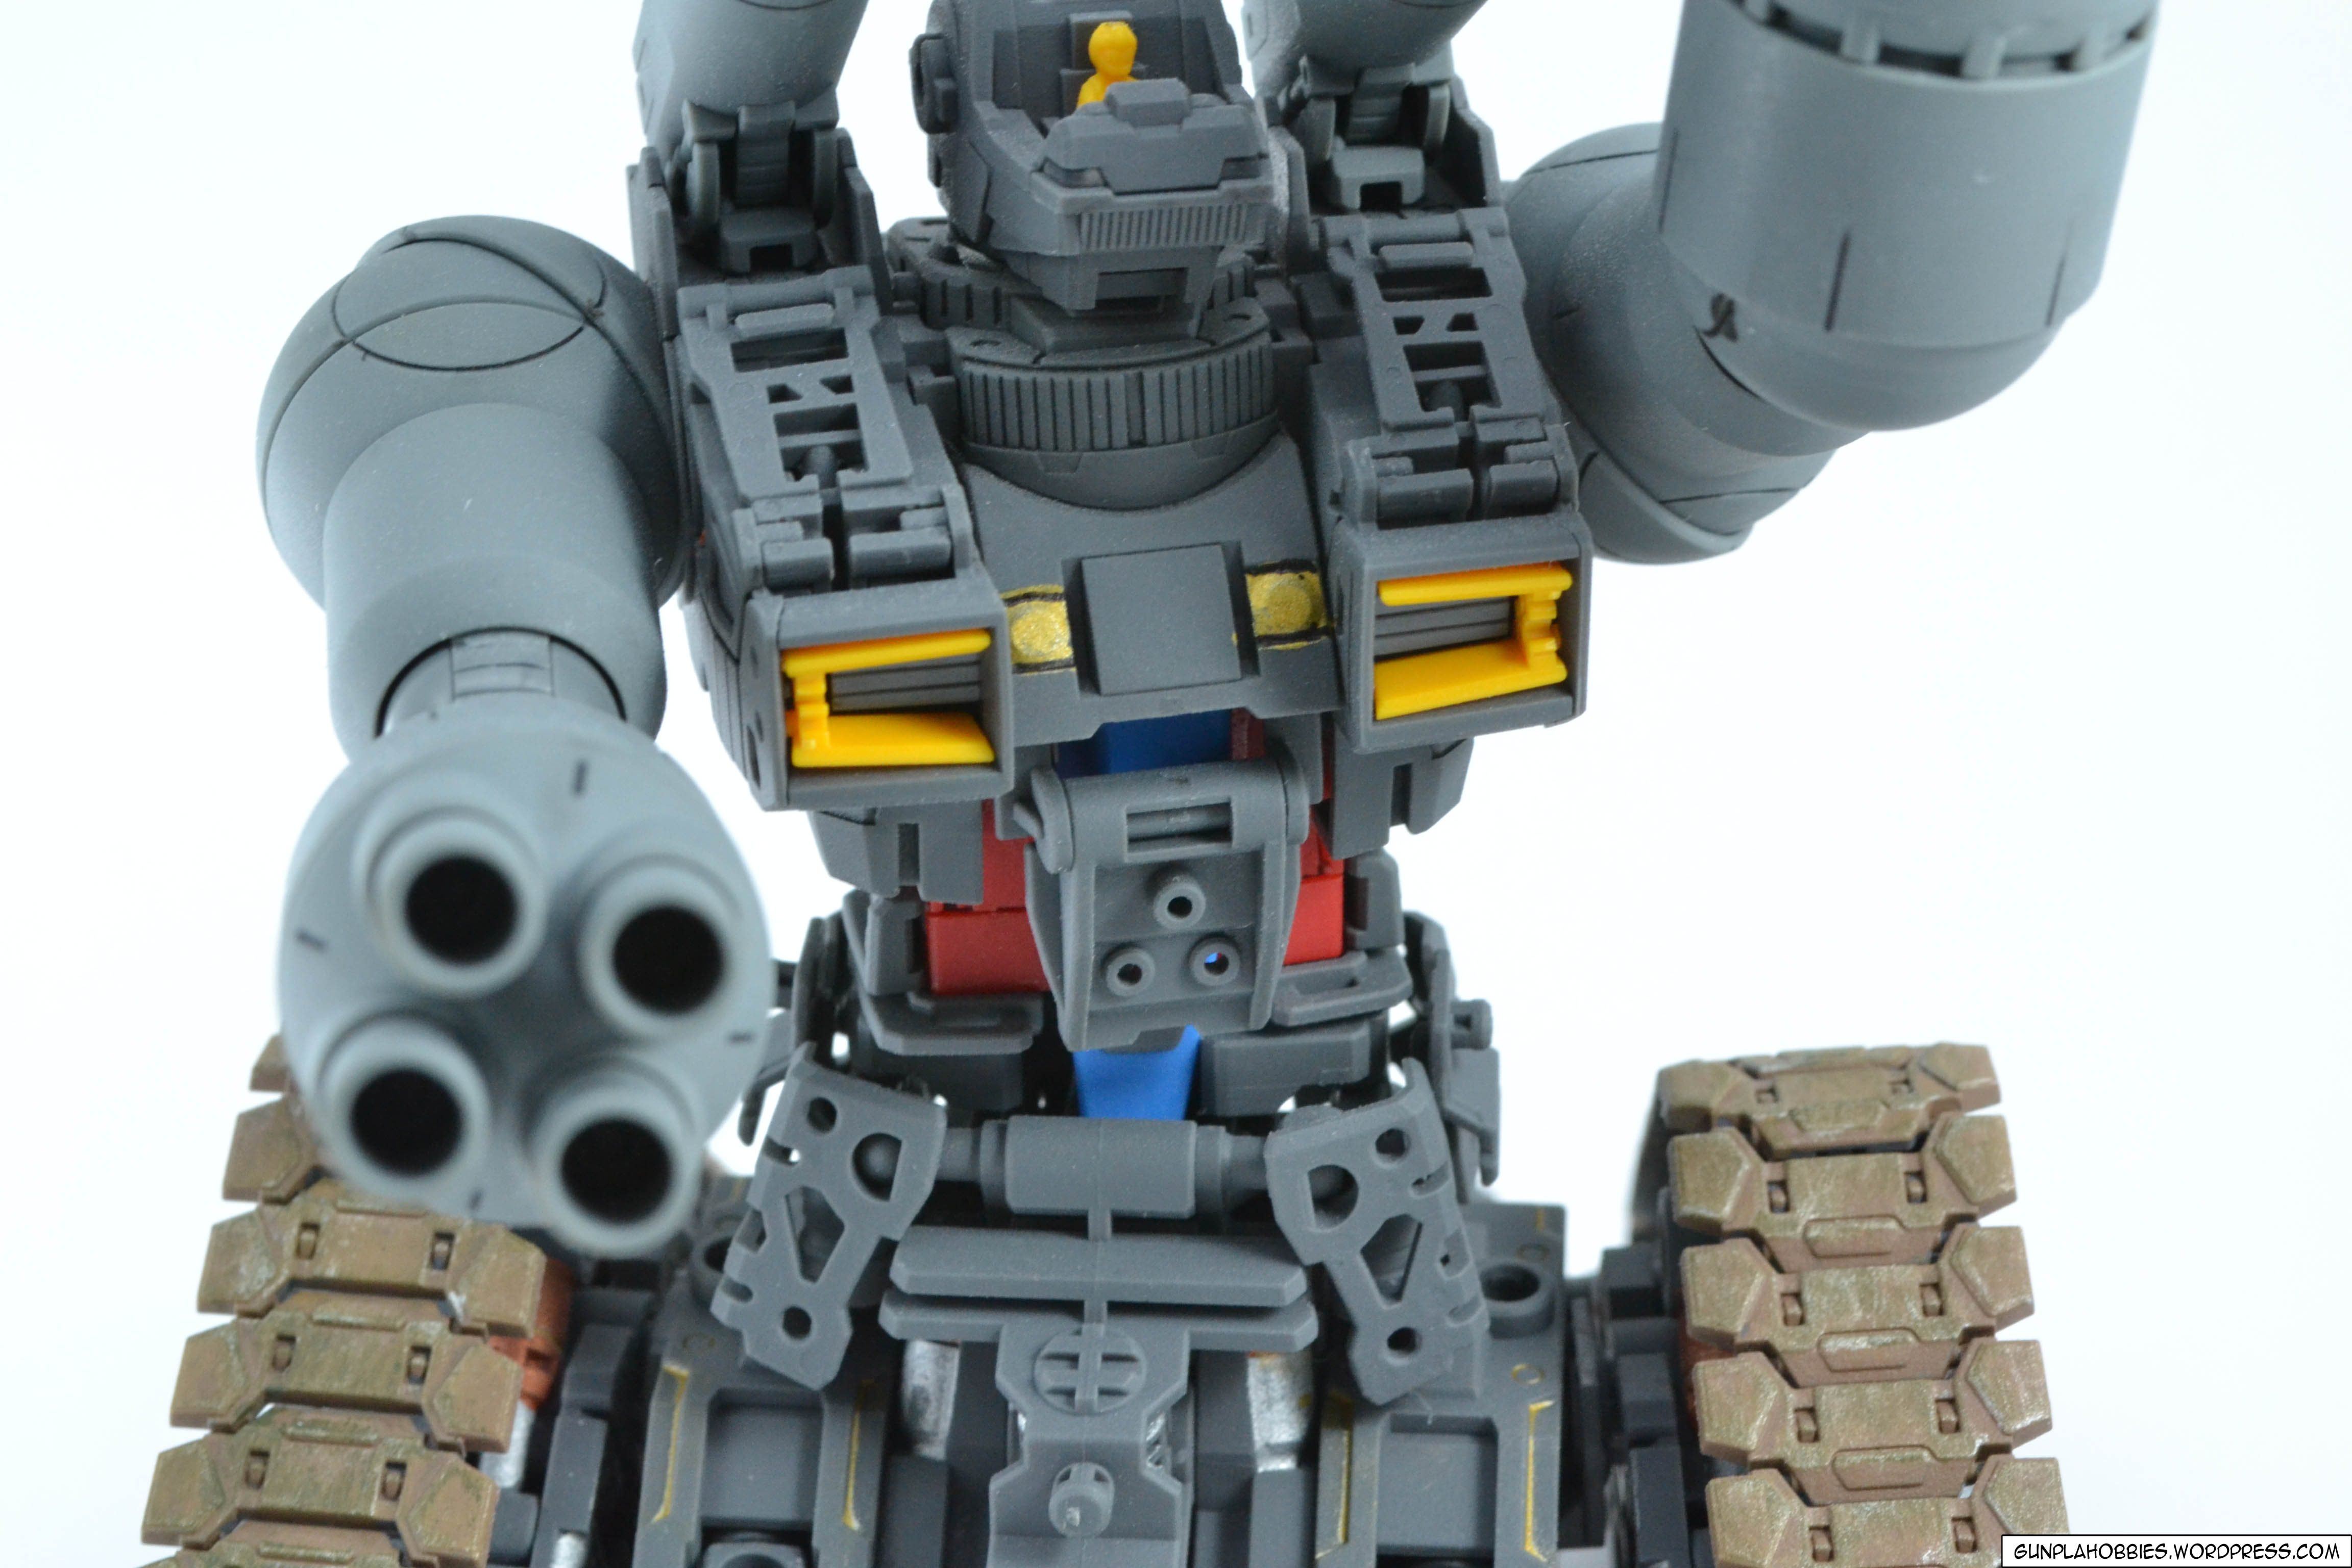
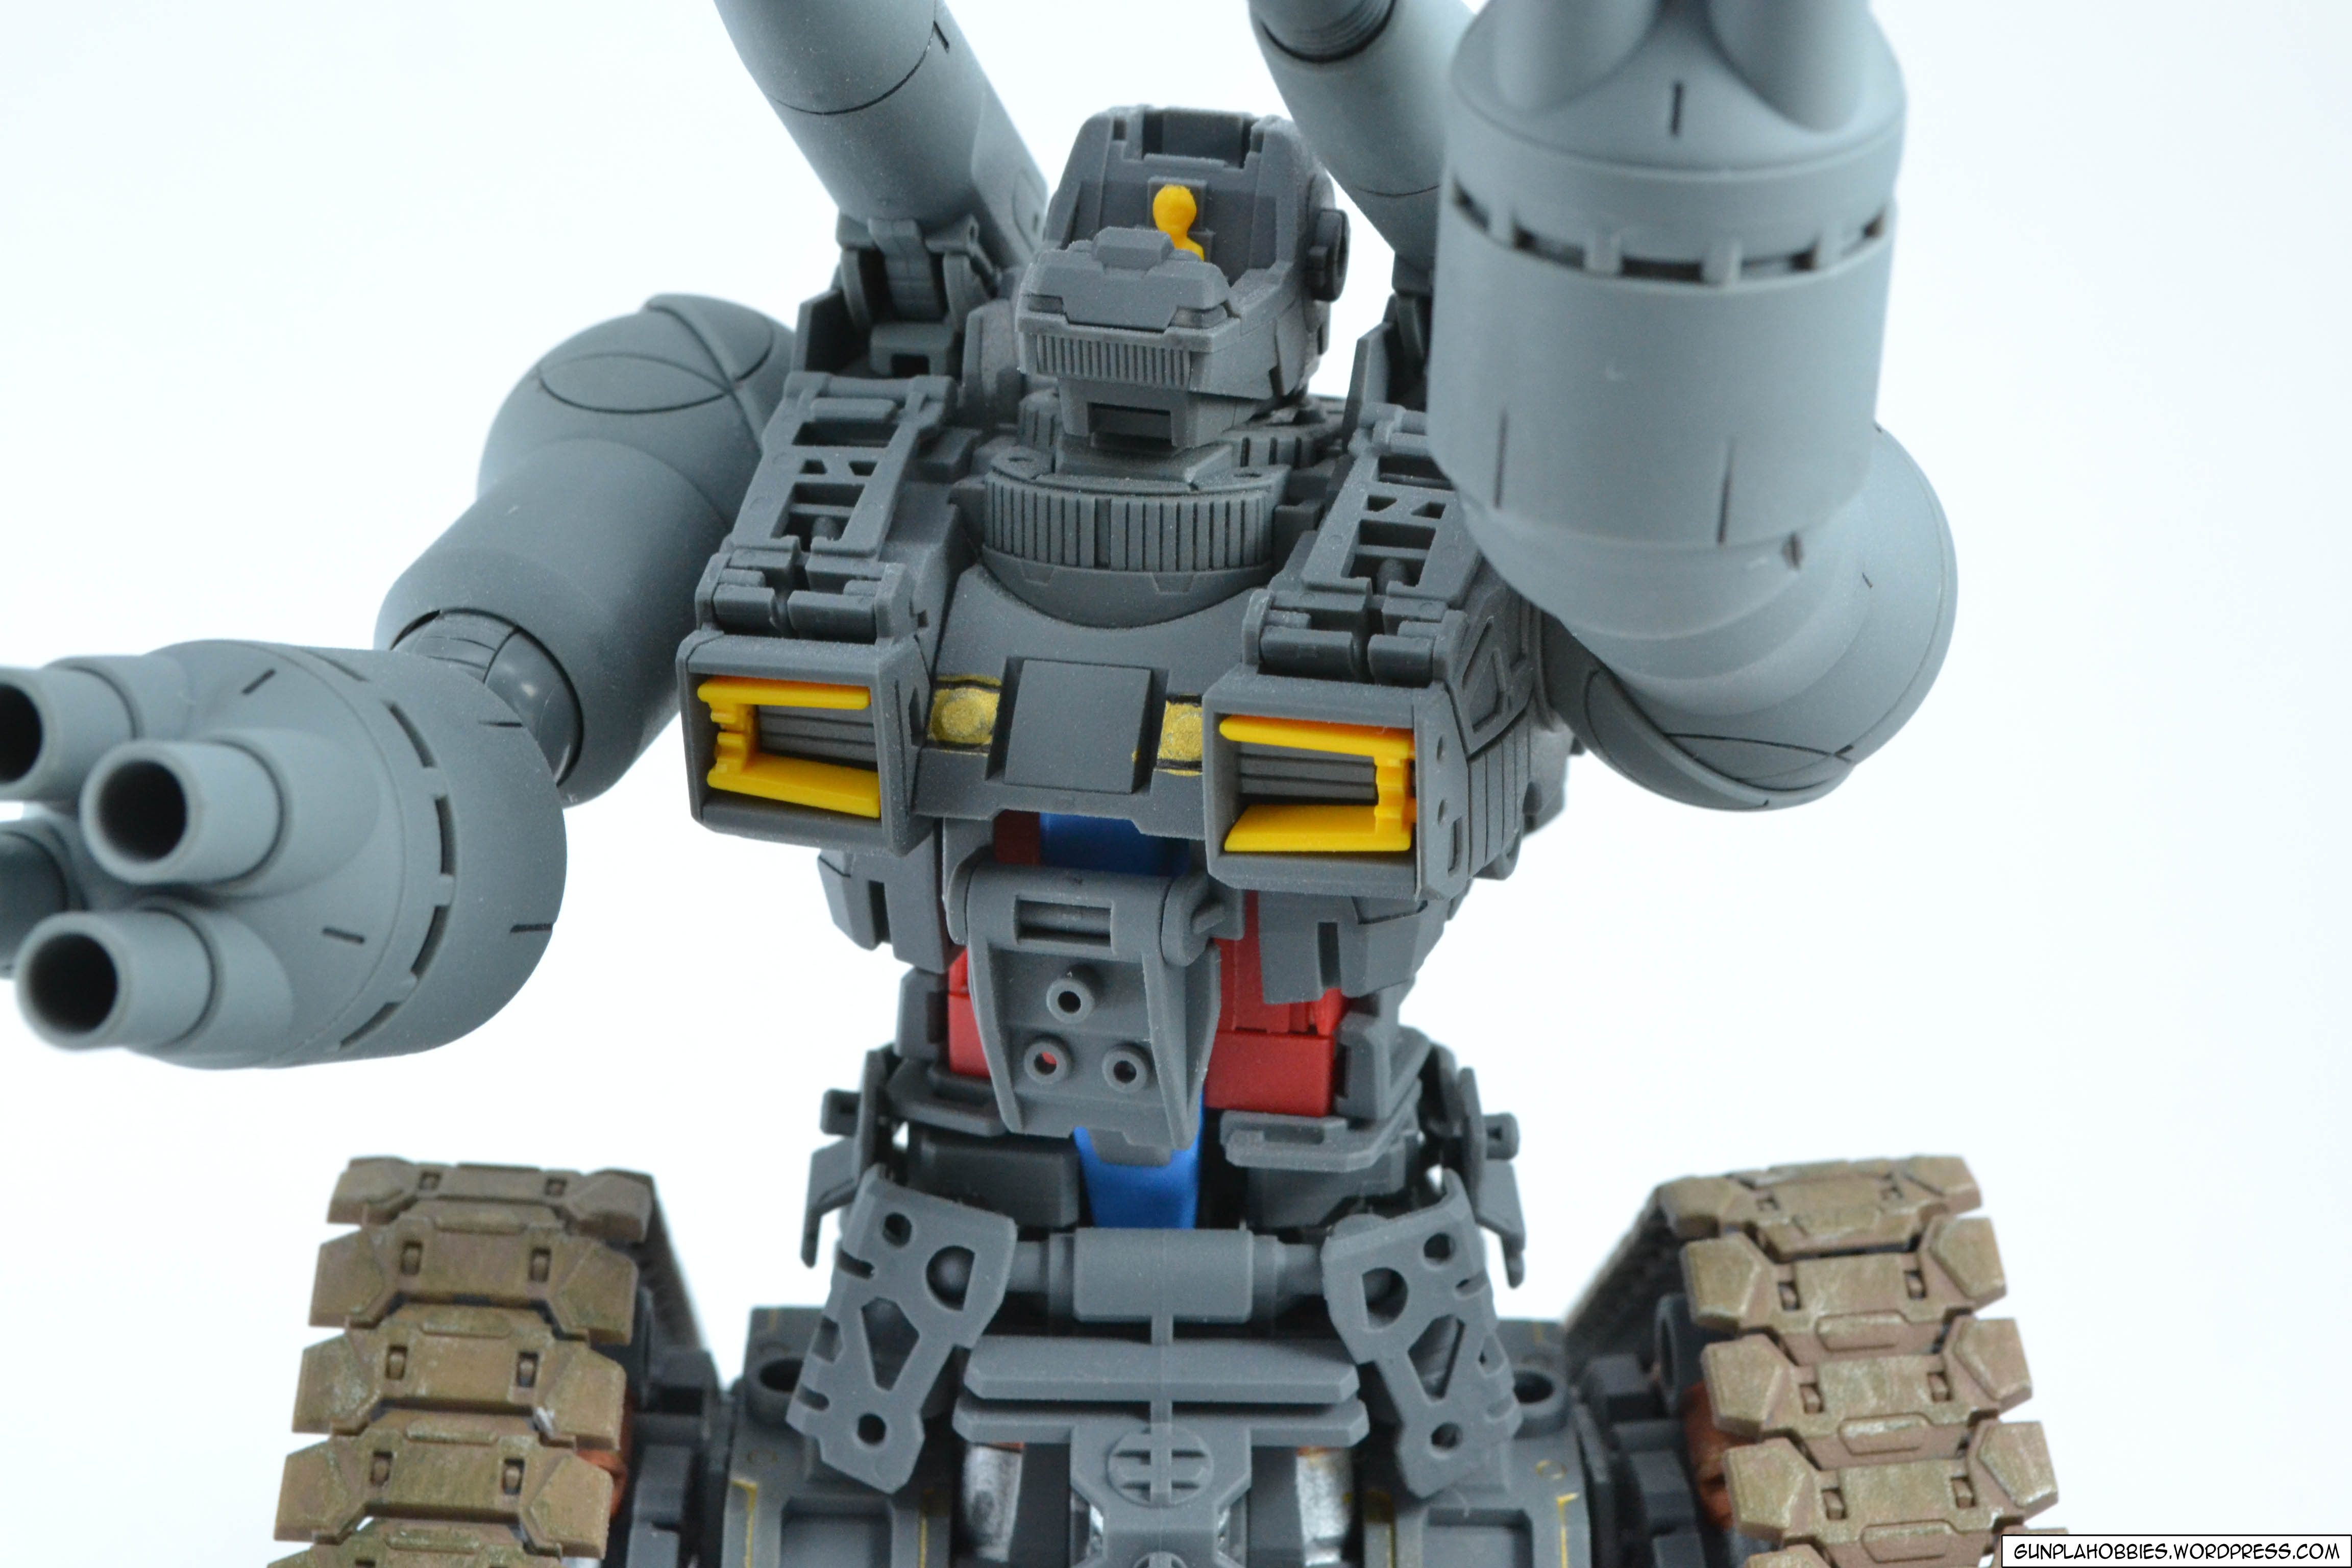
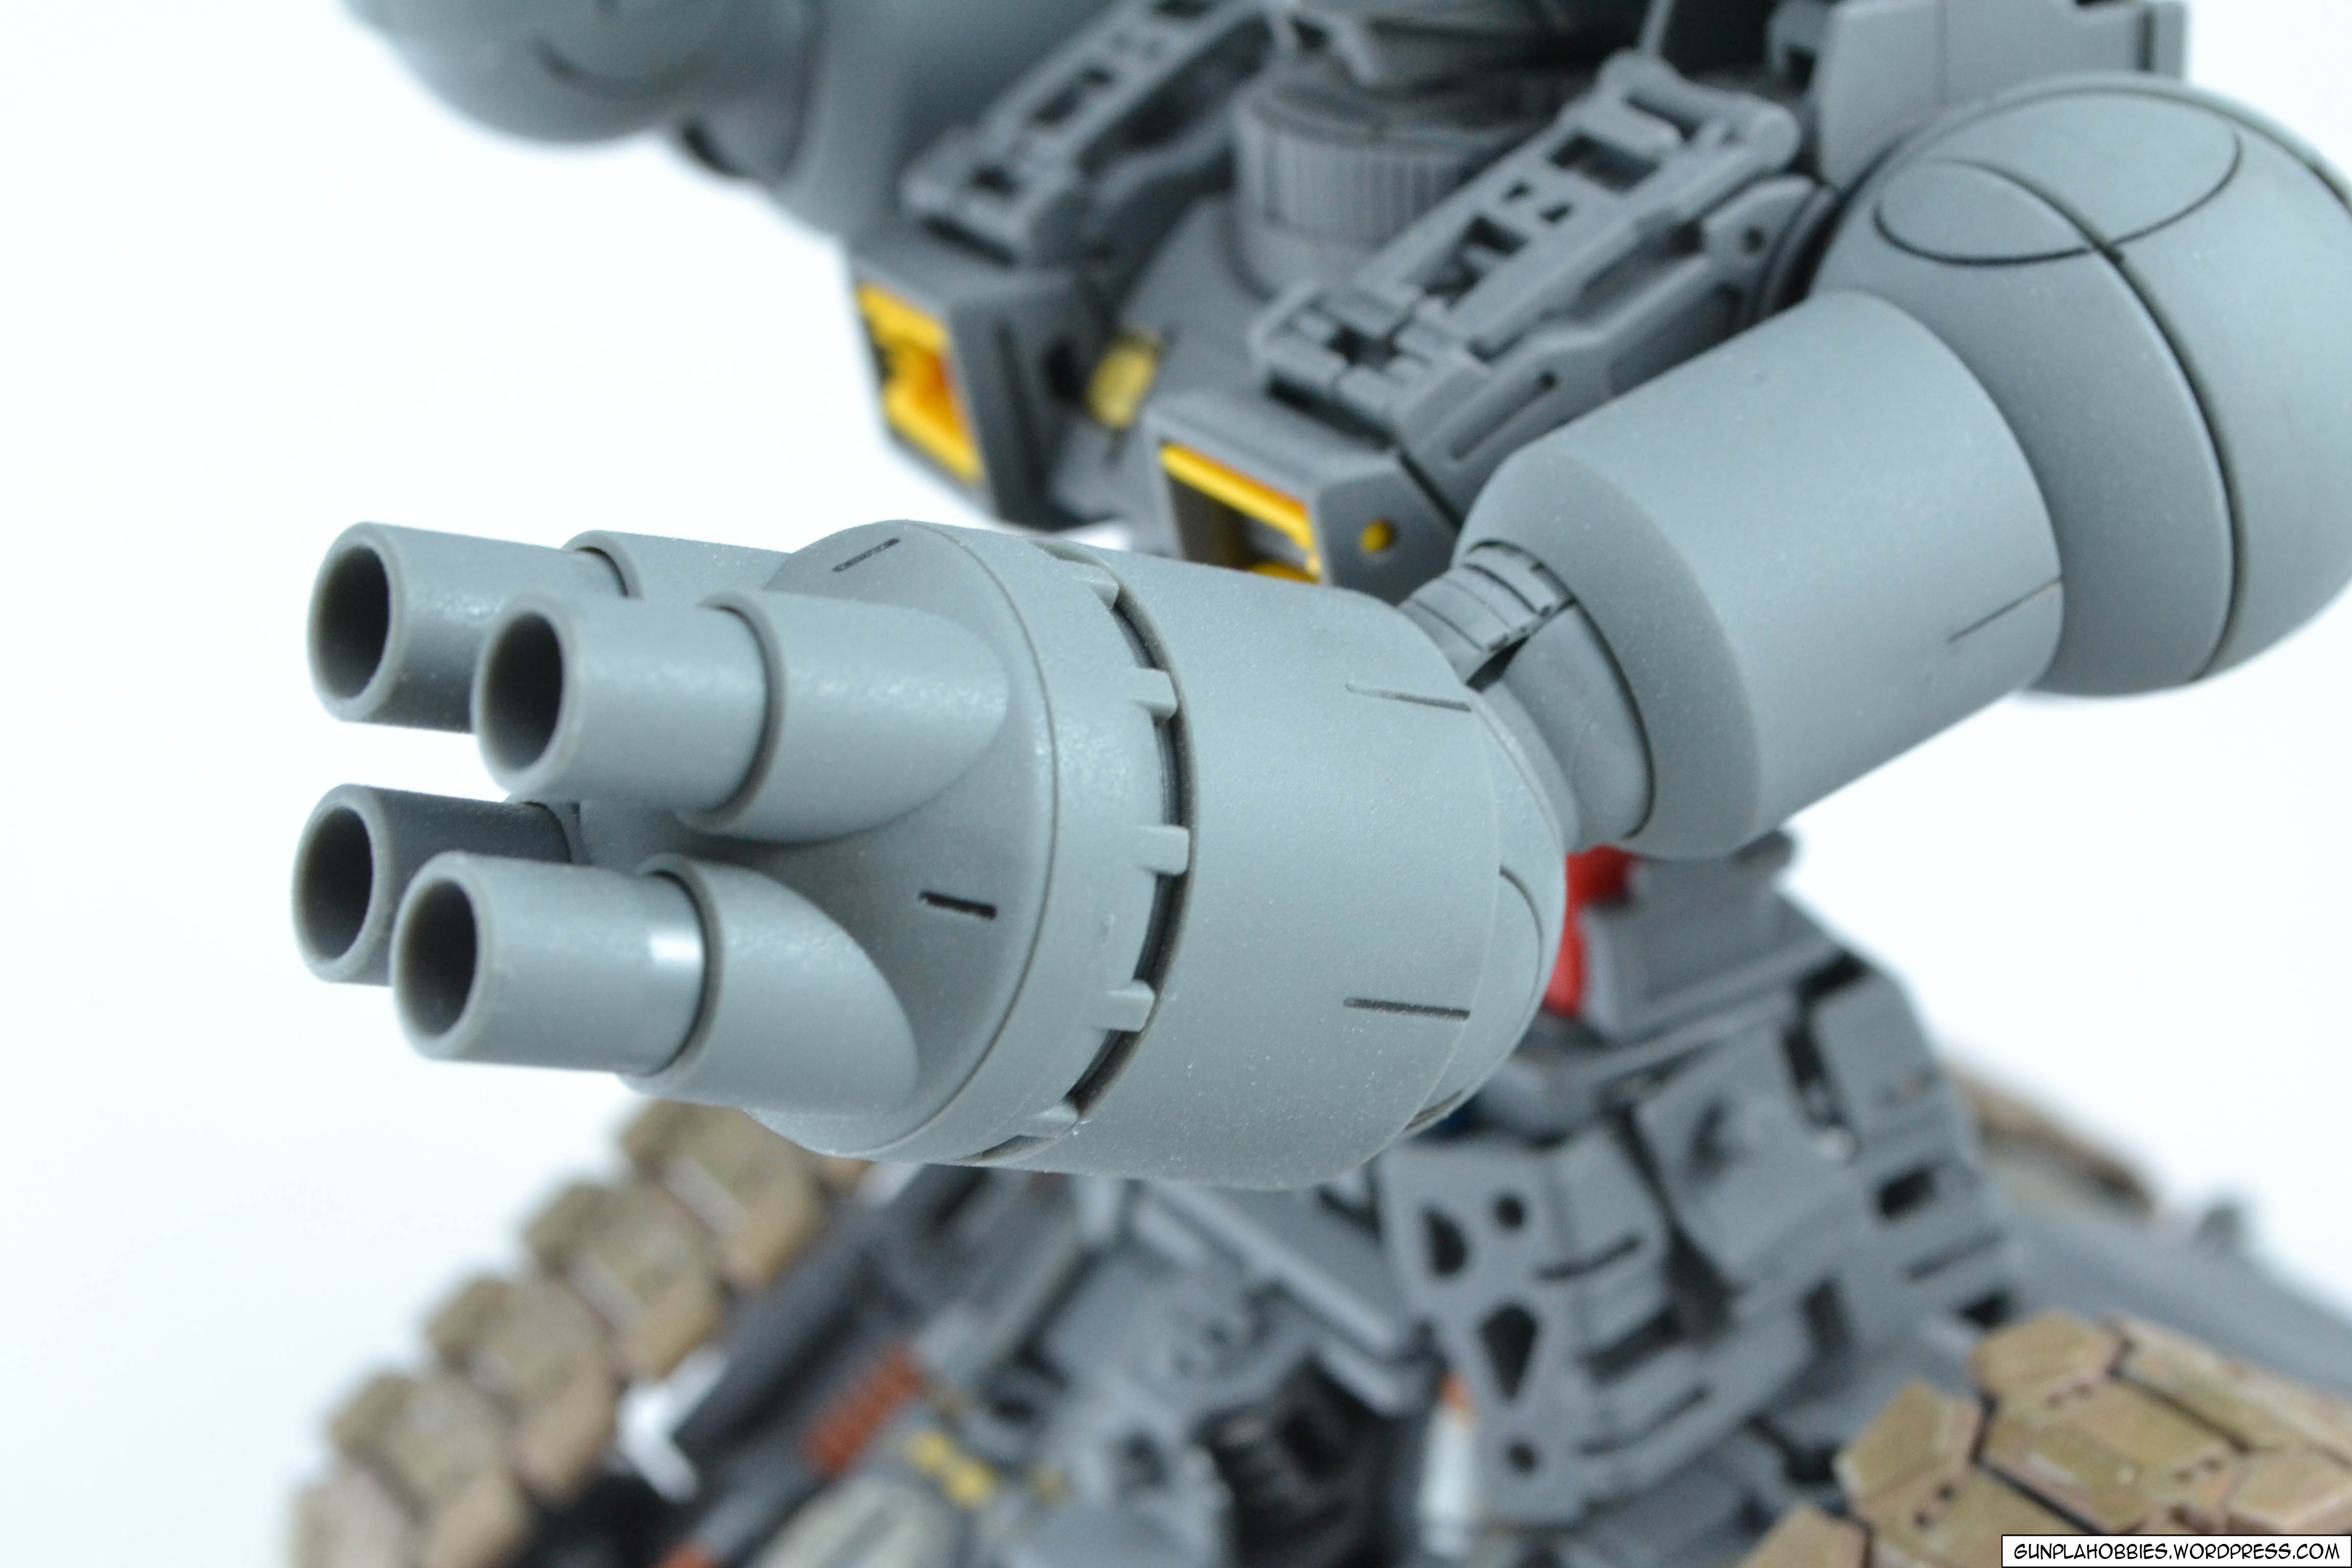
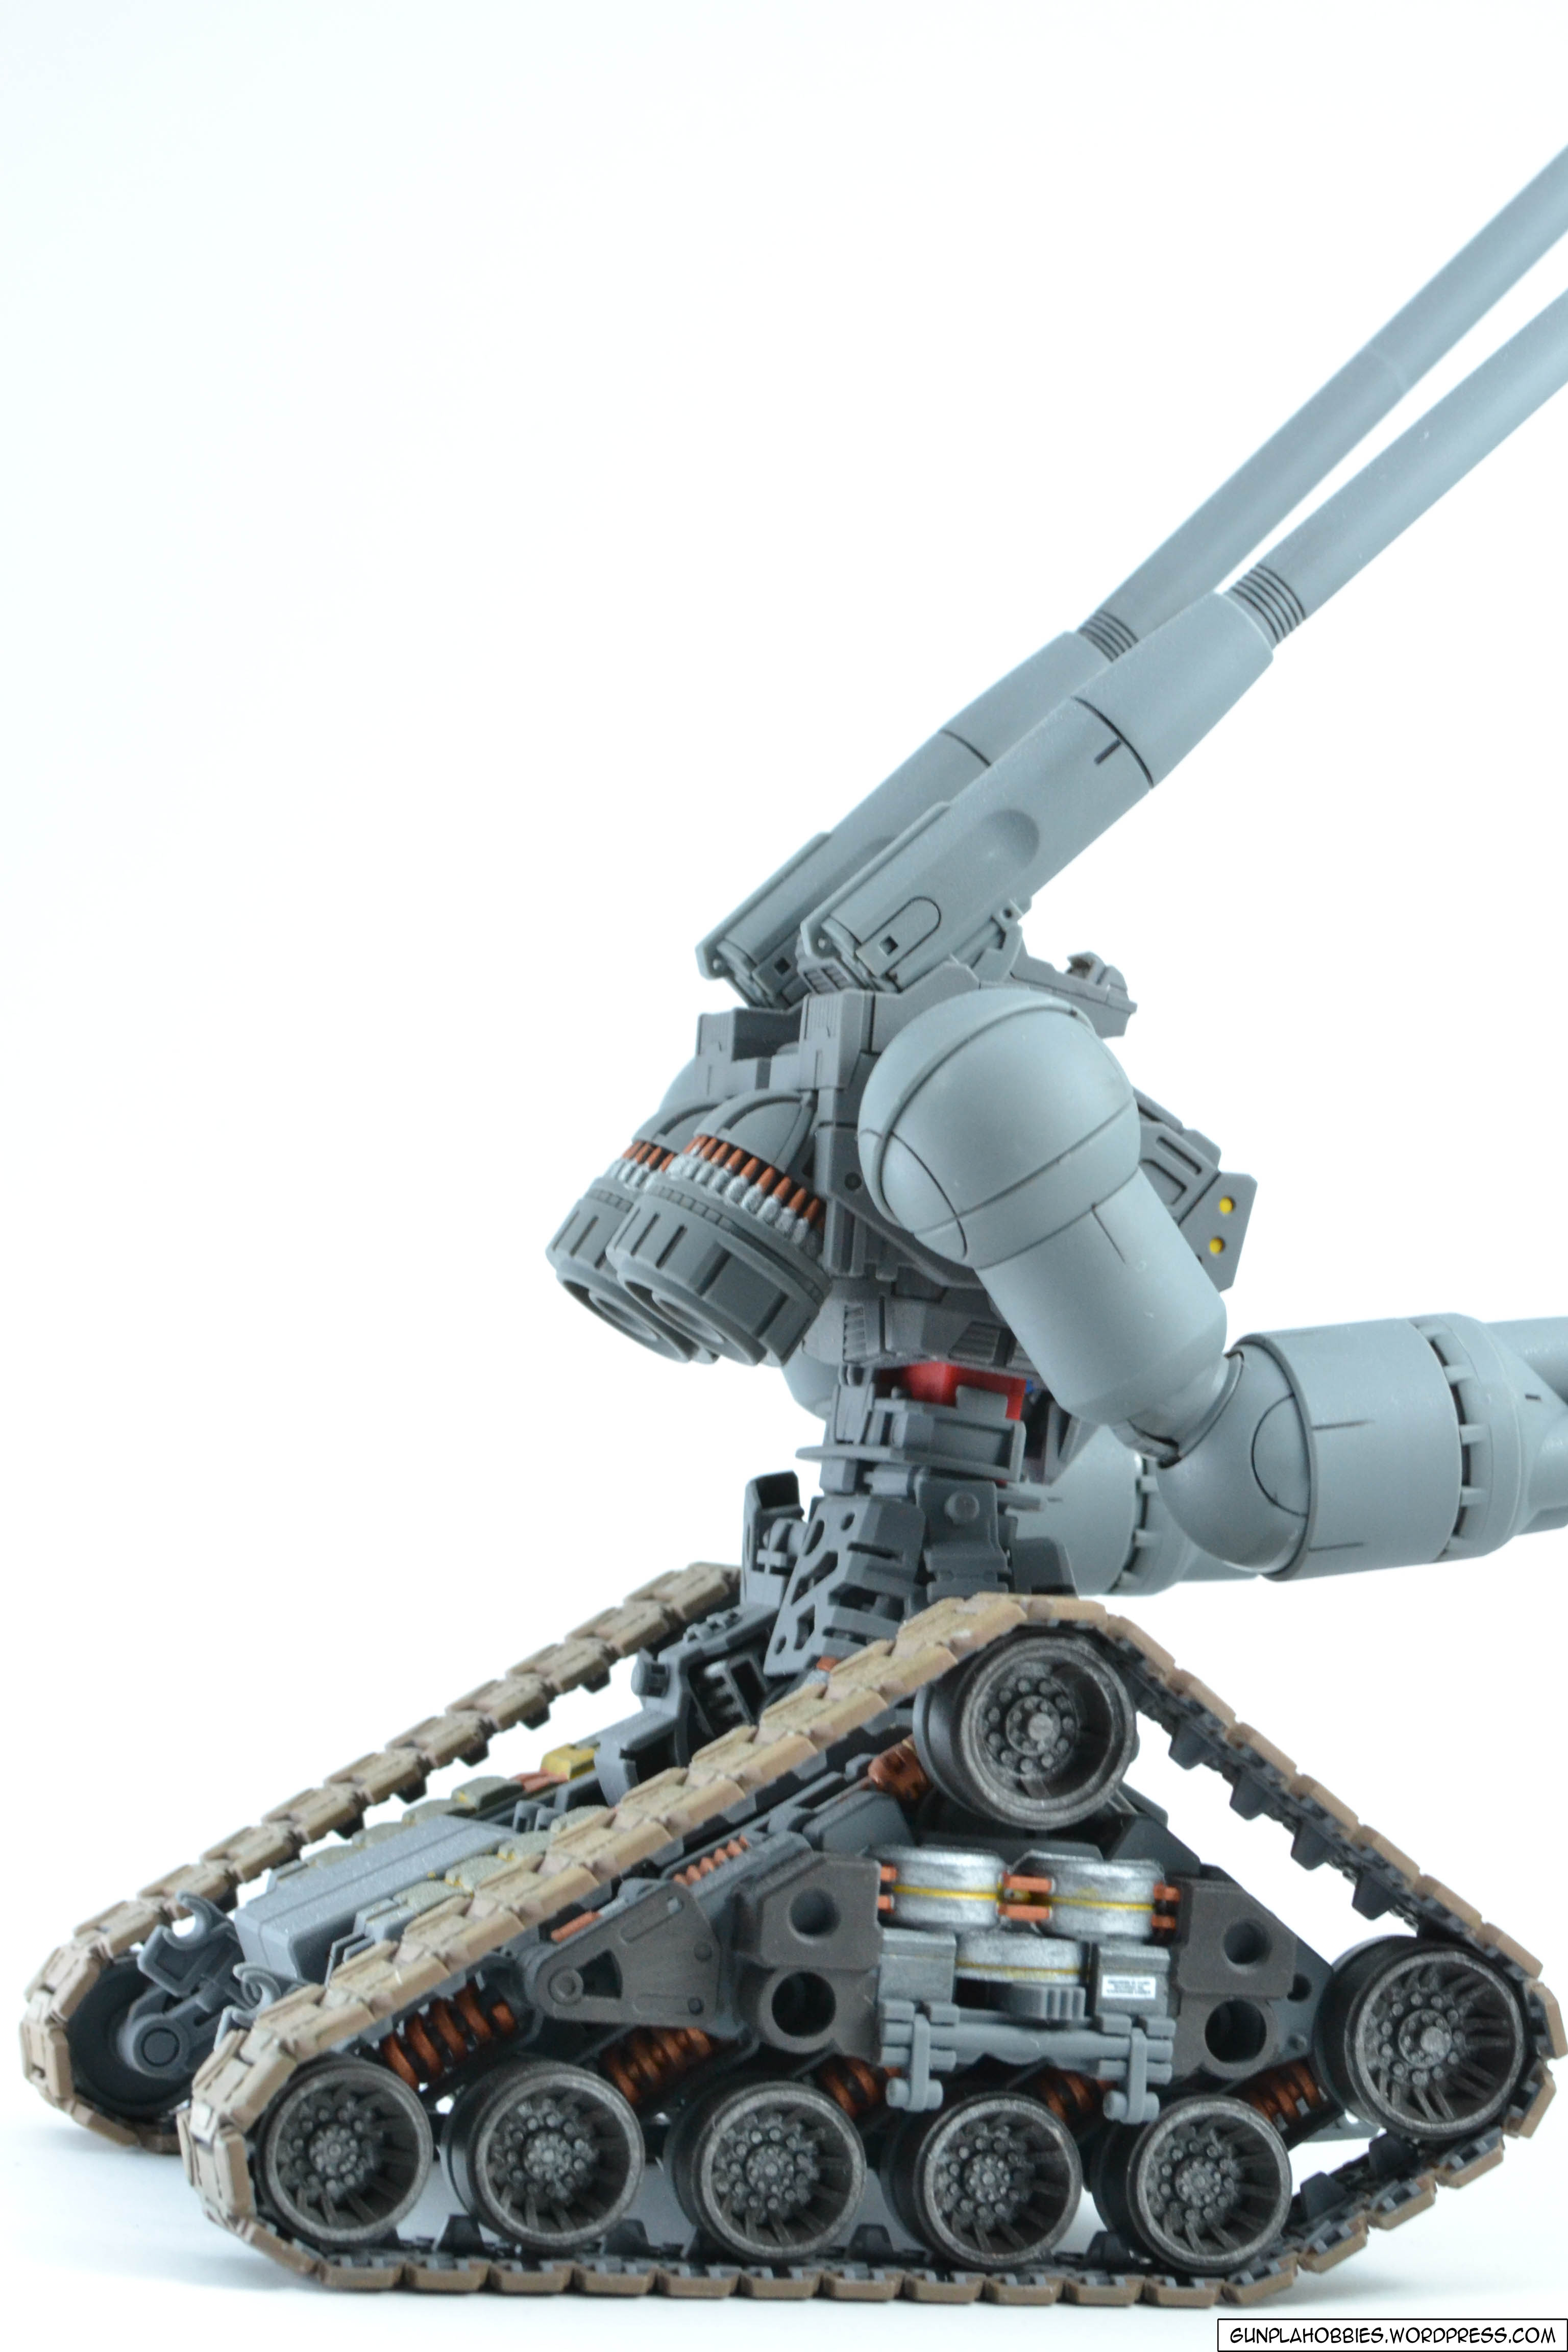
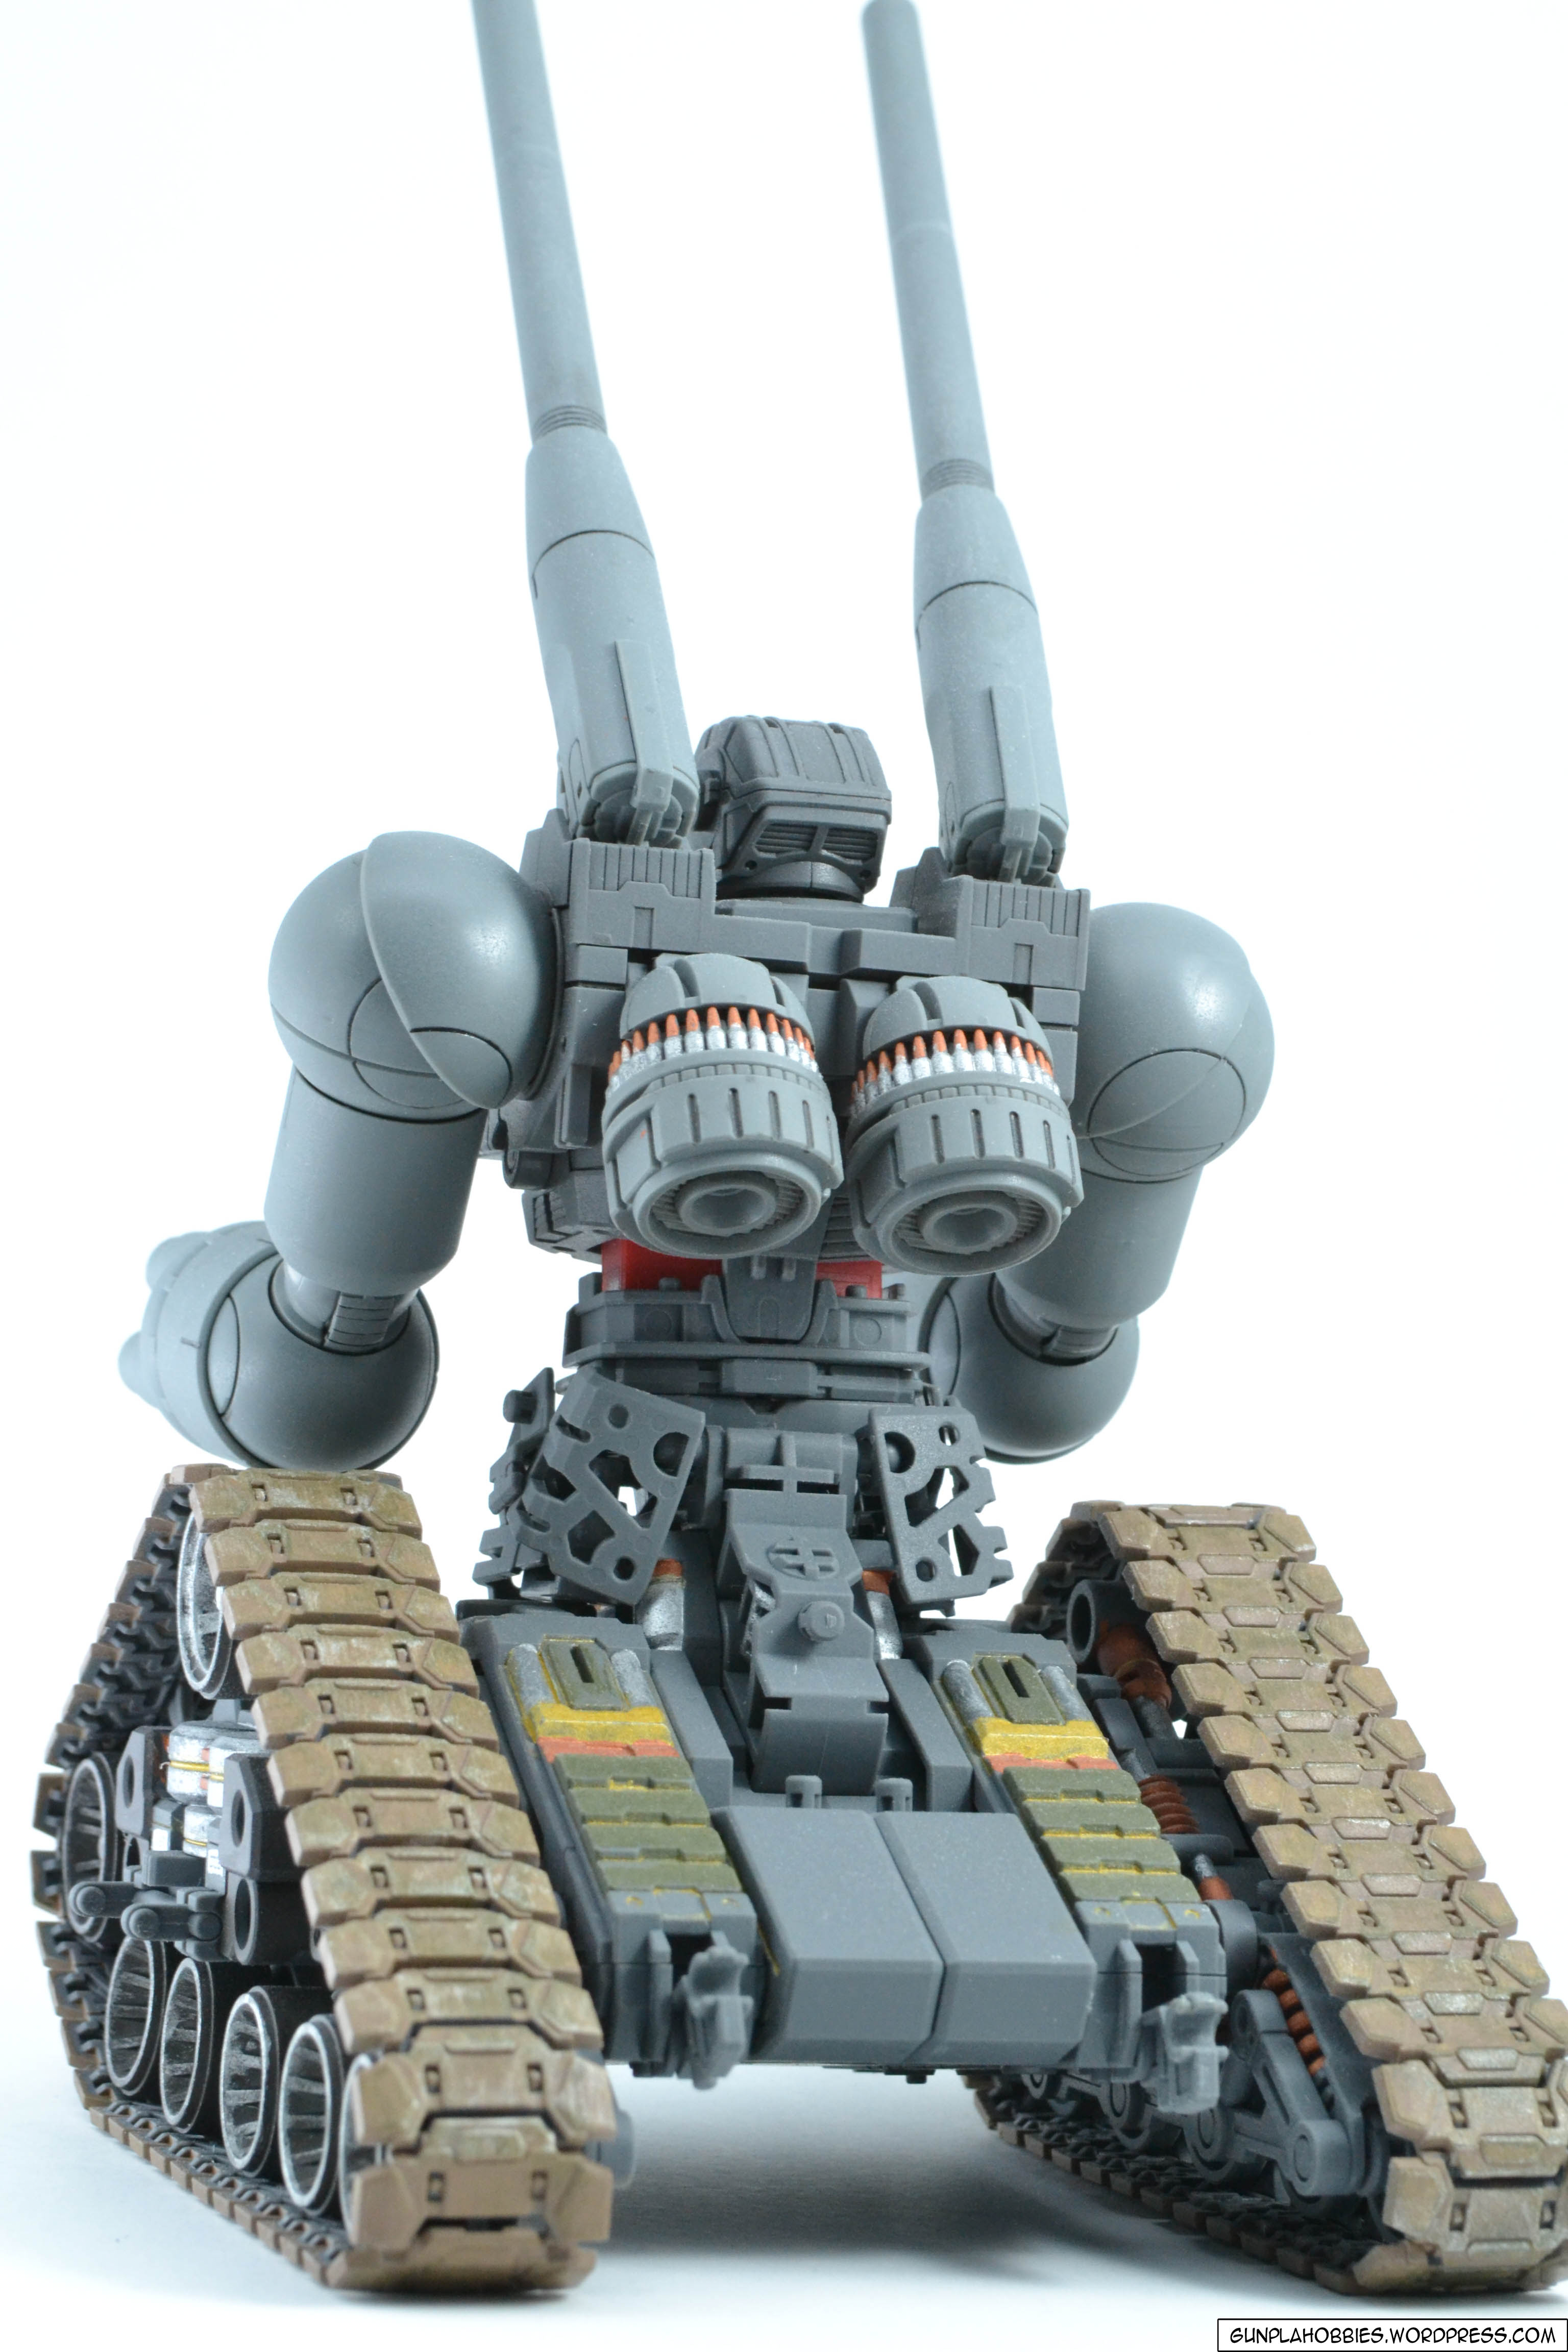
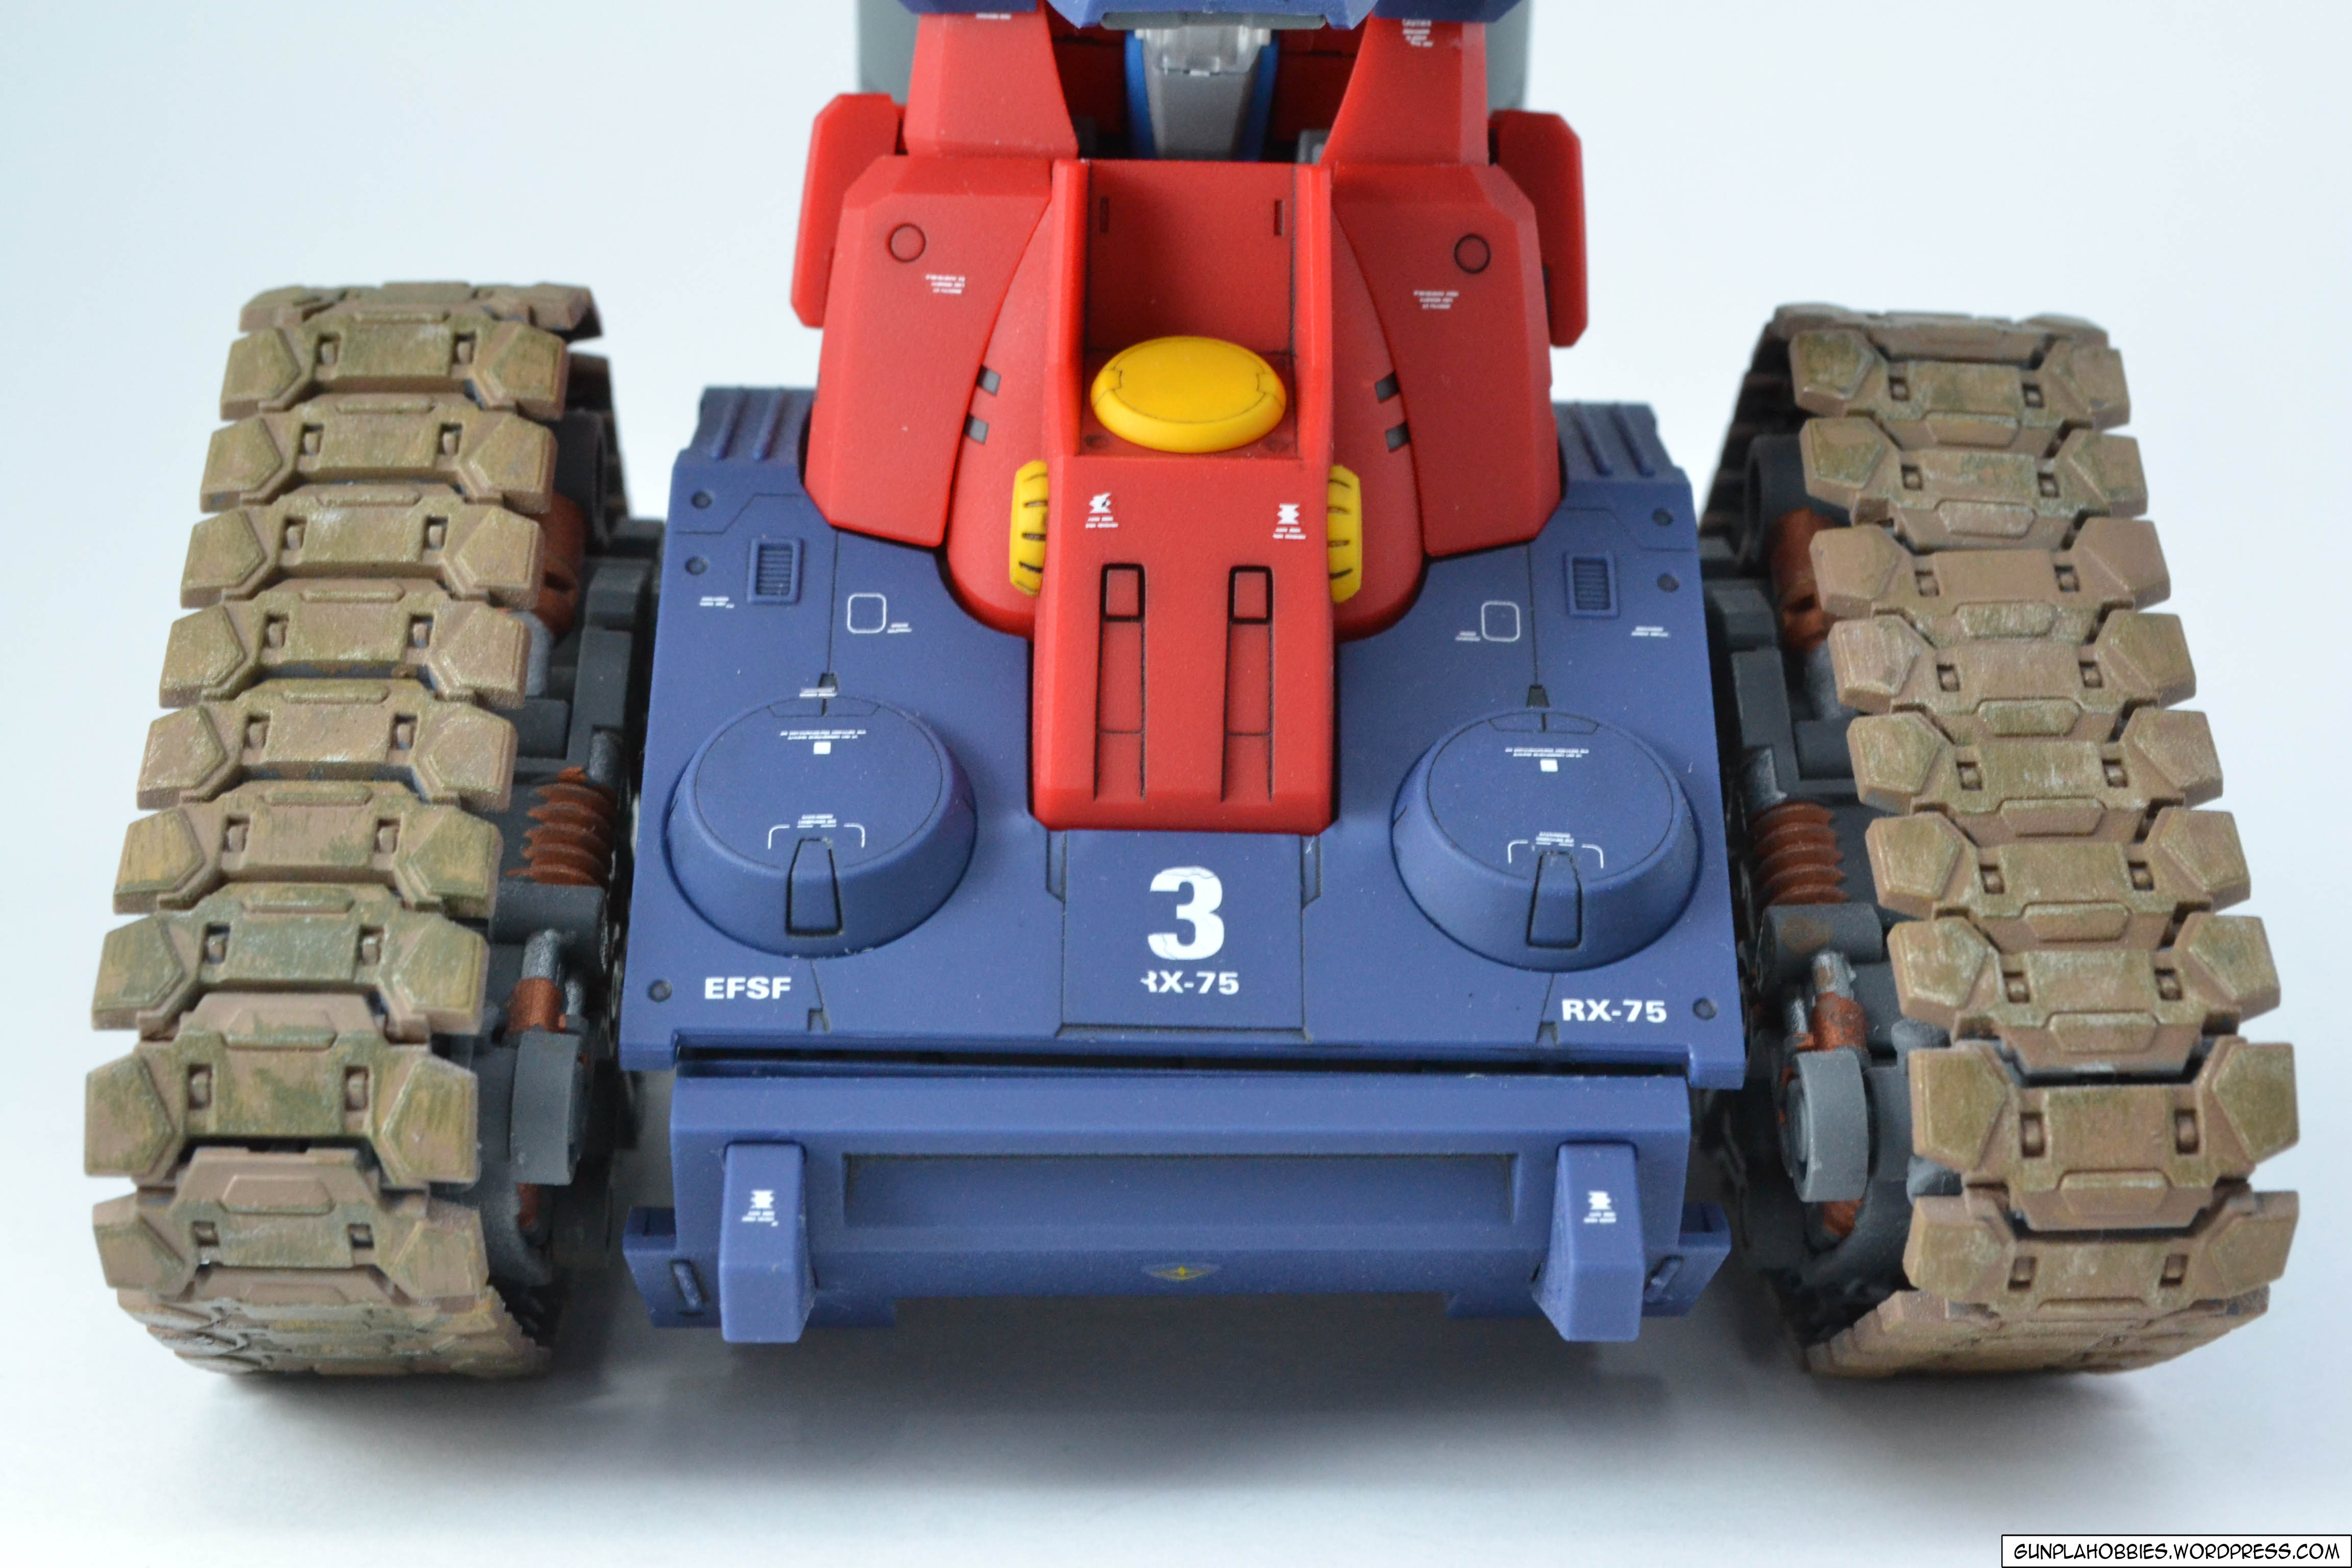
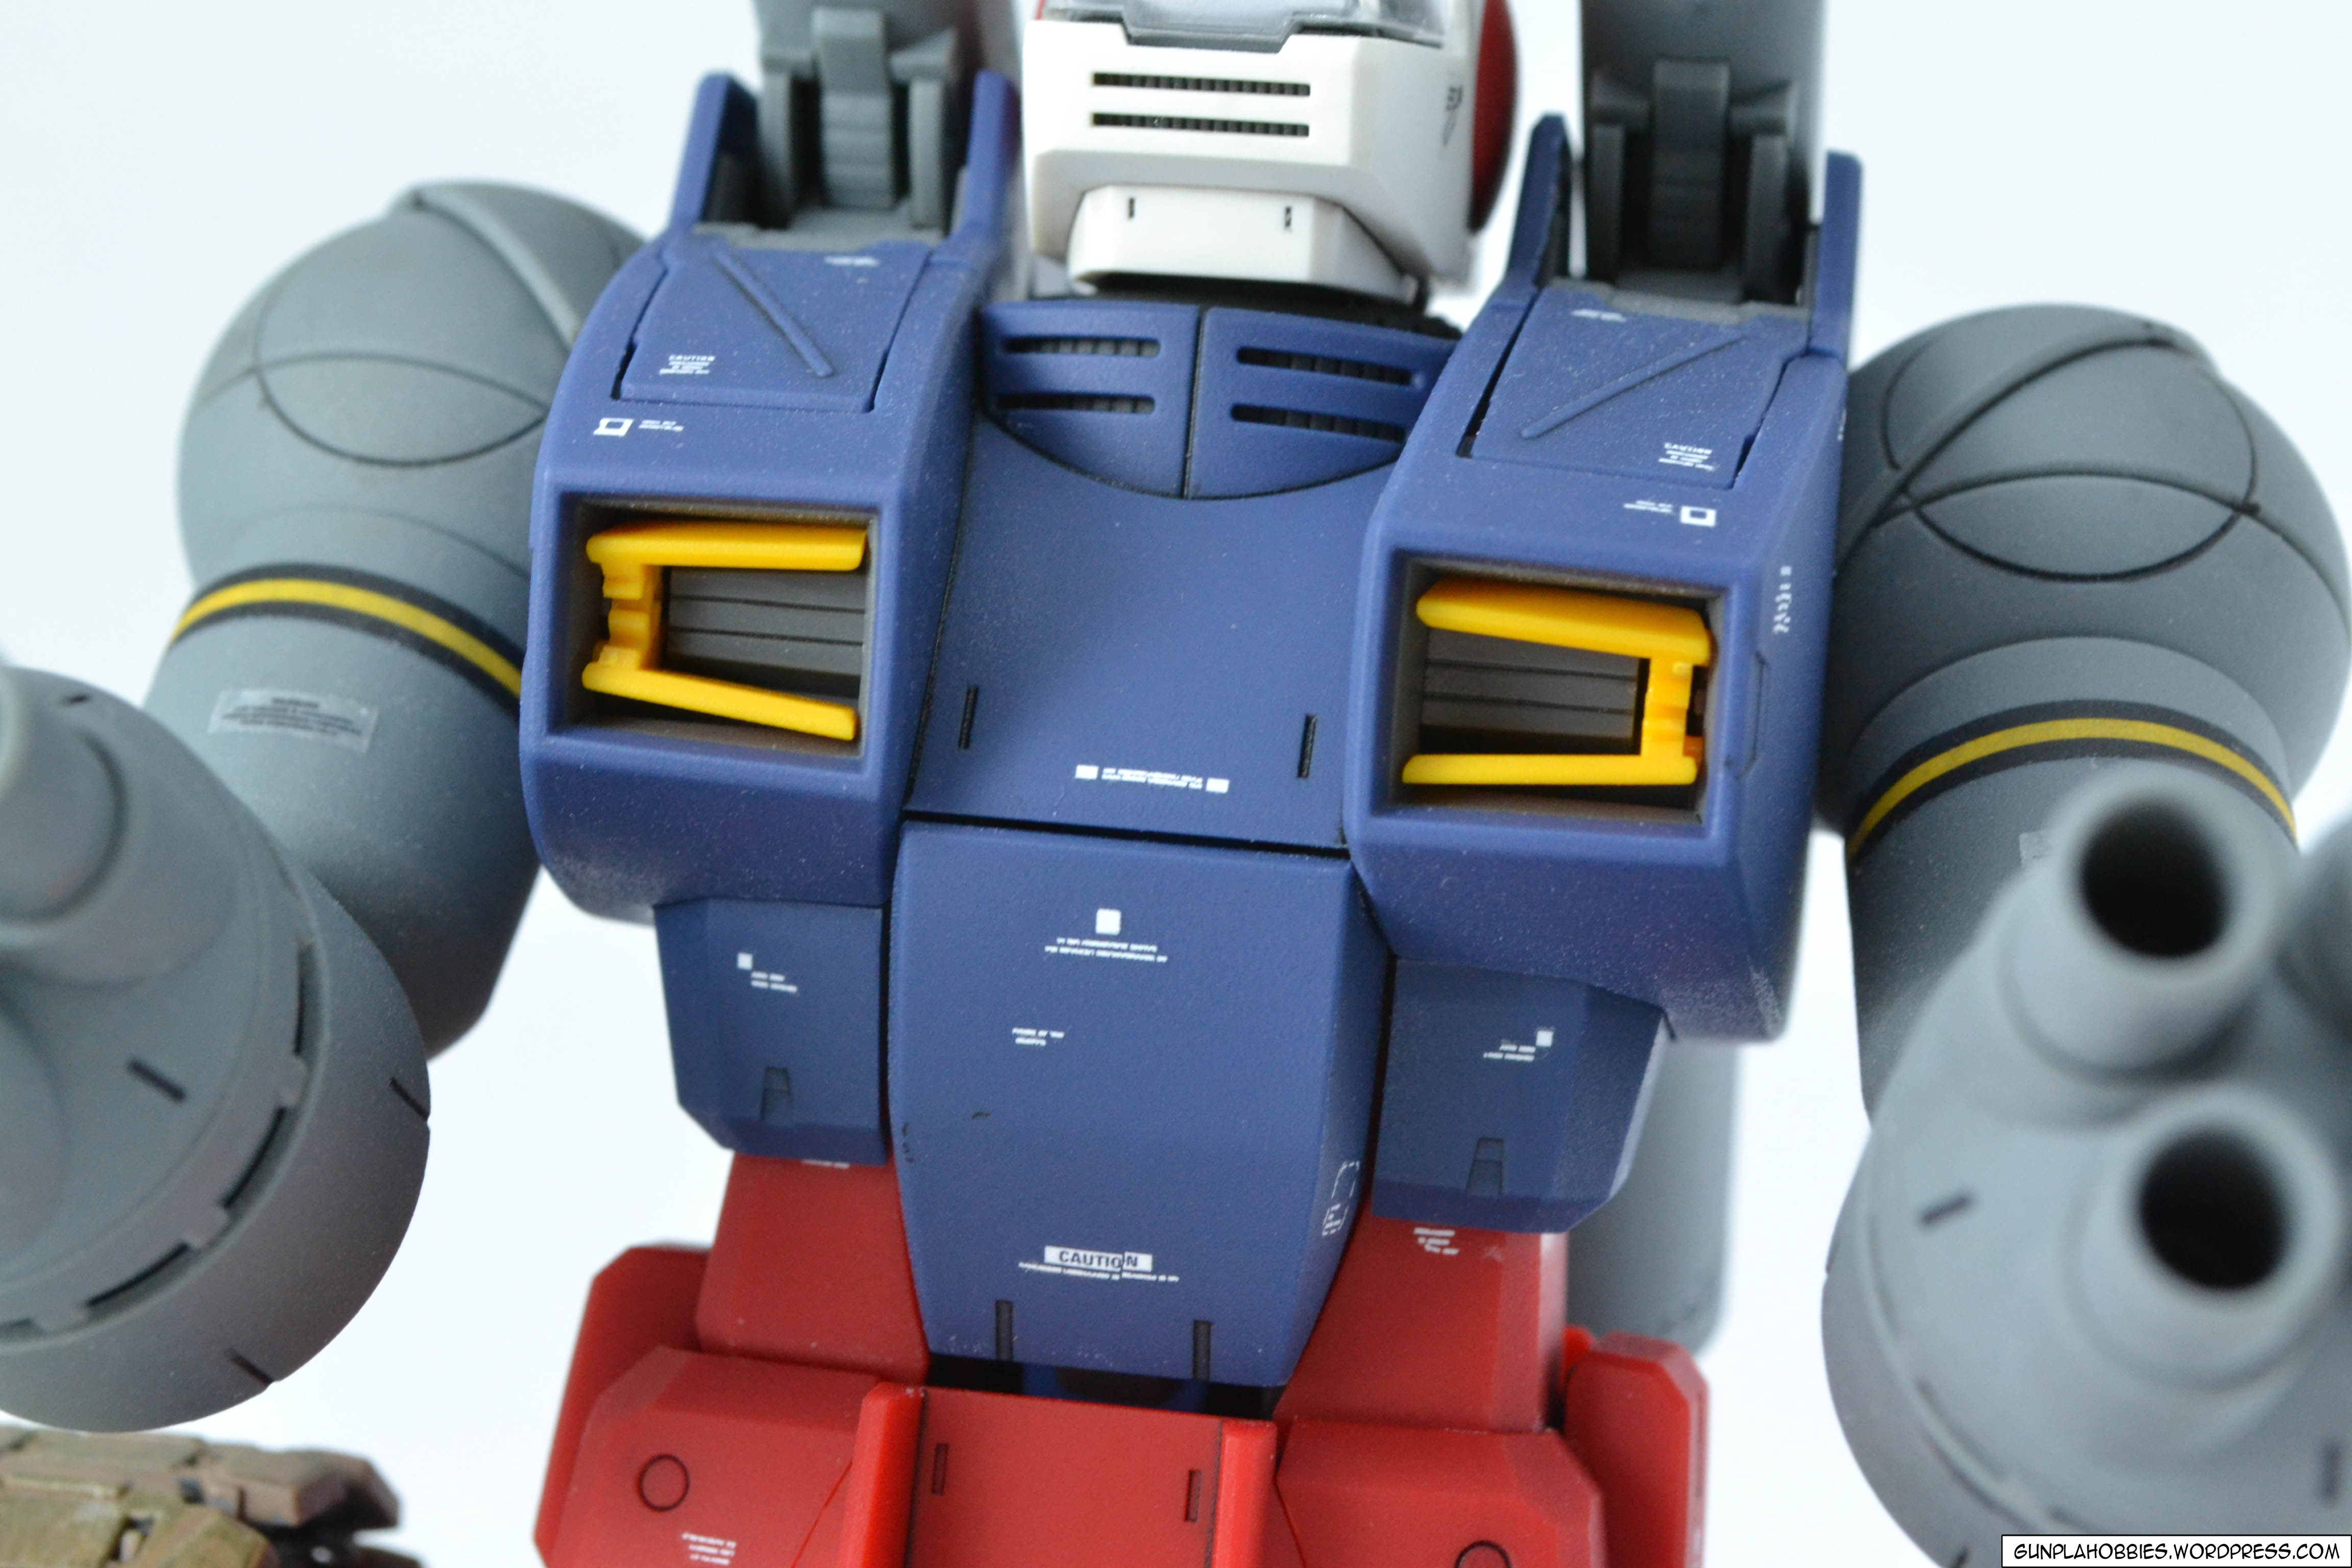
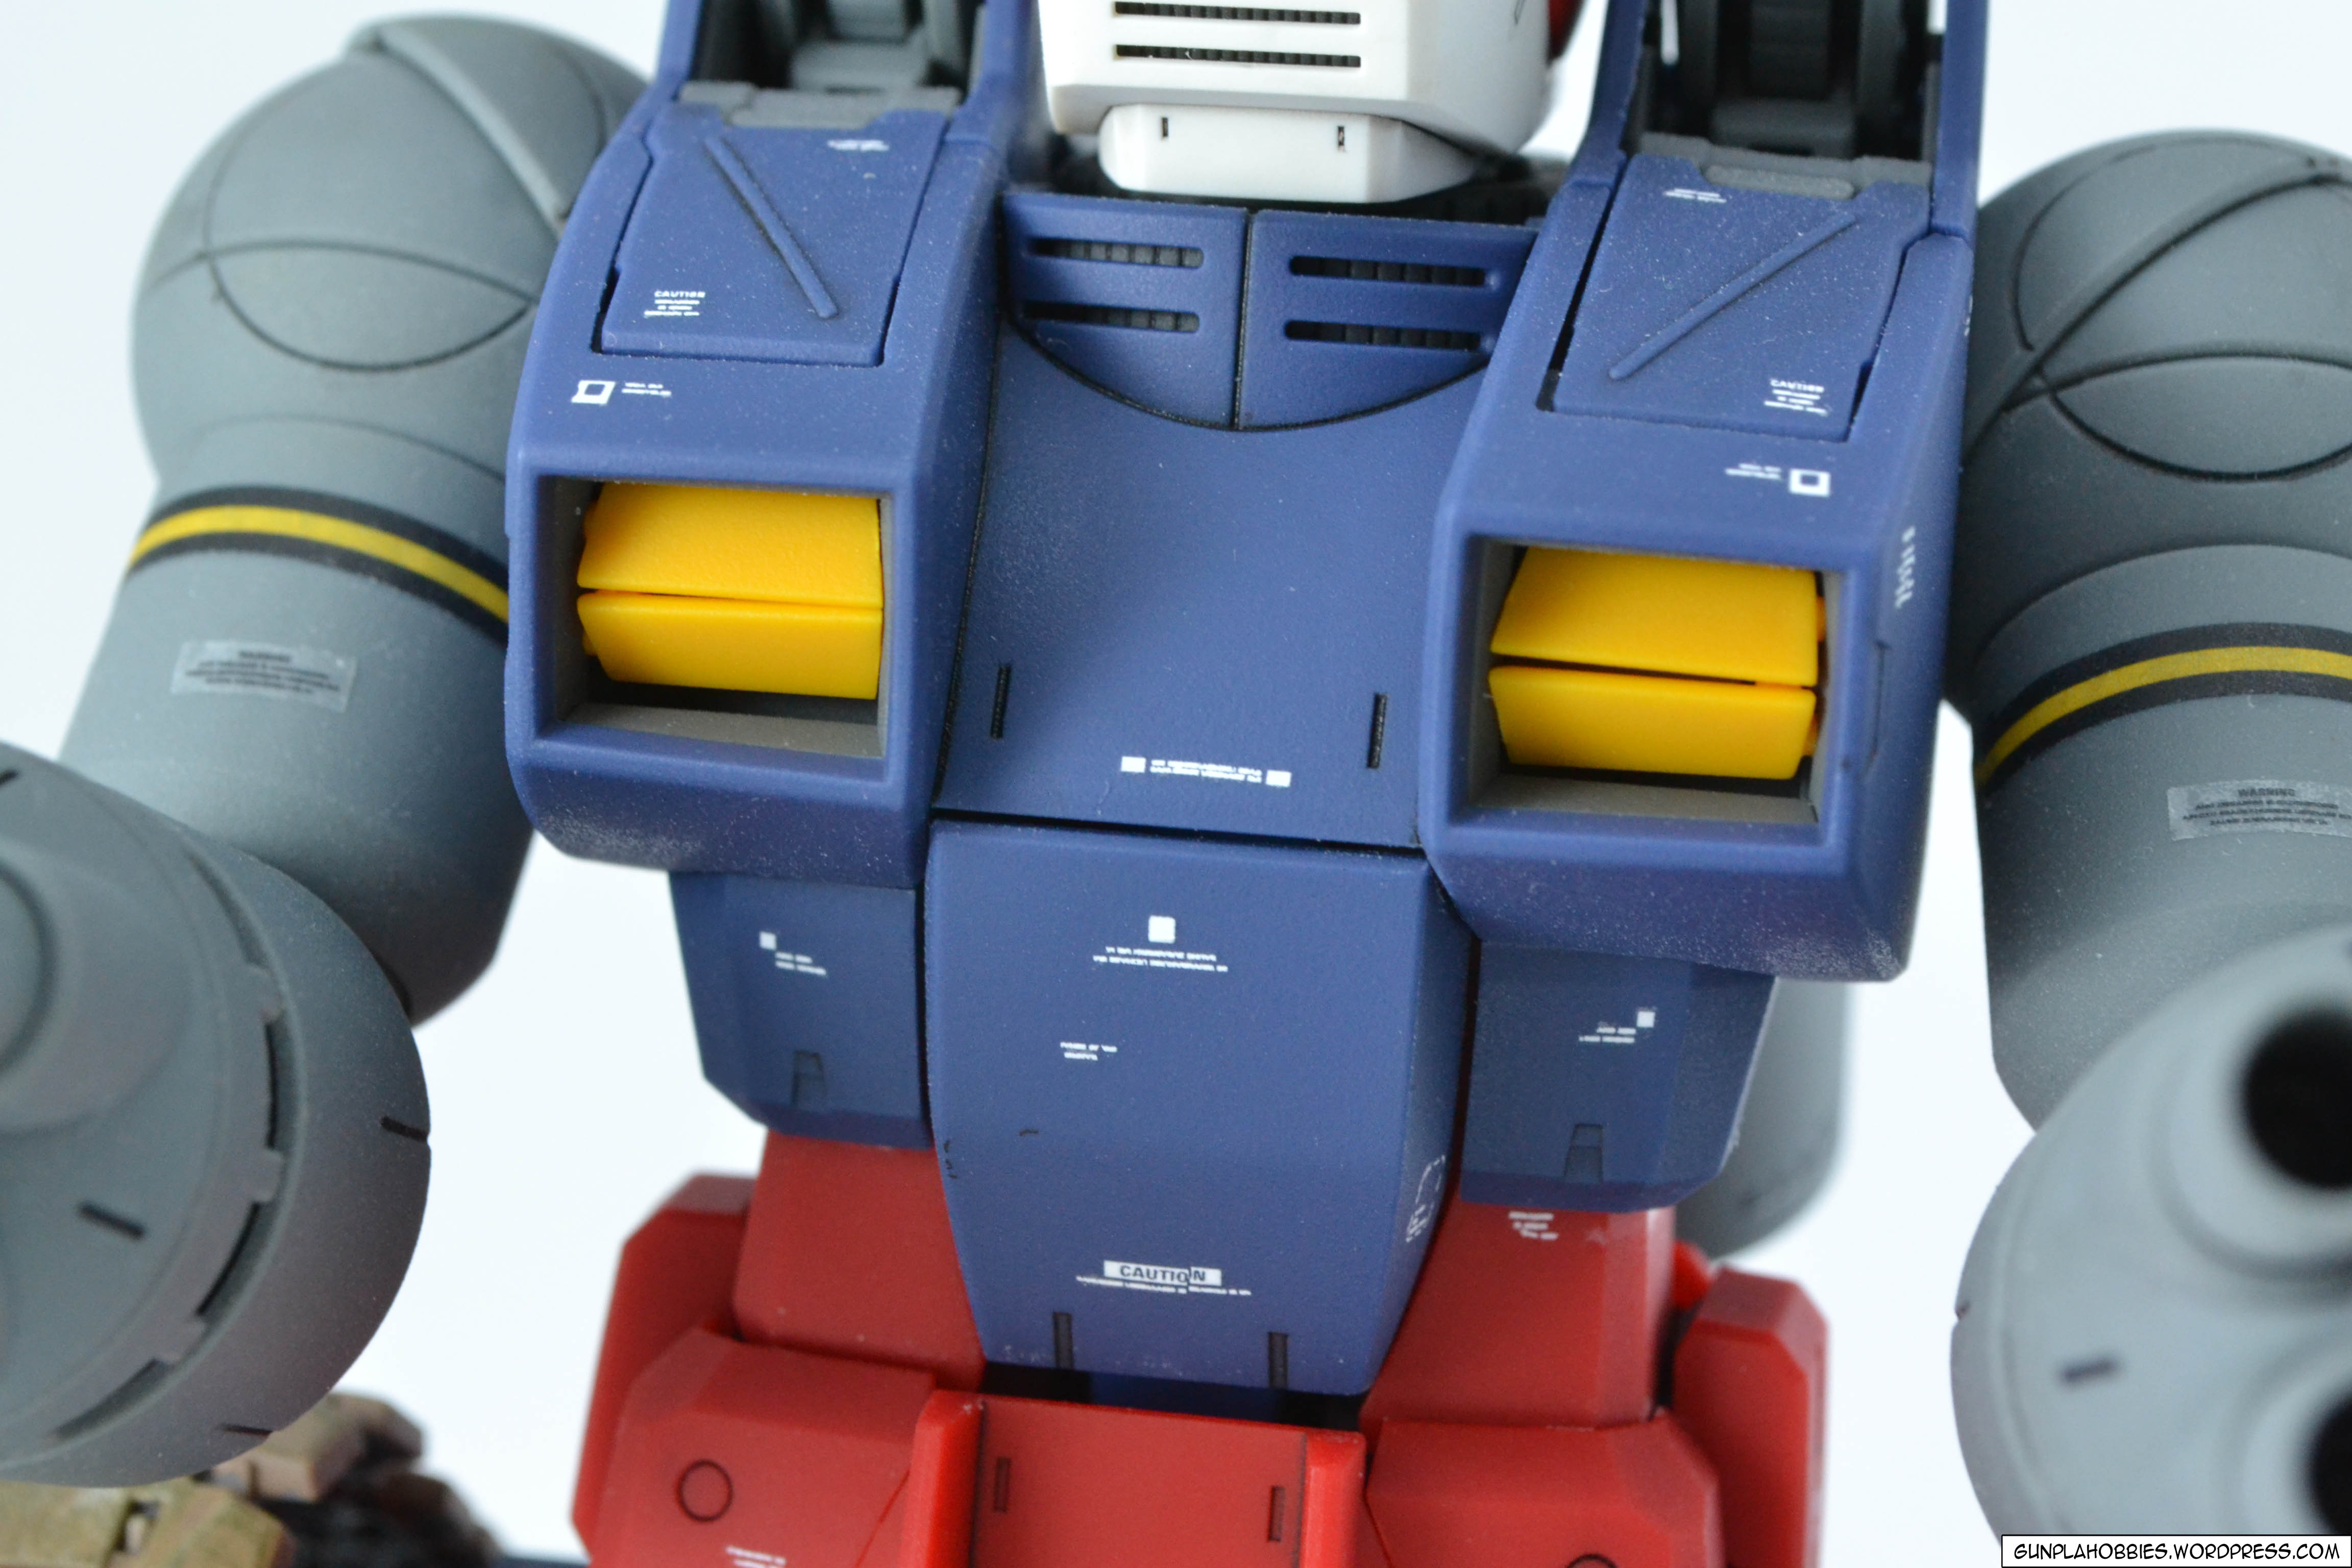
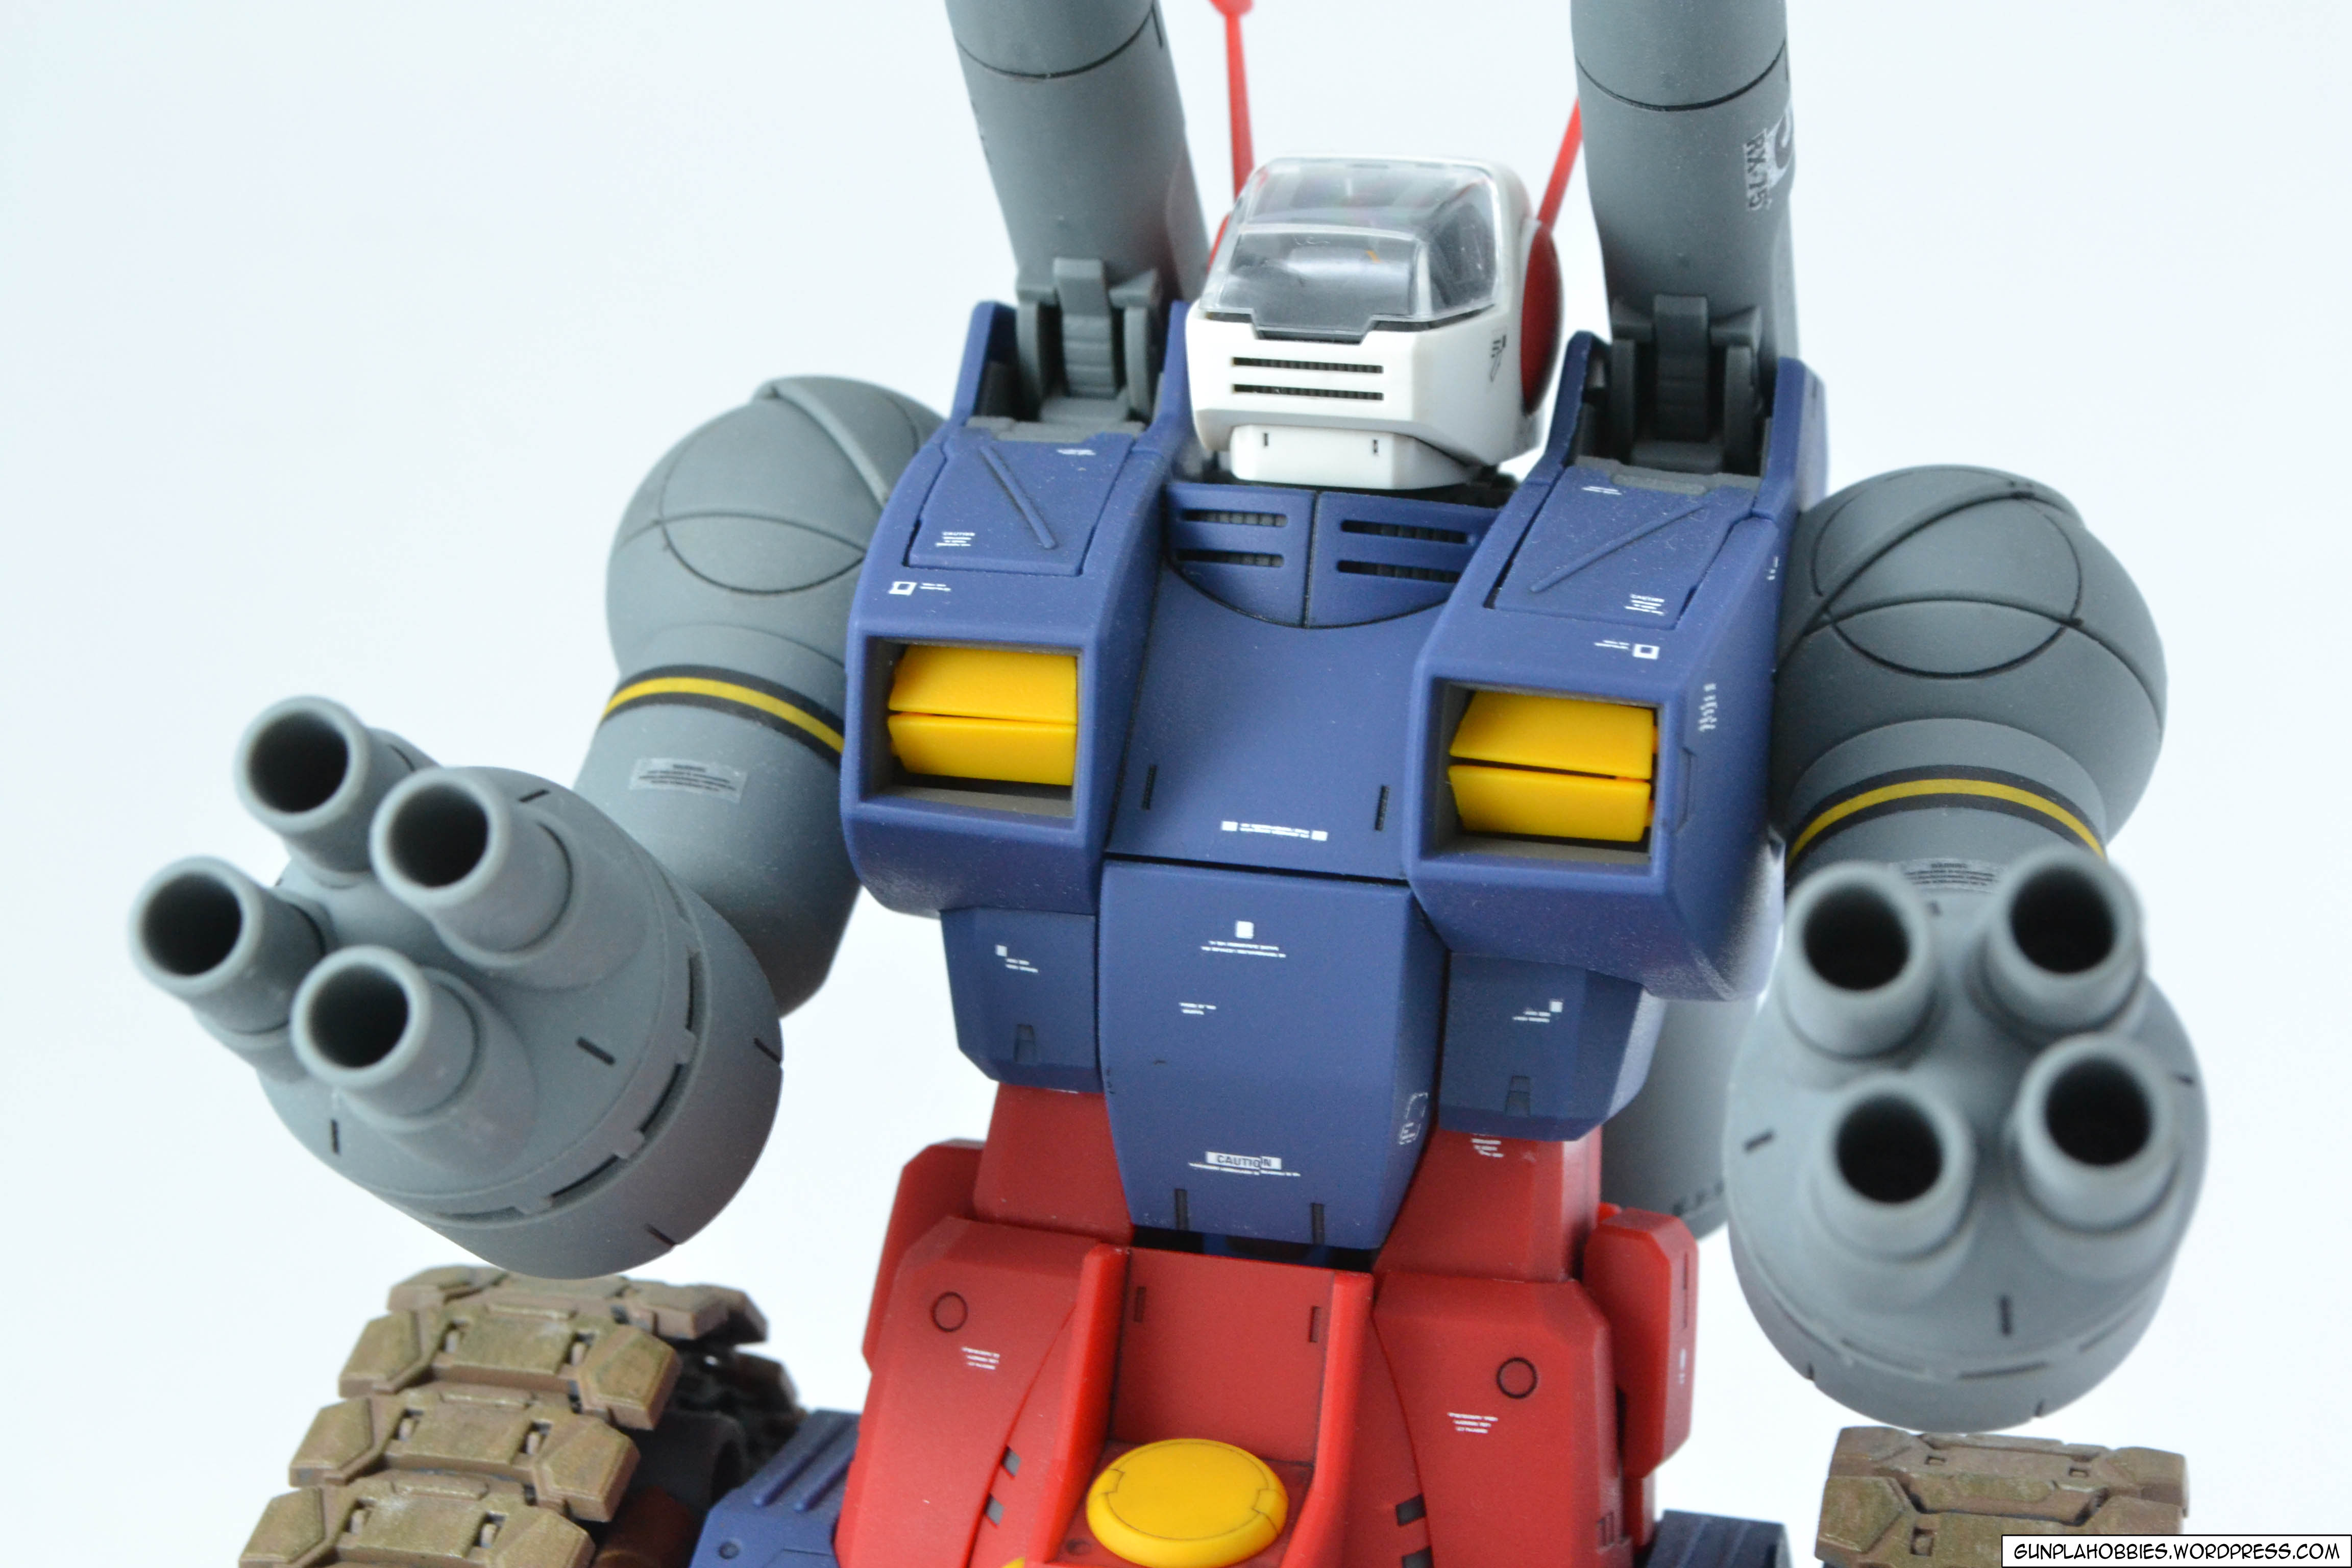
The cannons can be moved up to 45 degrees of an angle with respect to its shoulders and a minimum of 0 degrees.
“Two 180mm Cannon is equipped on the shouders of the Guntank. The cannons are used for long range artillery and sniping. It has a firing distance of 260km, which exceeds visual range.”

I turned on the LED lights in the following photos:
You can see two green lights on the head unit:

The dashboard lights up too!


Theh on/off switch can be found at the bottom of the head unit:


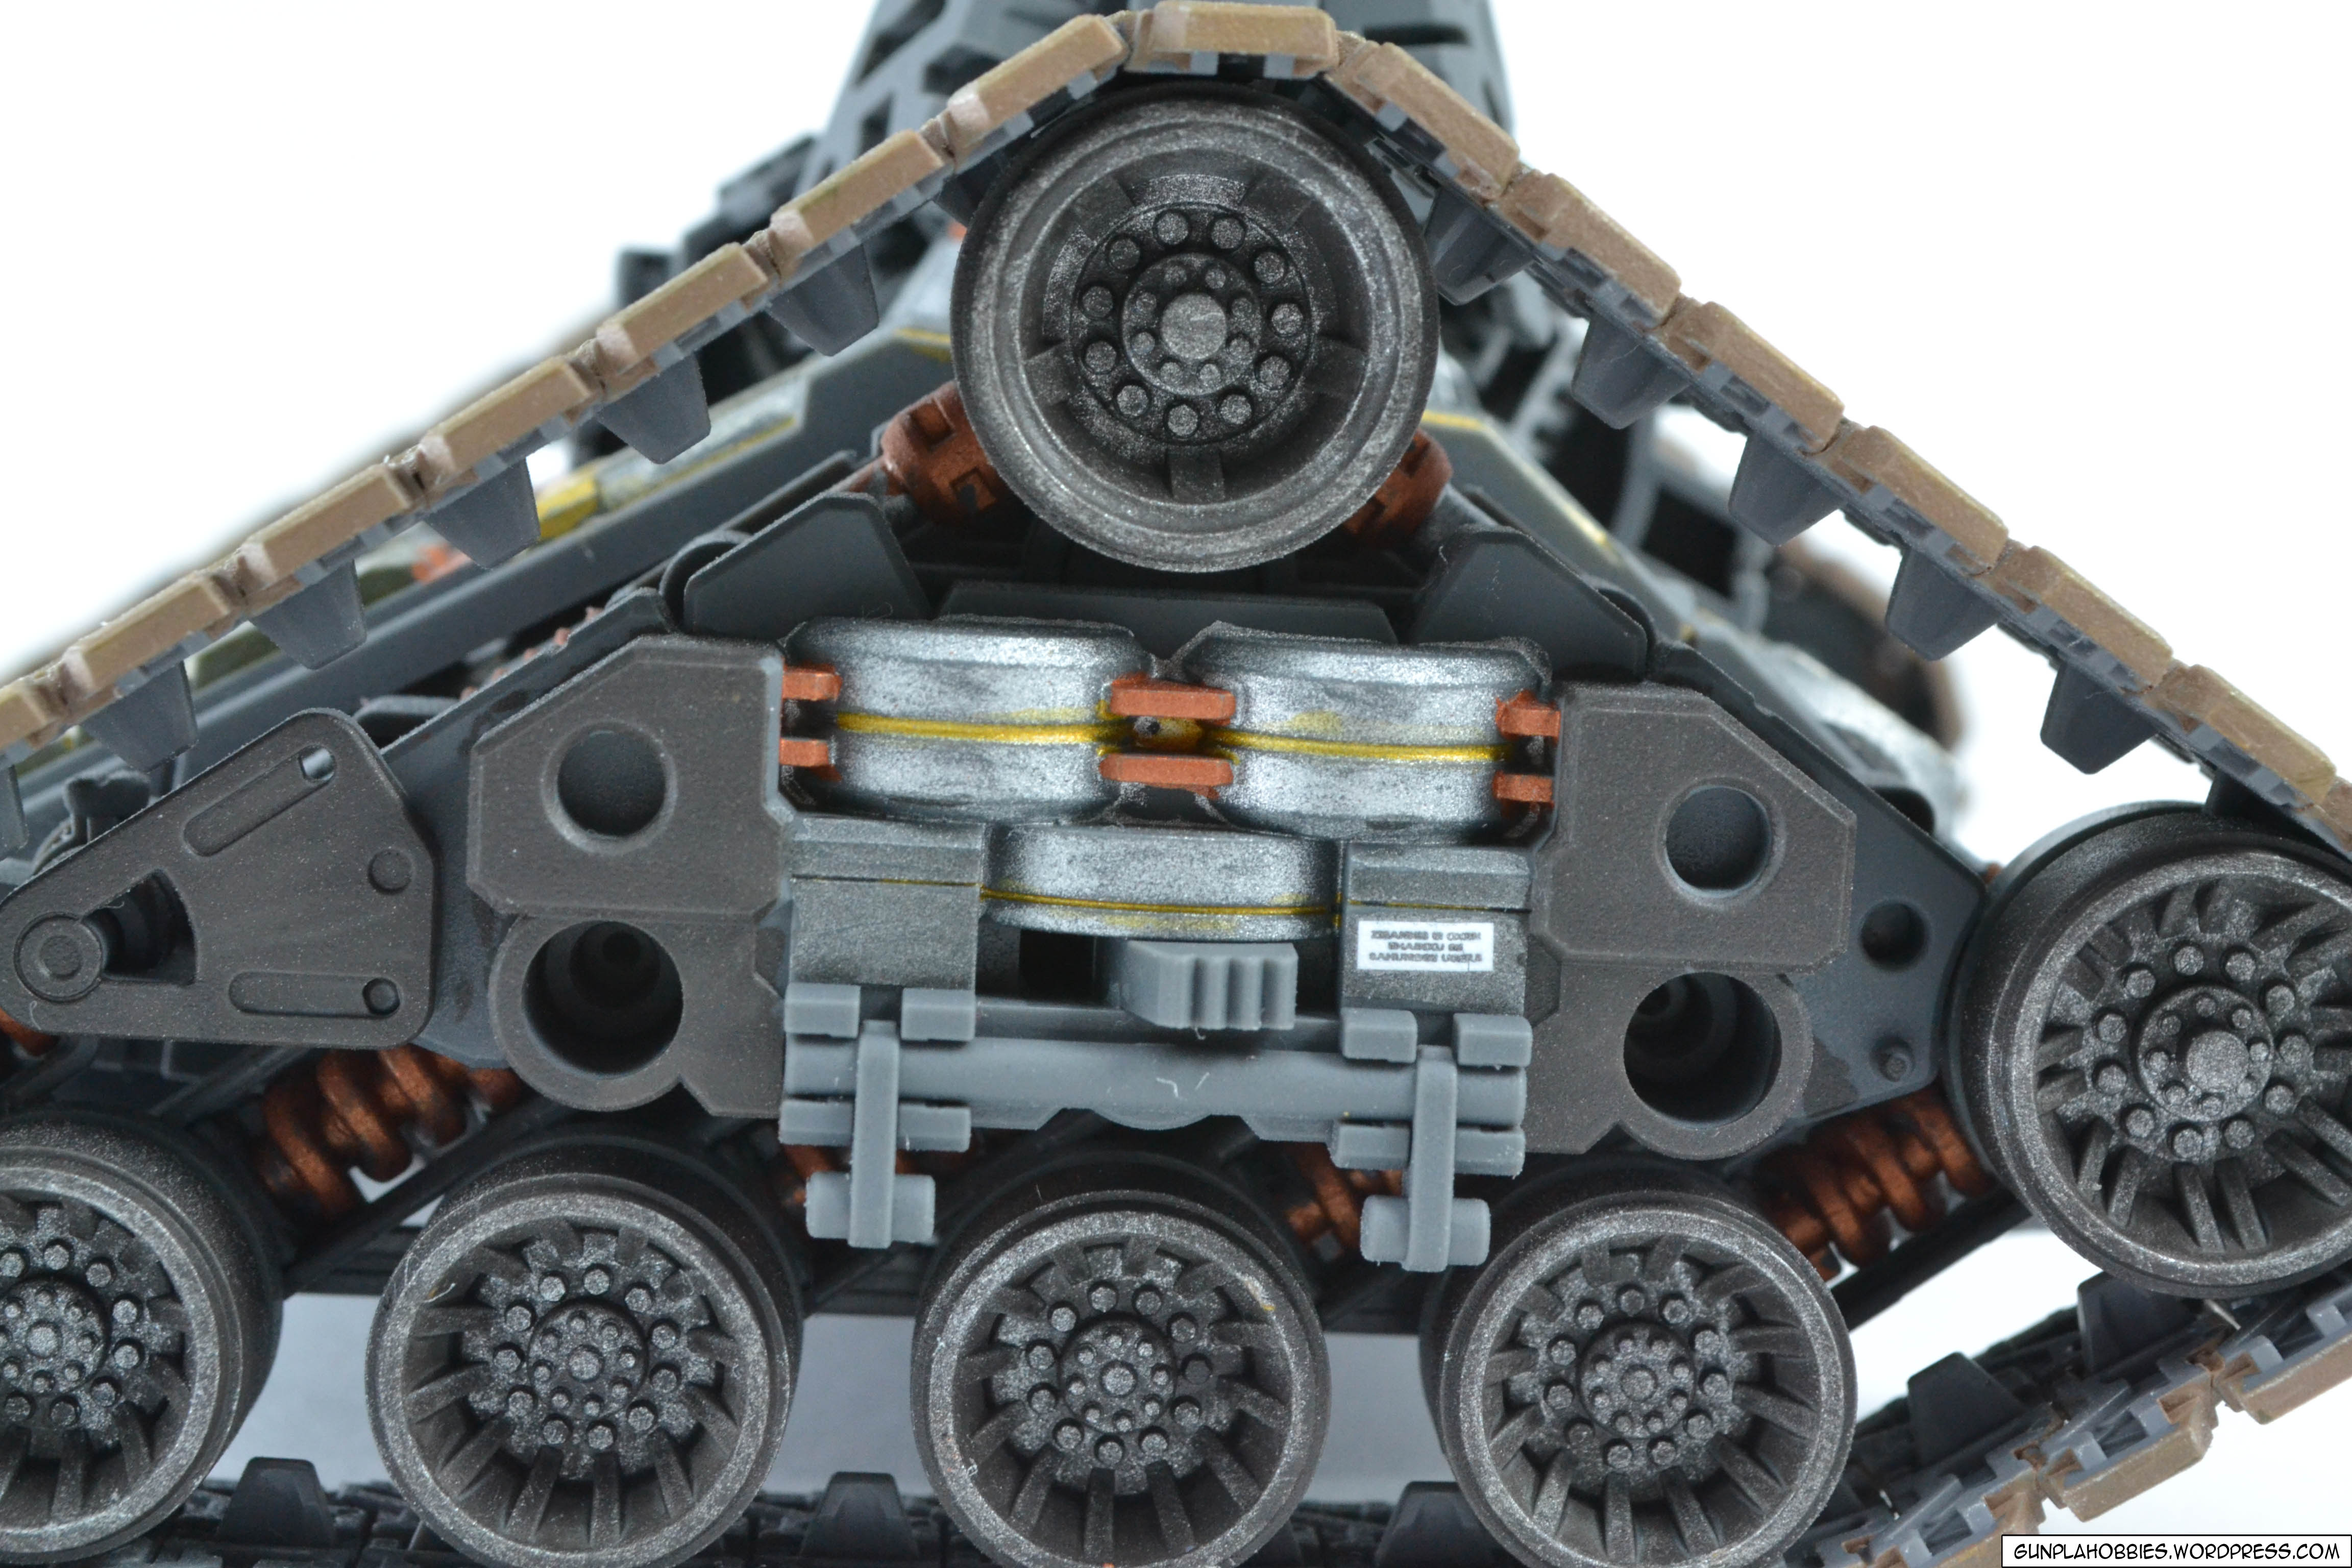
The tank wheels/threads are flexible like this:


I used a mix of Flat Earth, Dark Green and Chrome Silver in painting the threads


I tried experimenting and used Gold Leaf in panel lining some of the inner frame areas:

For body unit twists:


The cannons can be compressed as there is a small spring like plastic structure inside the cannon, I think this is for the recoil action of the cannon so that the whole unit doesn’t take the full recoil.


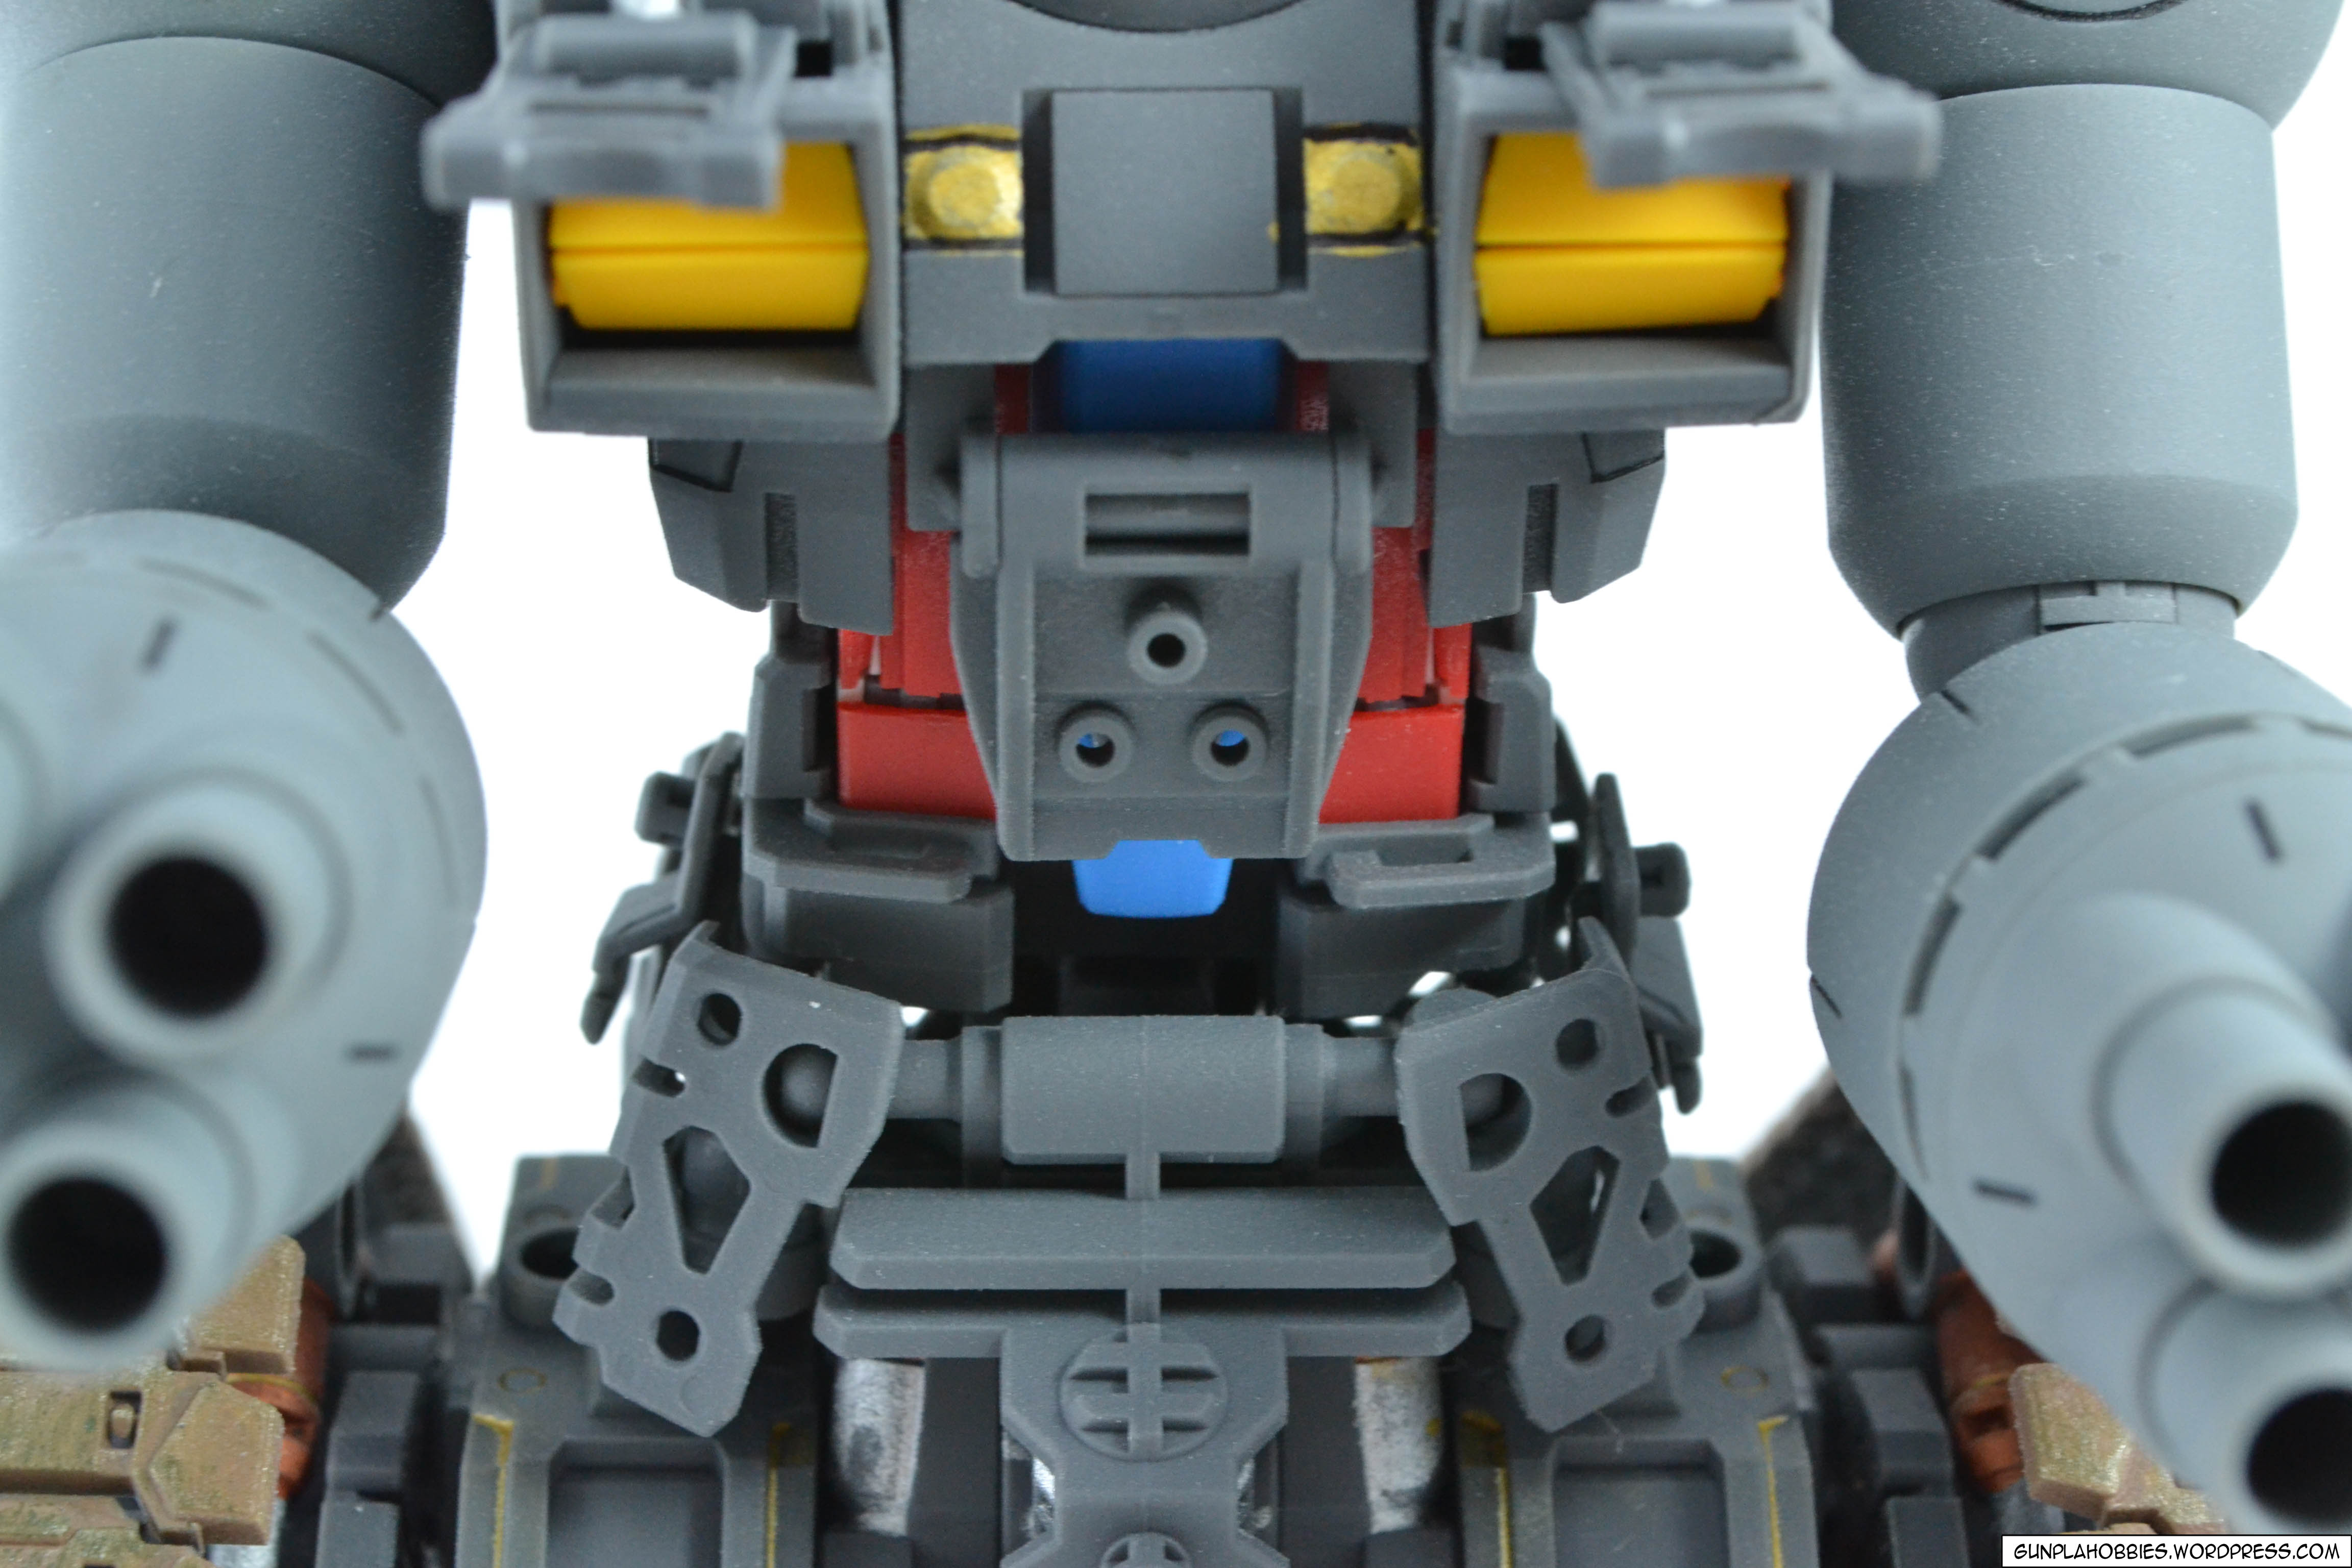
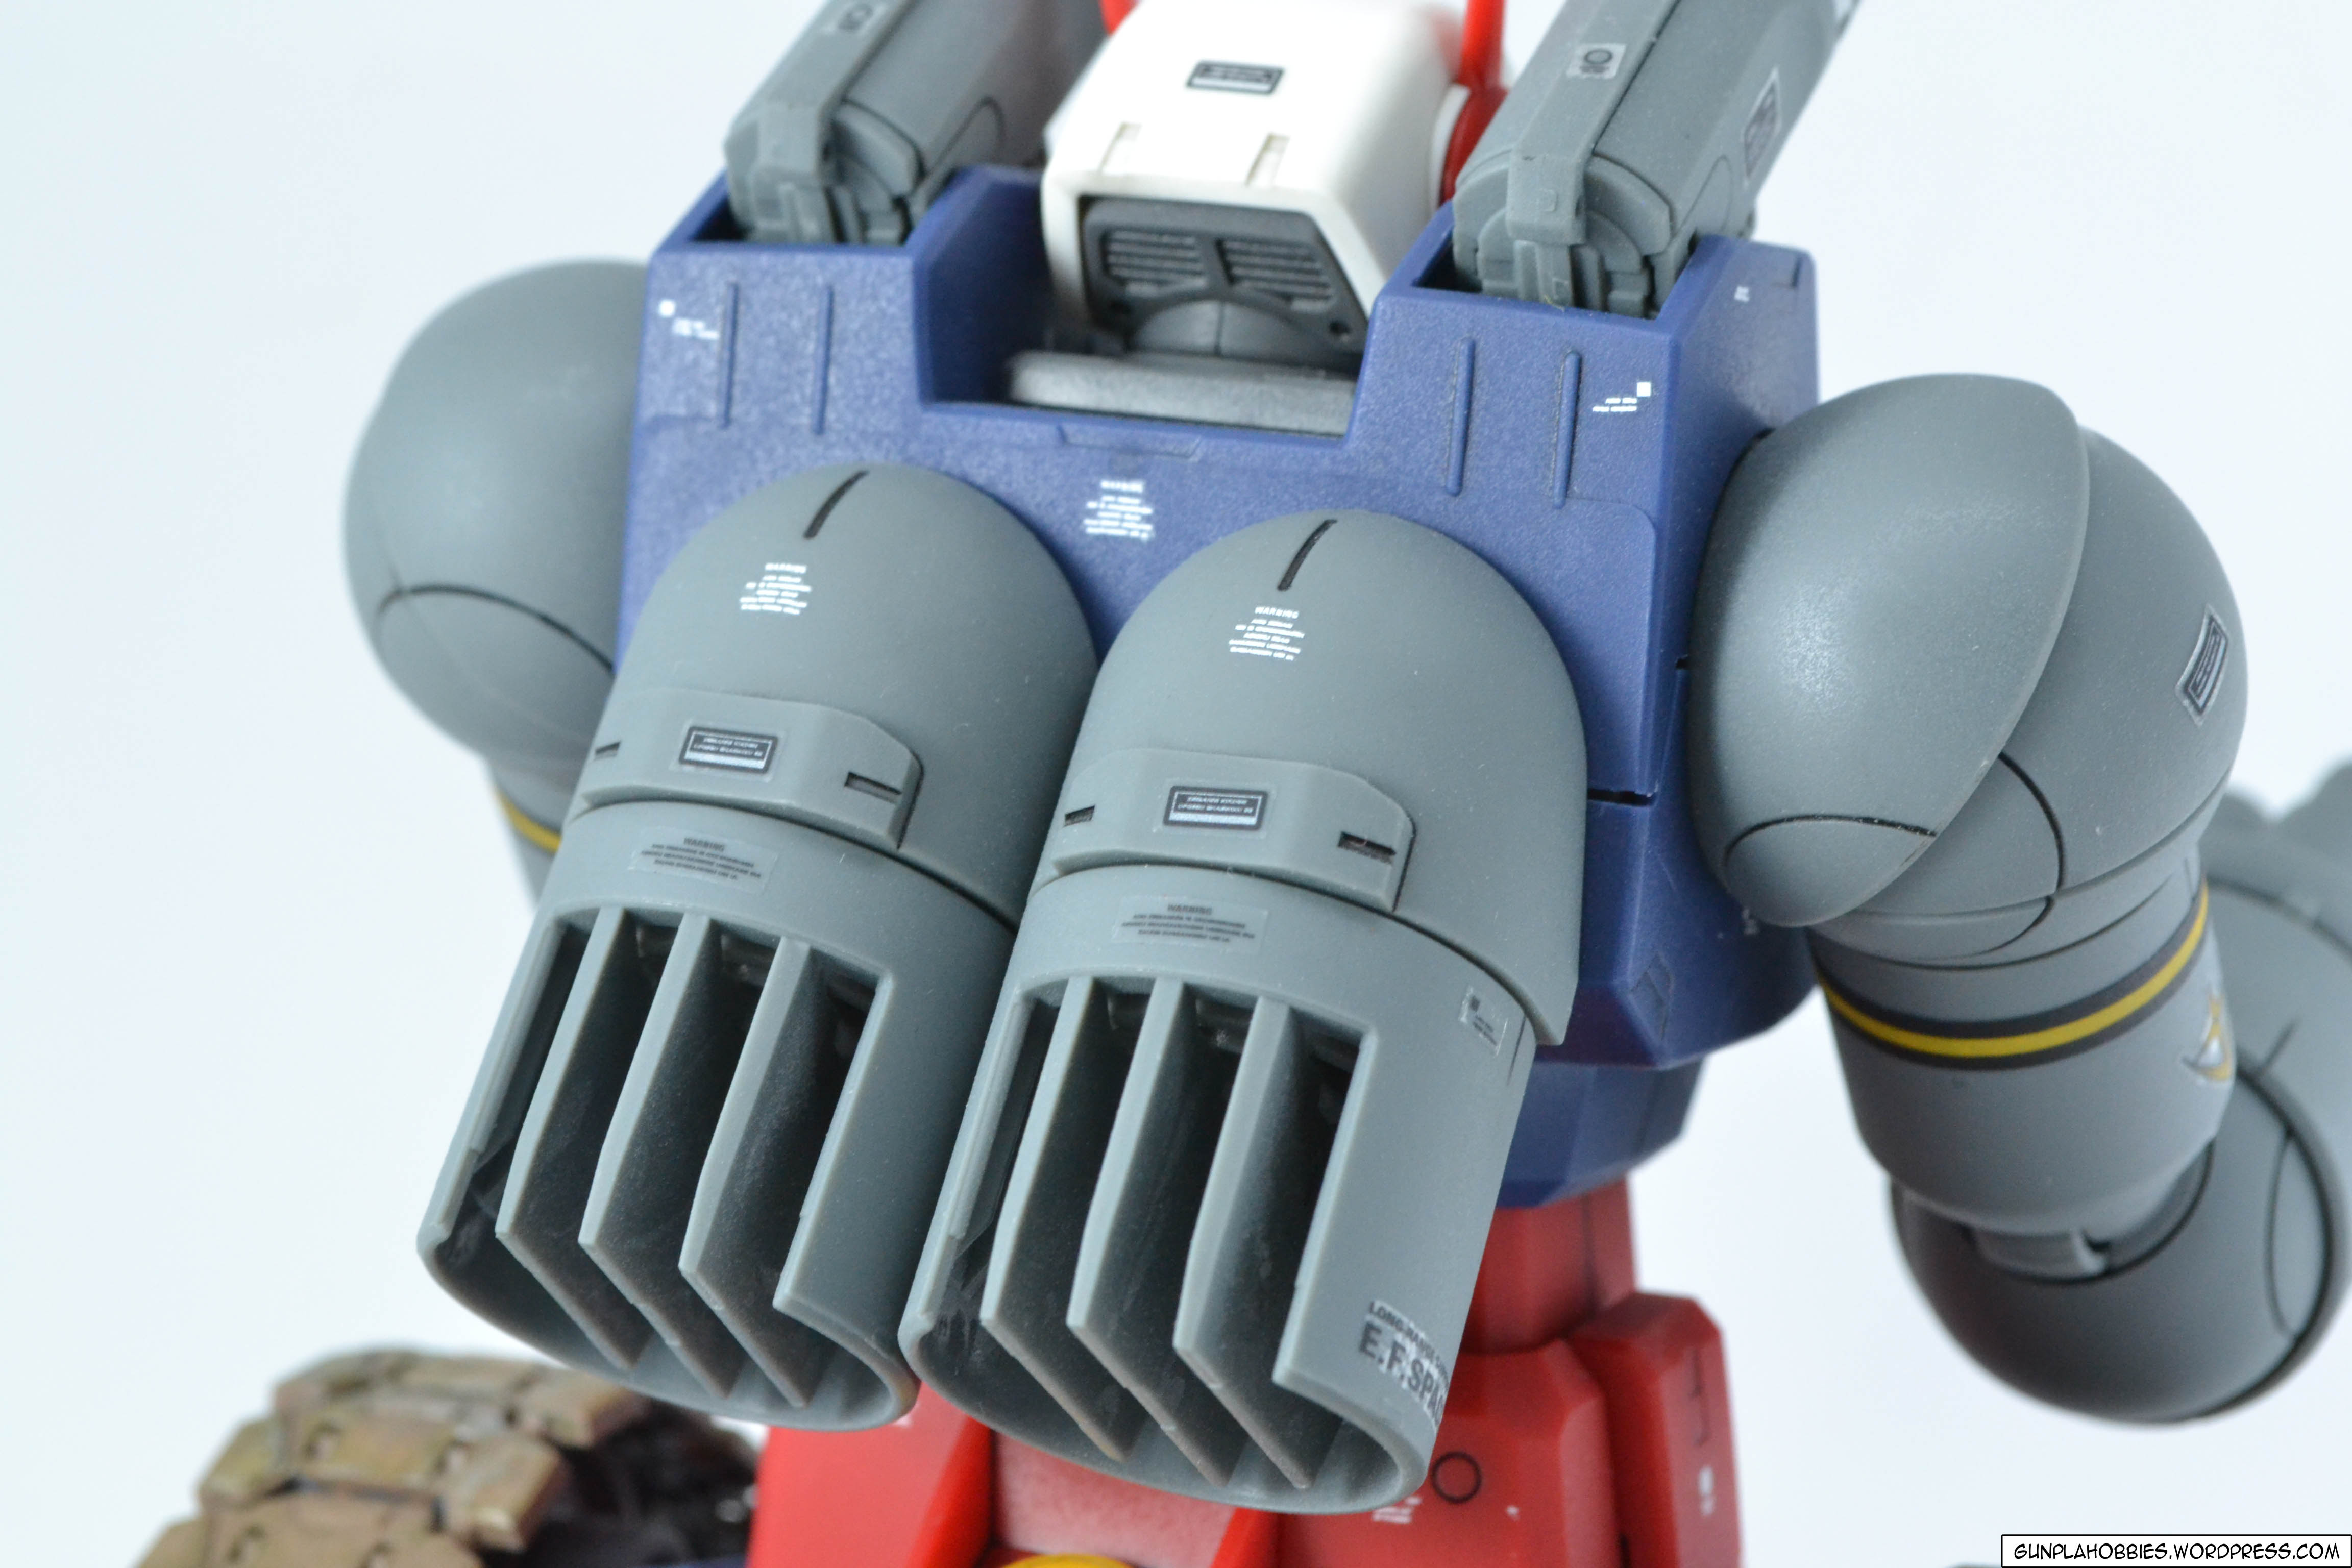
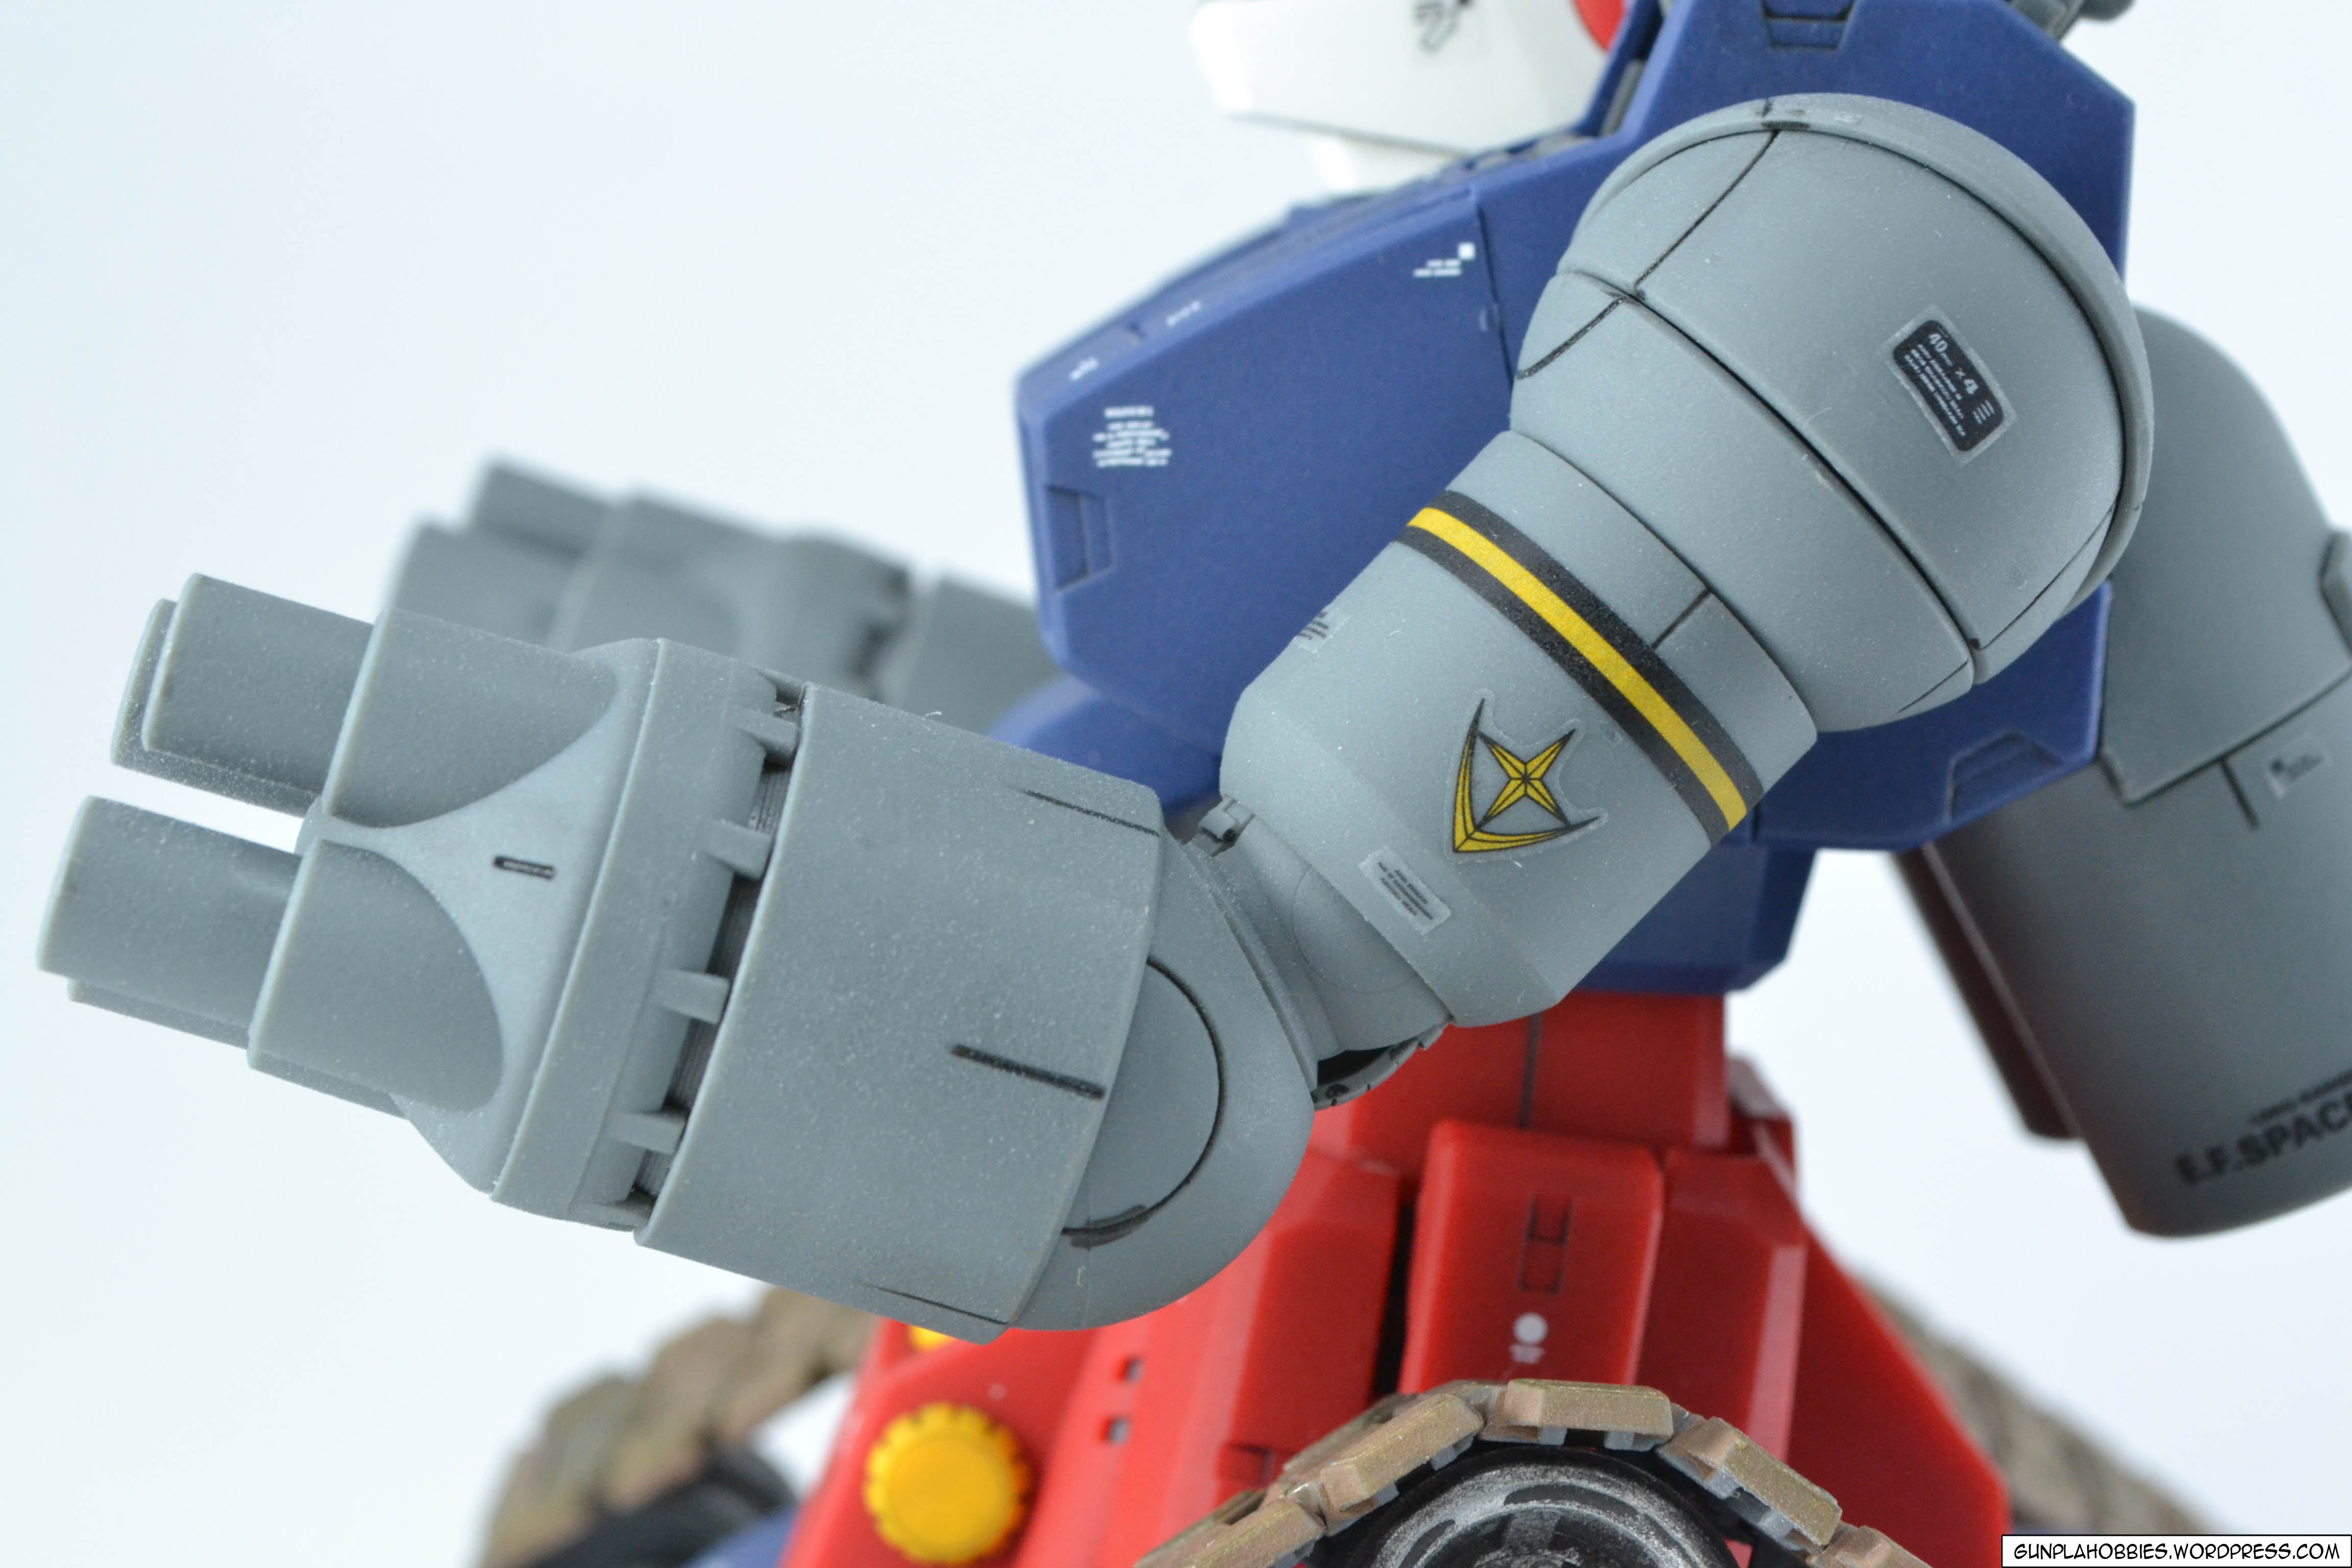
The arms can also be compressed/stretched, maybe to compensate for the recoil too. “Two 4-tube 40mm Bop Missile Launcher are mounted in the Guntank’s manipulators with an ammunition feed system. It fires small anti-aircraft missiles with a range of 20km. As the Guntank is not equipped with any close range weapon, 4-tube 40mm Rocket Launchers are used as the primary defense weapon.”

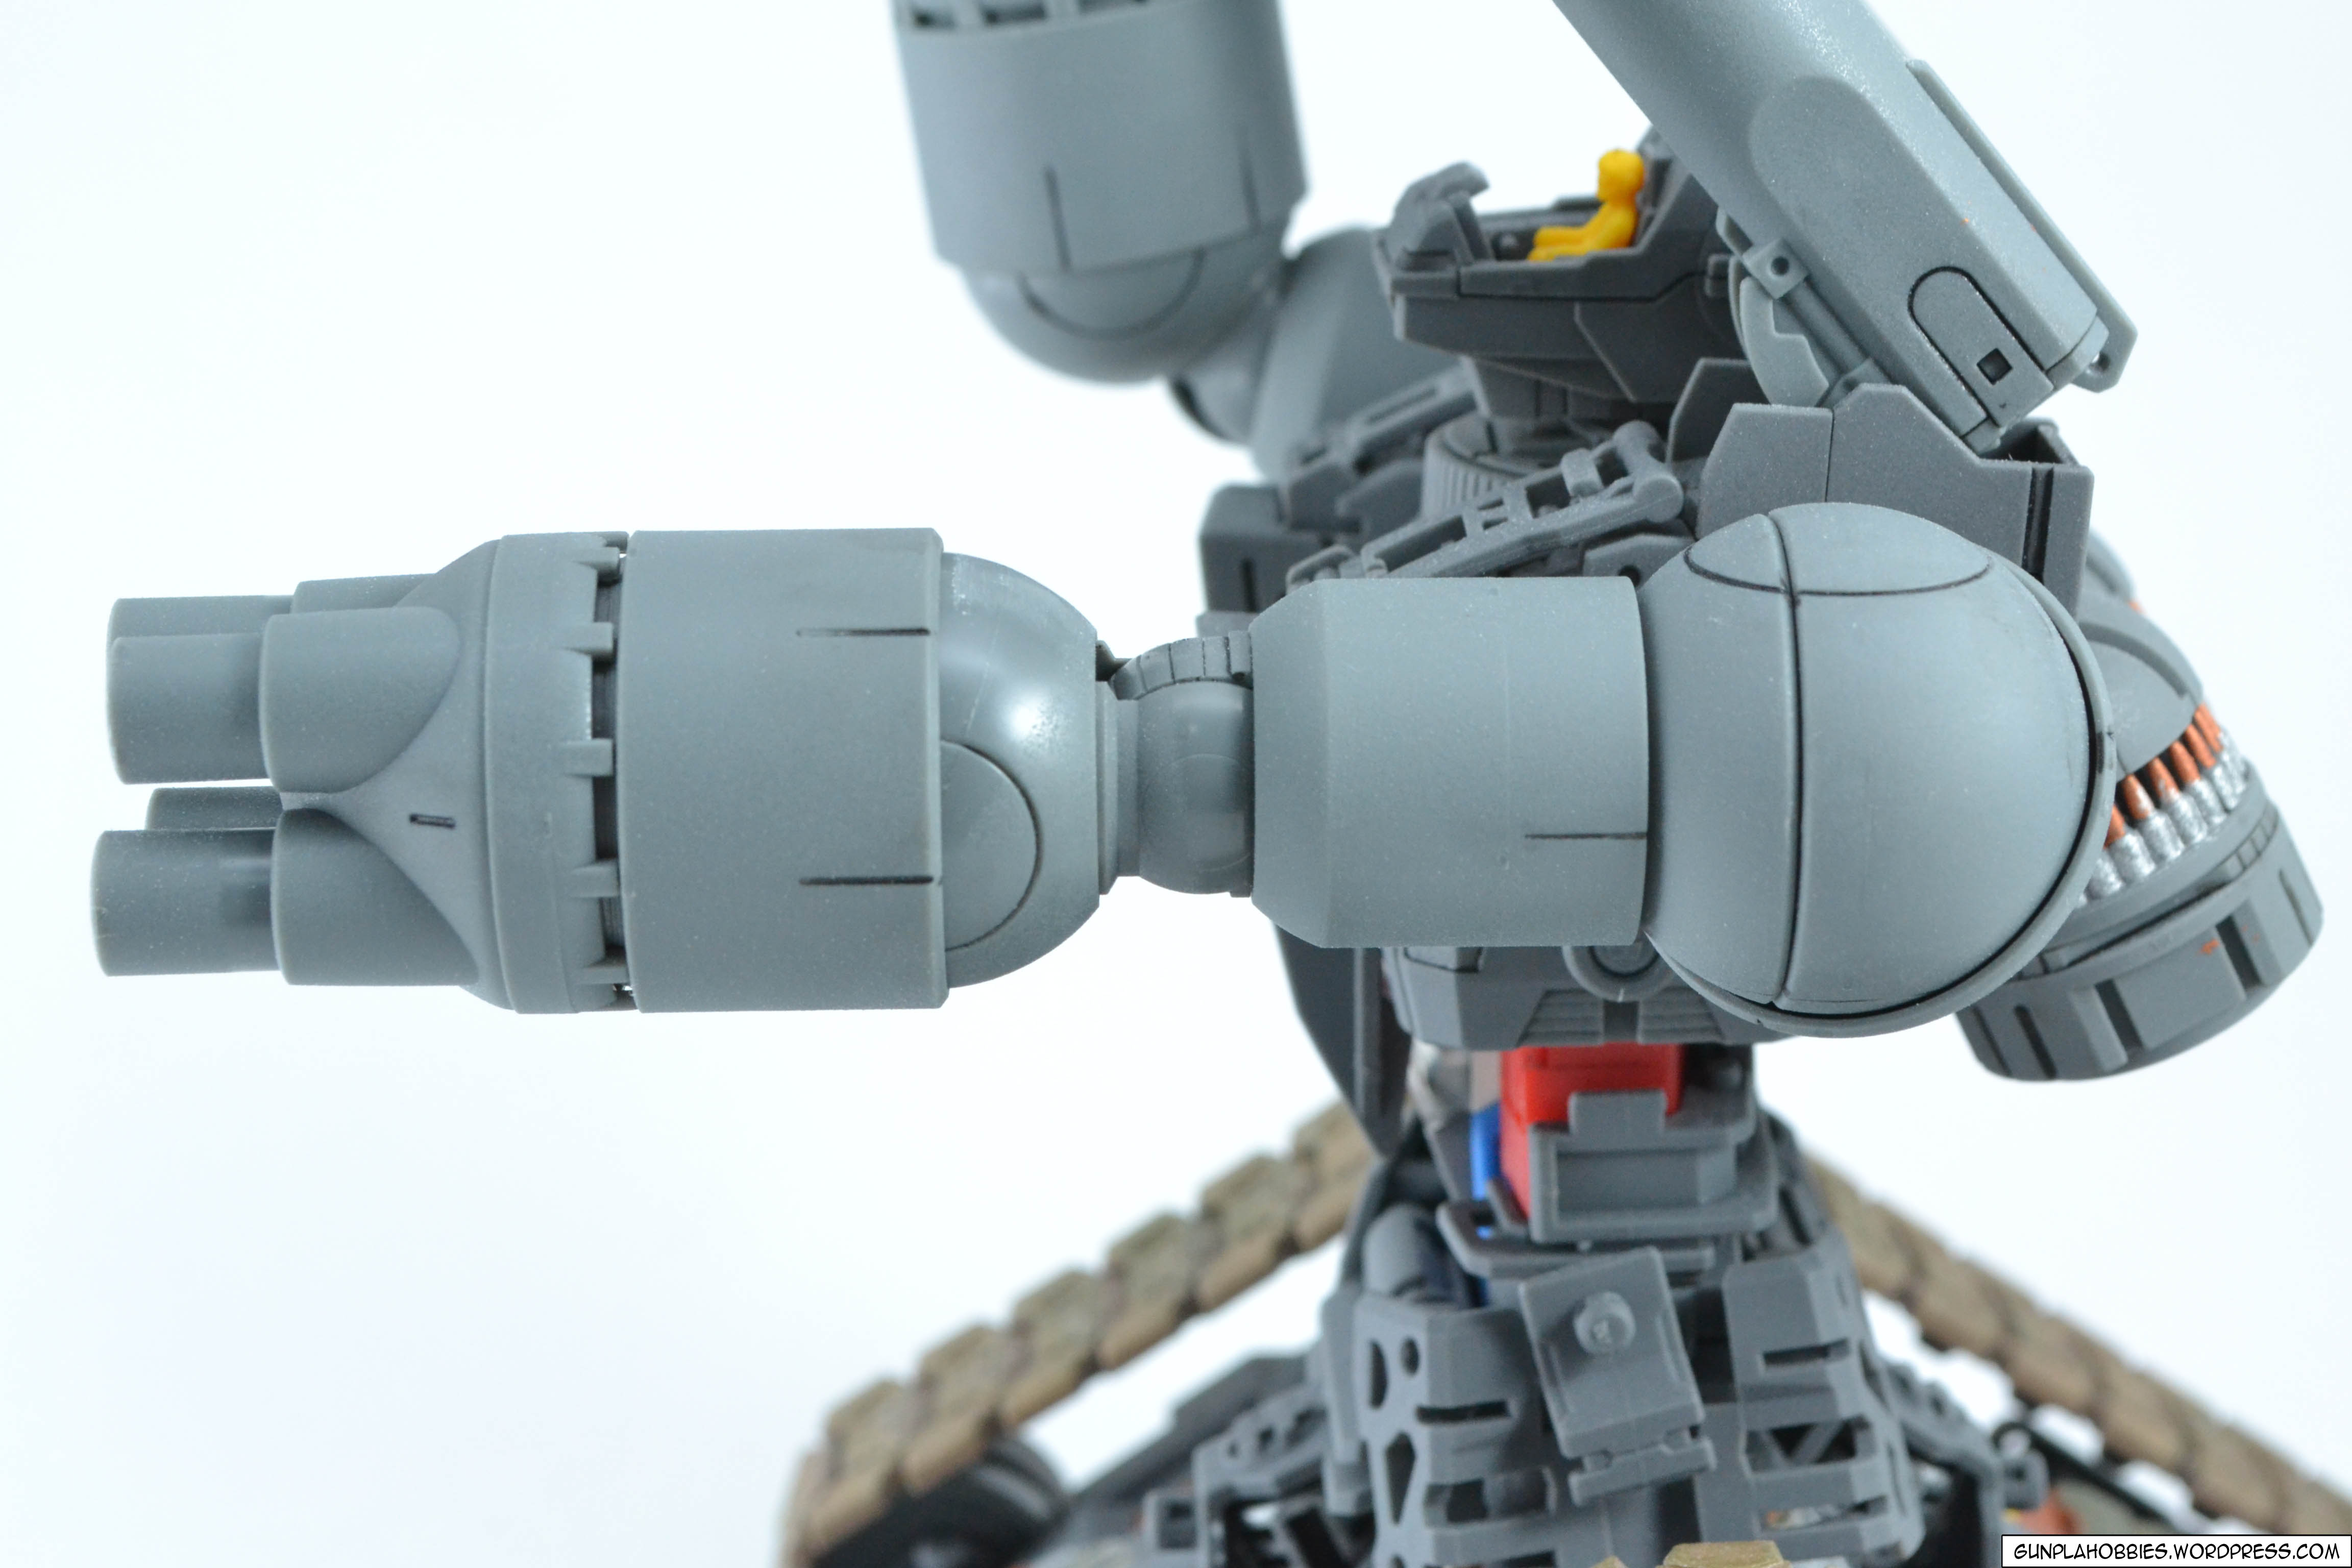

One cool feature of the arms is that there is a gimmick where in if you turn the arm bands, whether clockwise or counter-clockwise, the 4-tube 40mm Bop Missile Launcher will move inwards and outwards alternately, a video can be seen at Dalong’s review.

The yellow parts on his chest can be opened and closed, some kind of vents or filters:


On the back side of the lower body unit inner frame, I experimented with various paint colors too. It lacks some color contrast I think.


The large thrusters on his back can be turned too:

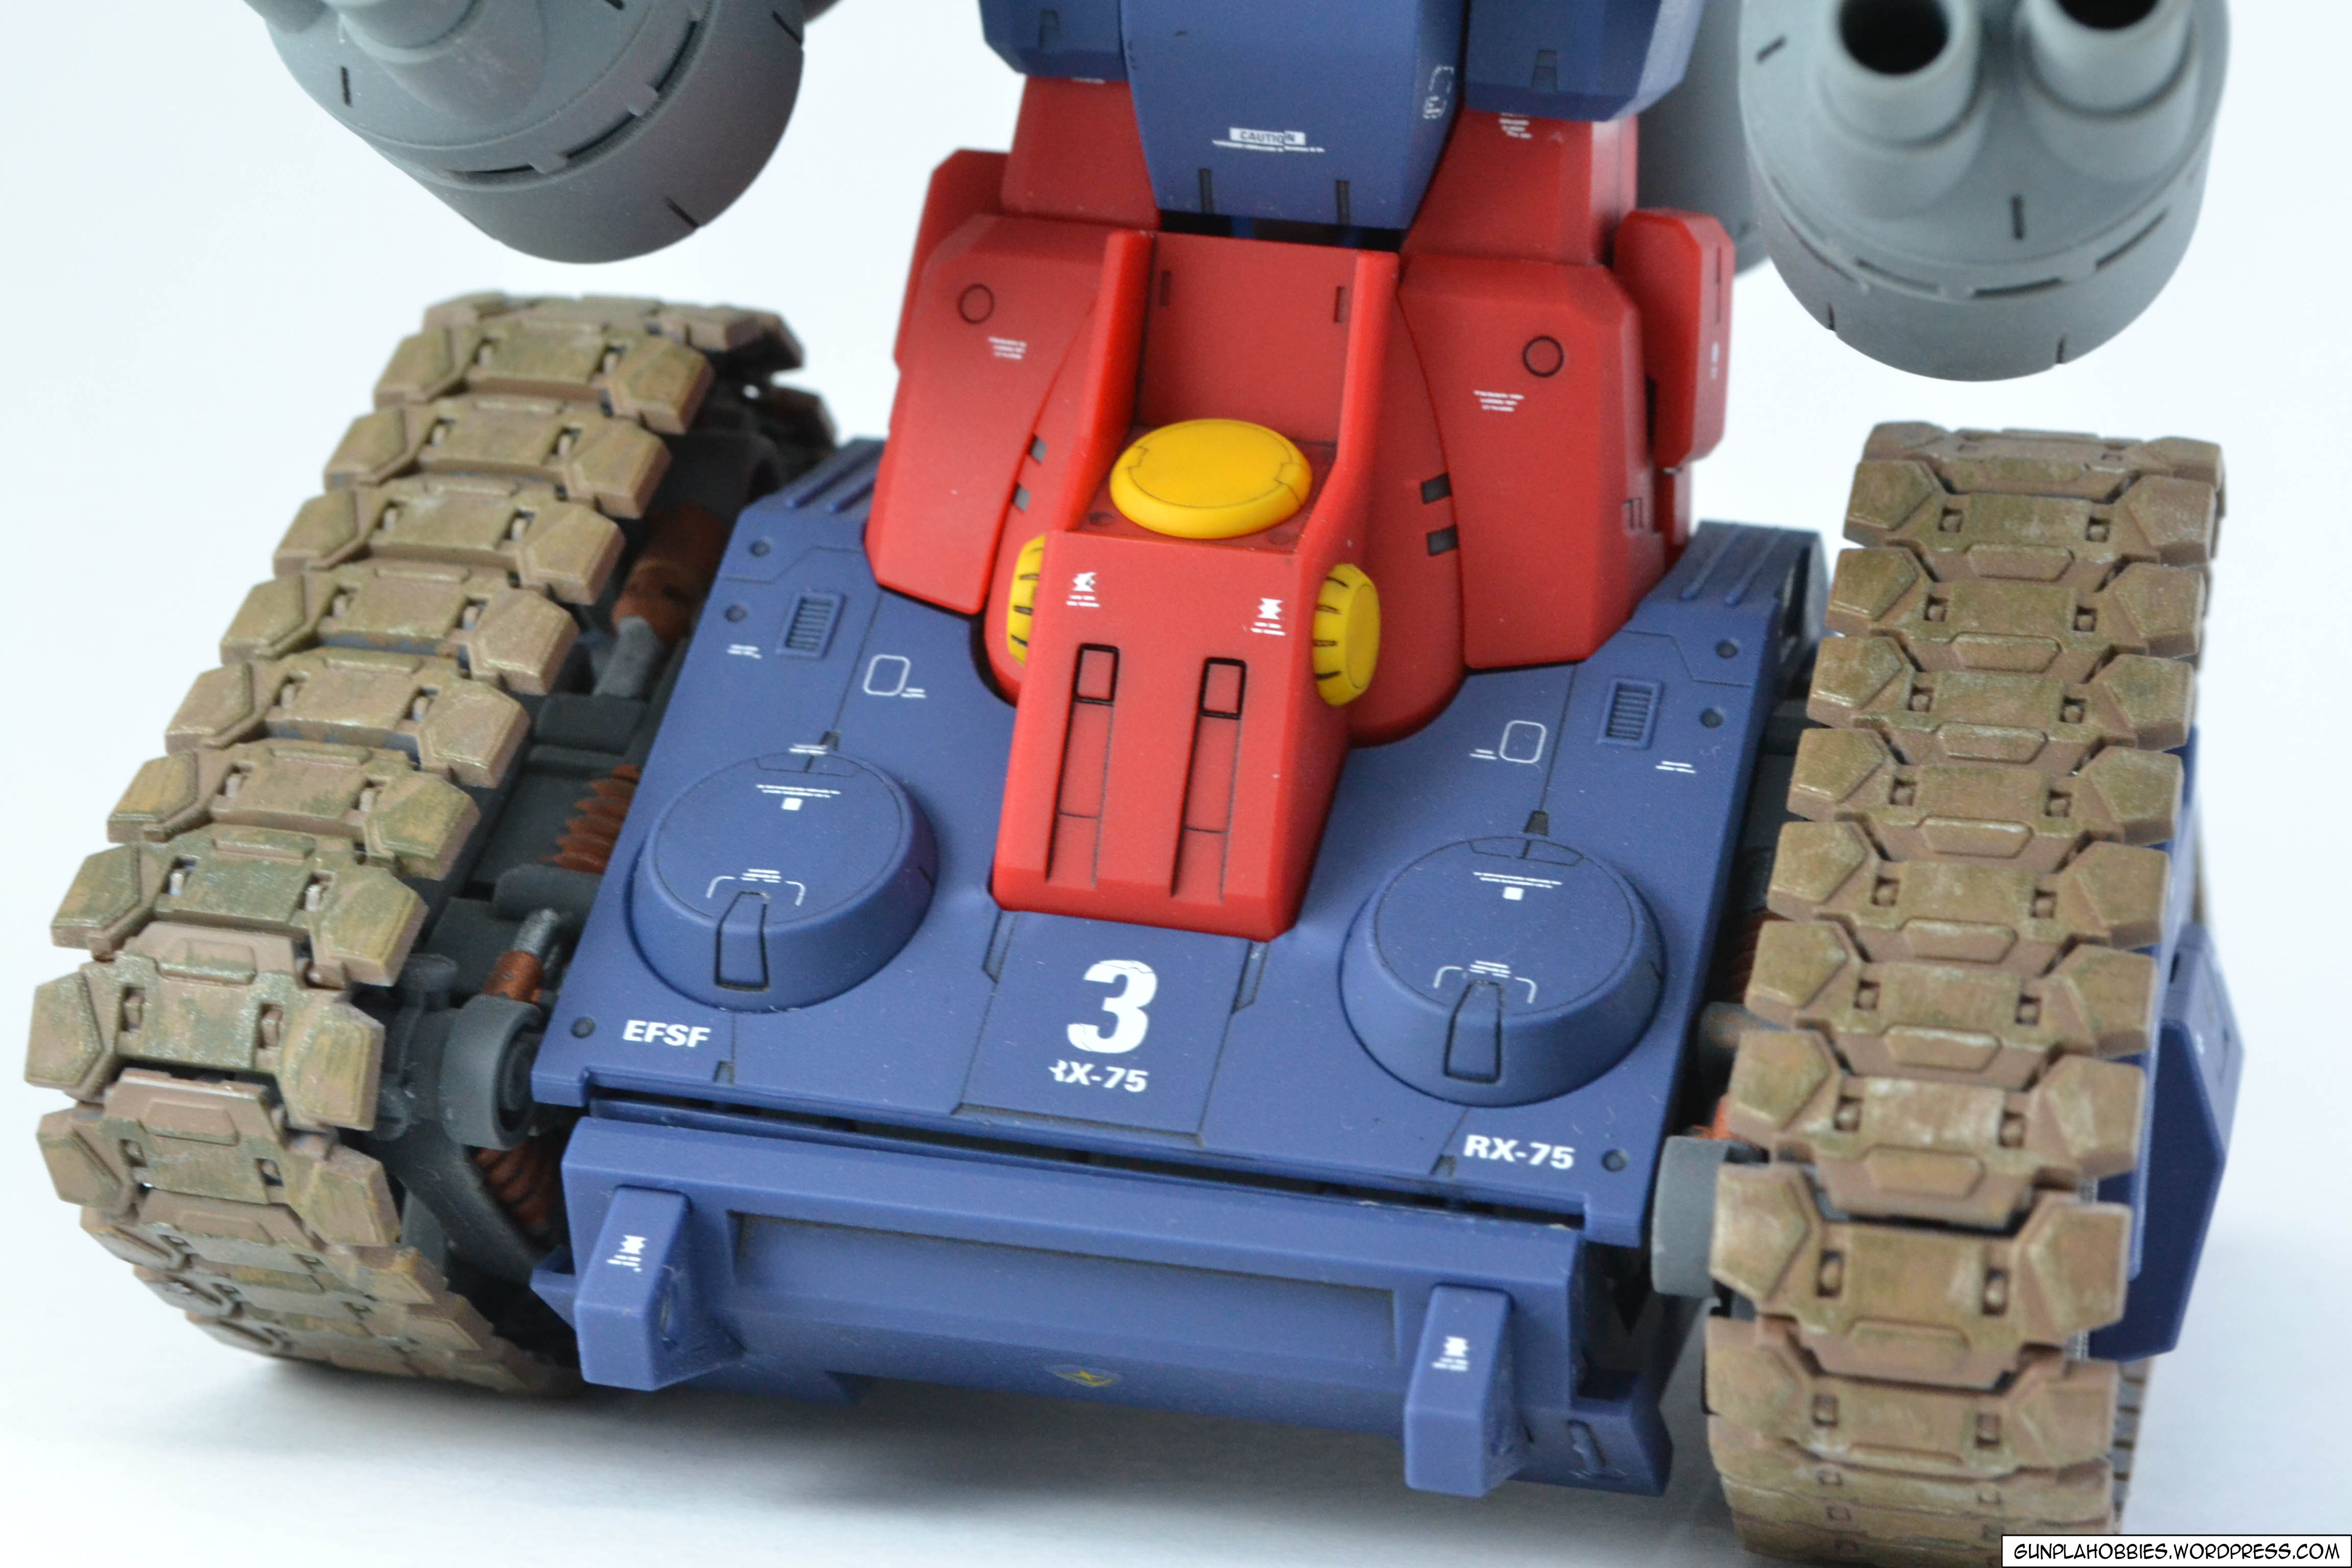
Some details on the sides of the lower body unit:


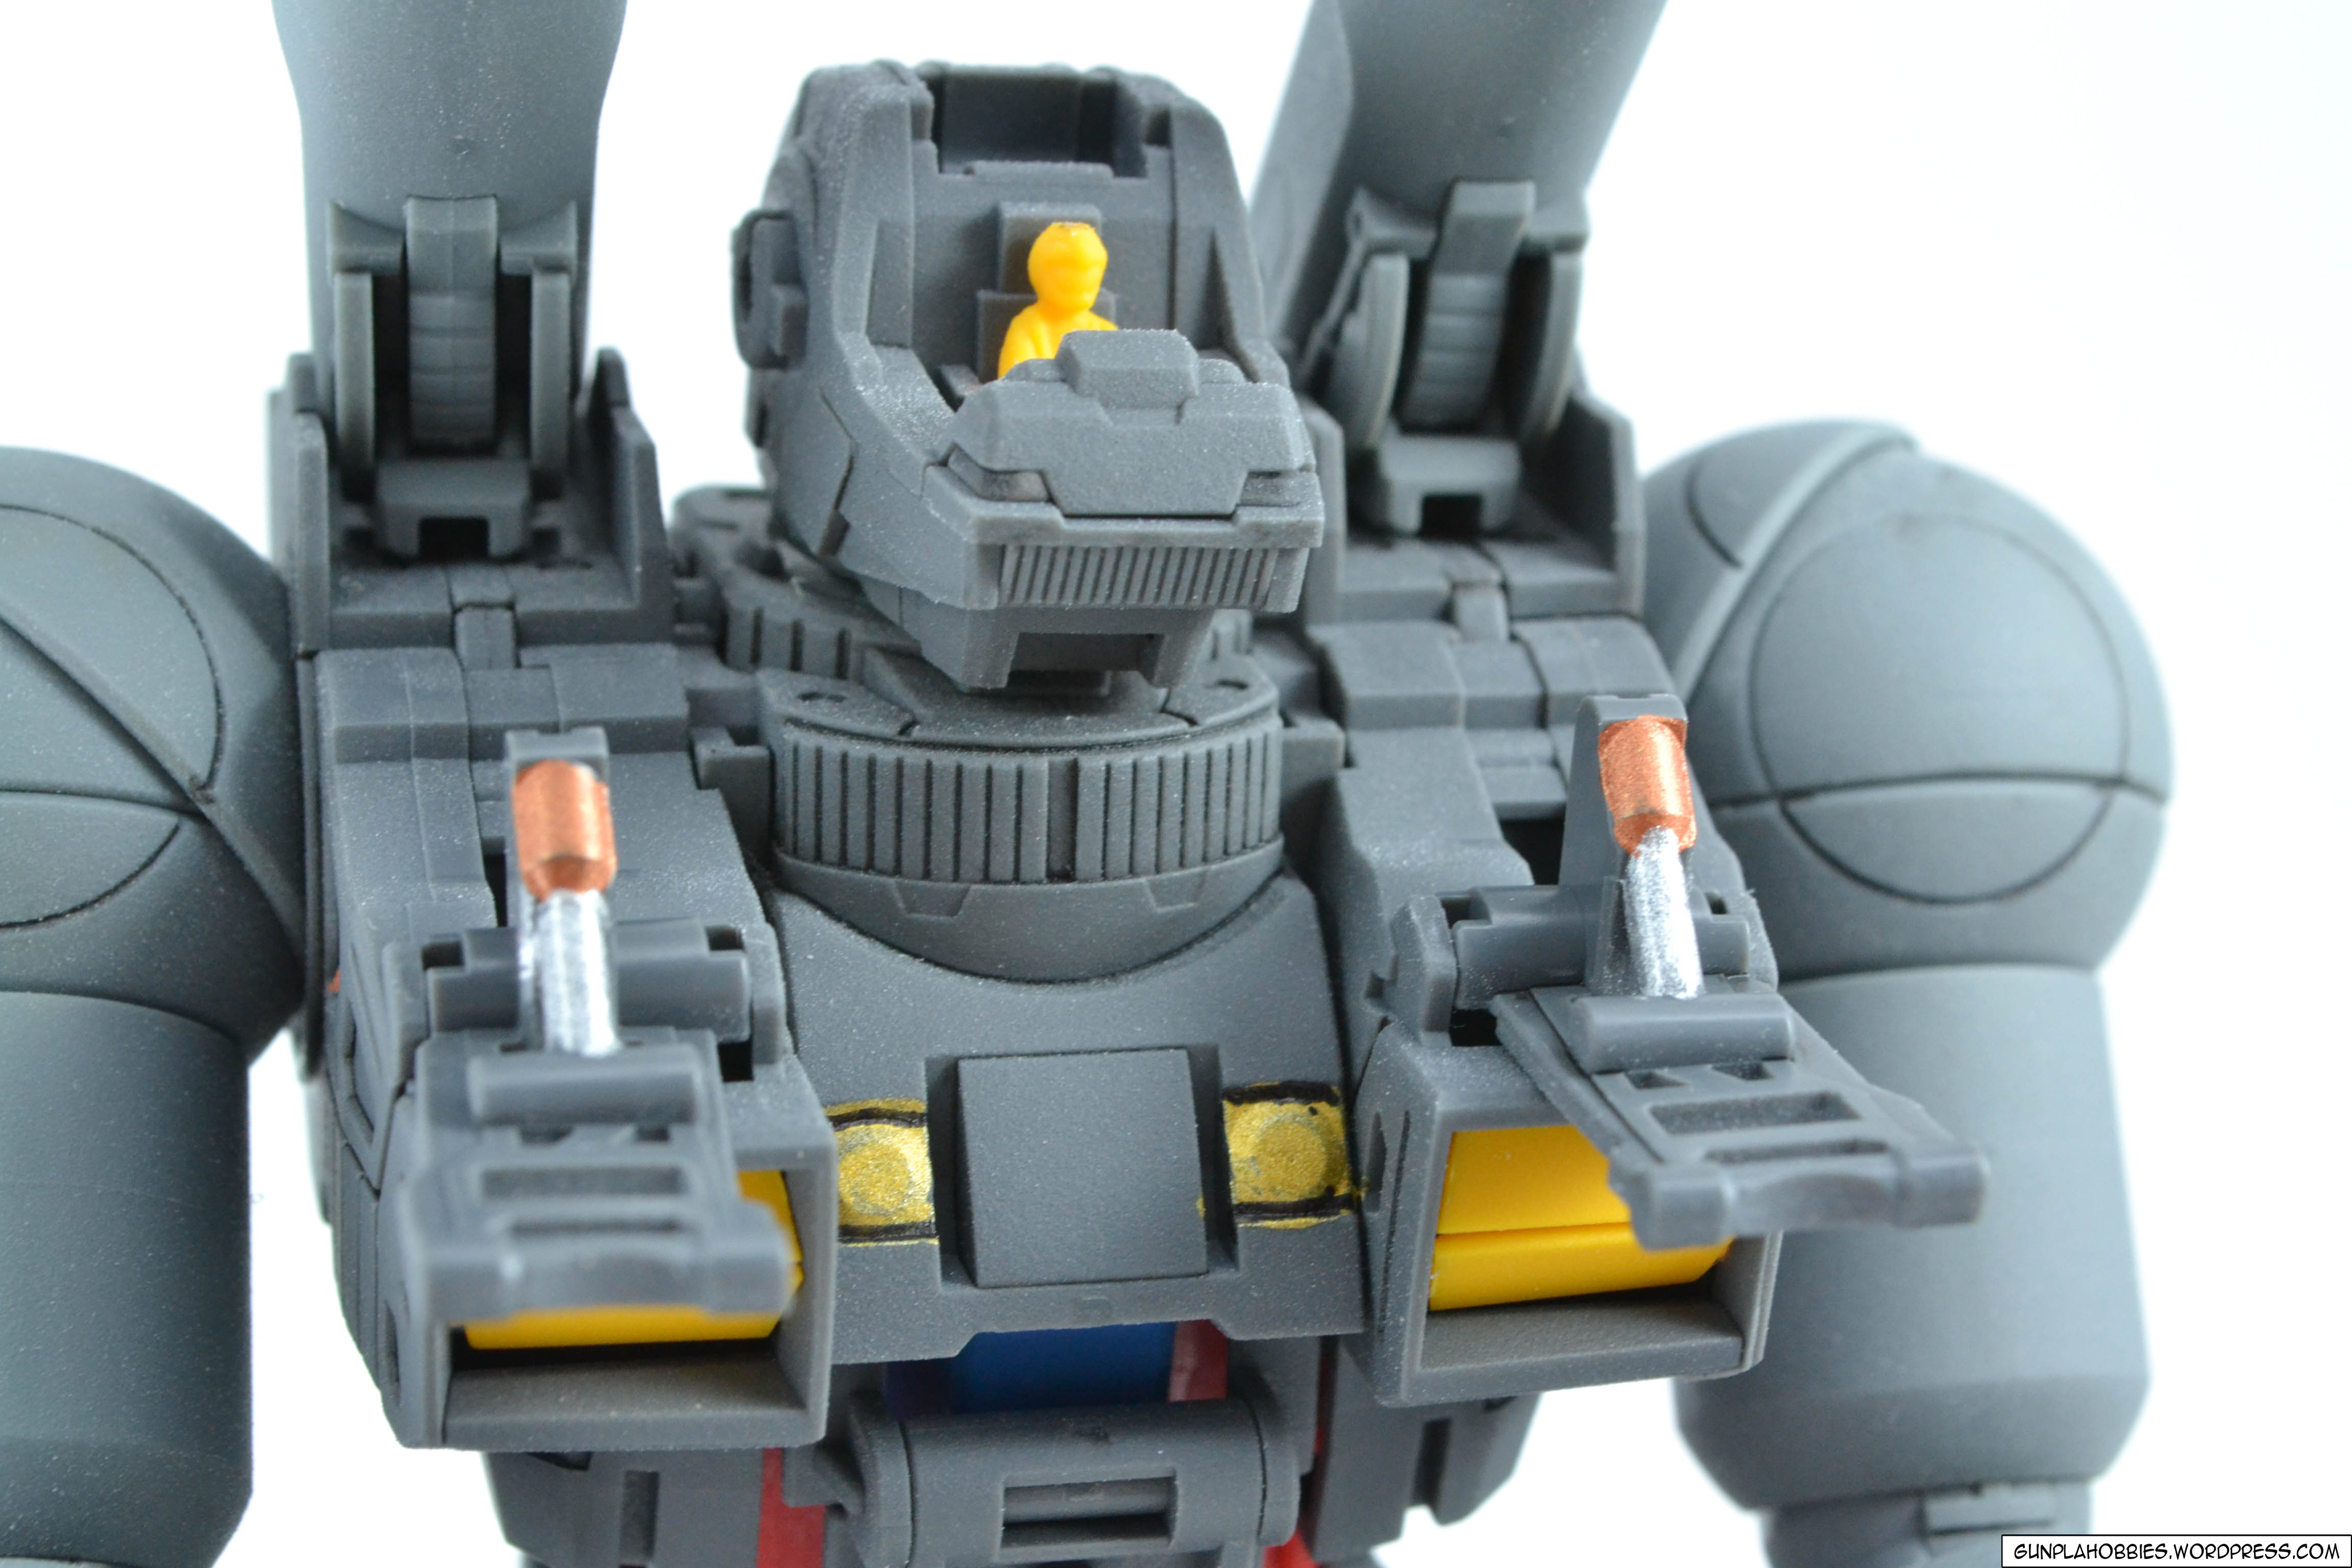
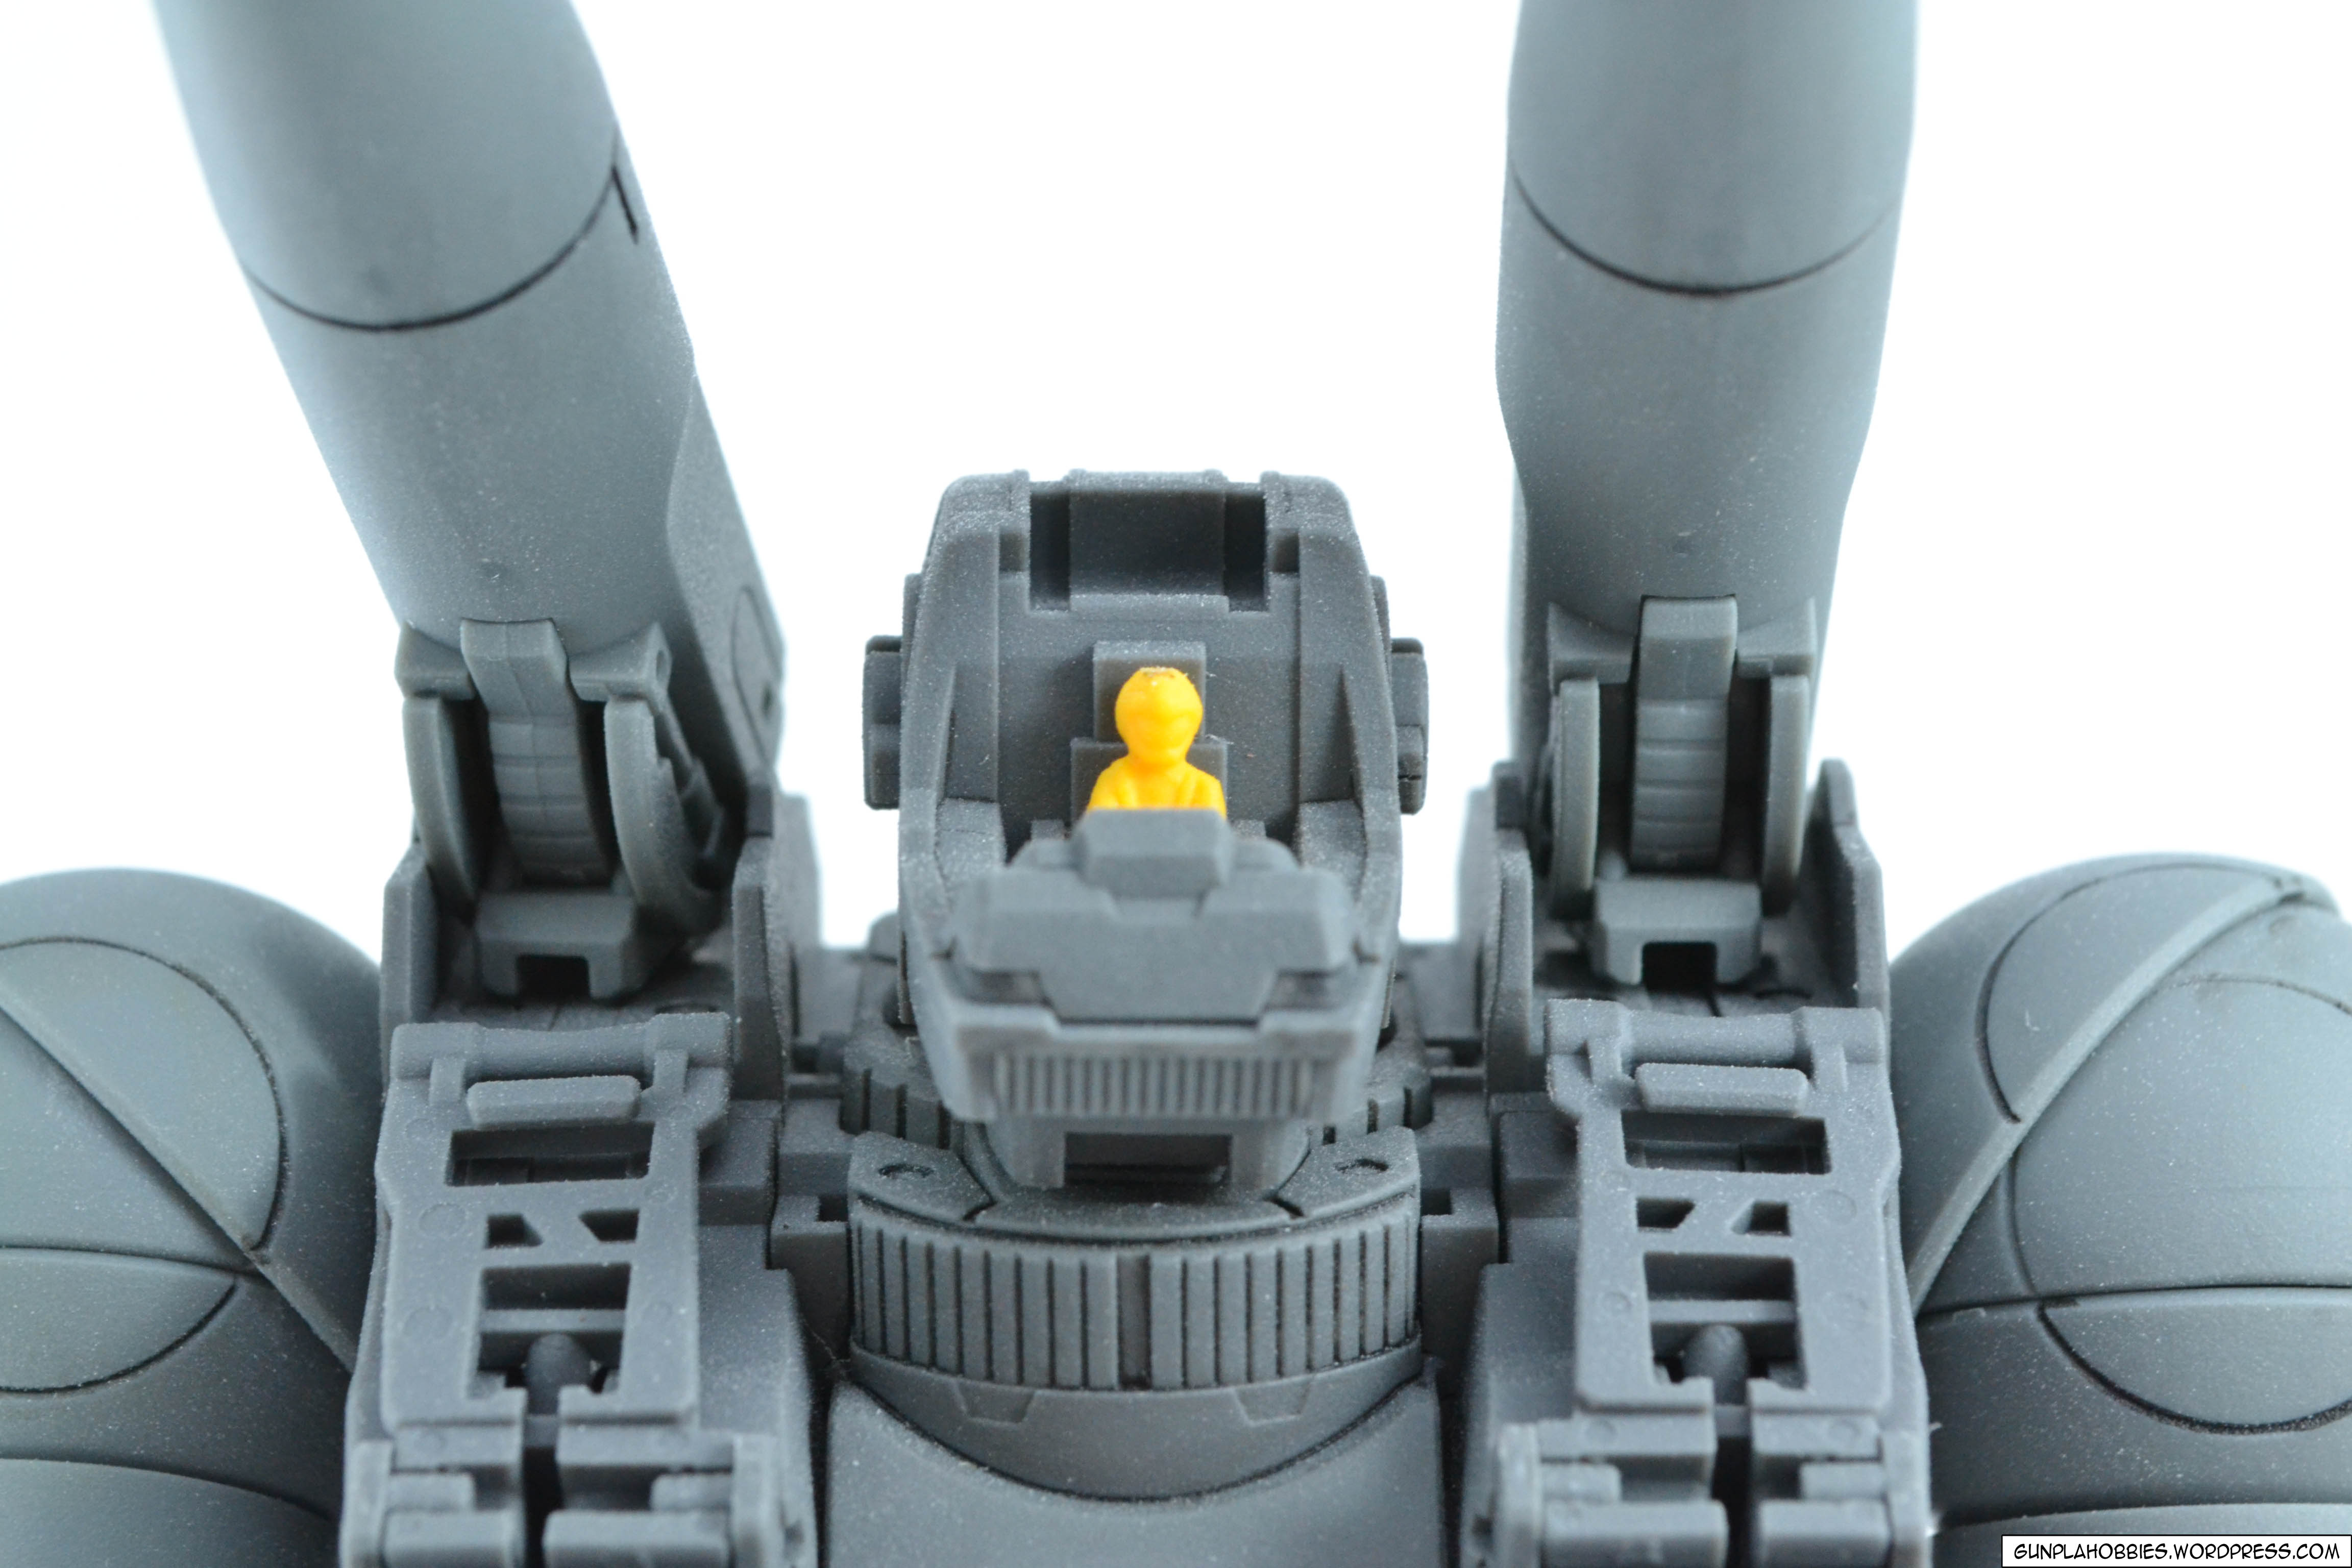
In the middle of his chest is a hatch that can be opened and close to reveal the secondary pilot of the Guntank which resides inside the core fighter:

The pilot is yellow, lazy to paint him, such as small person.


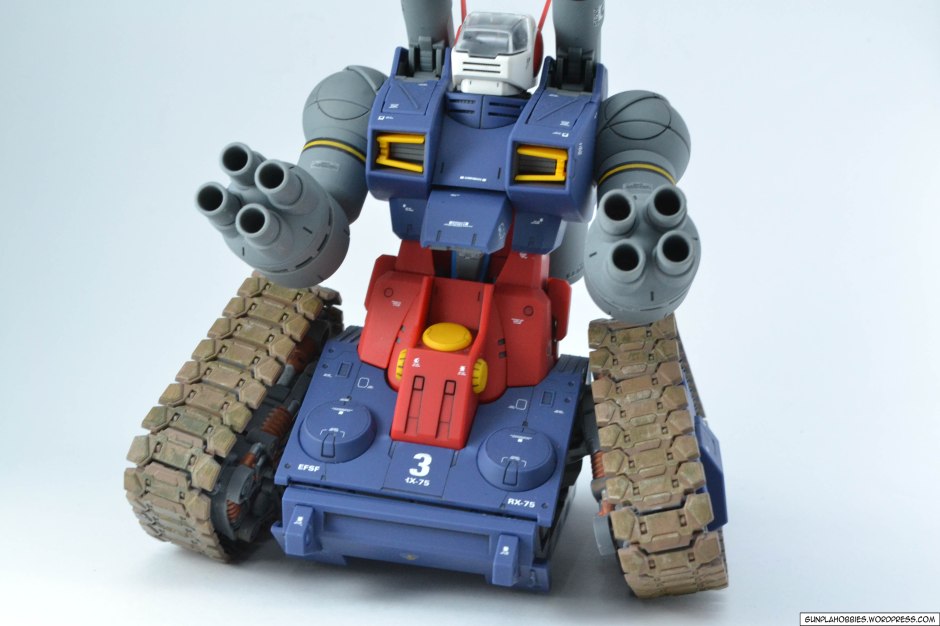
Now with the armor on and the decals put on:


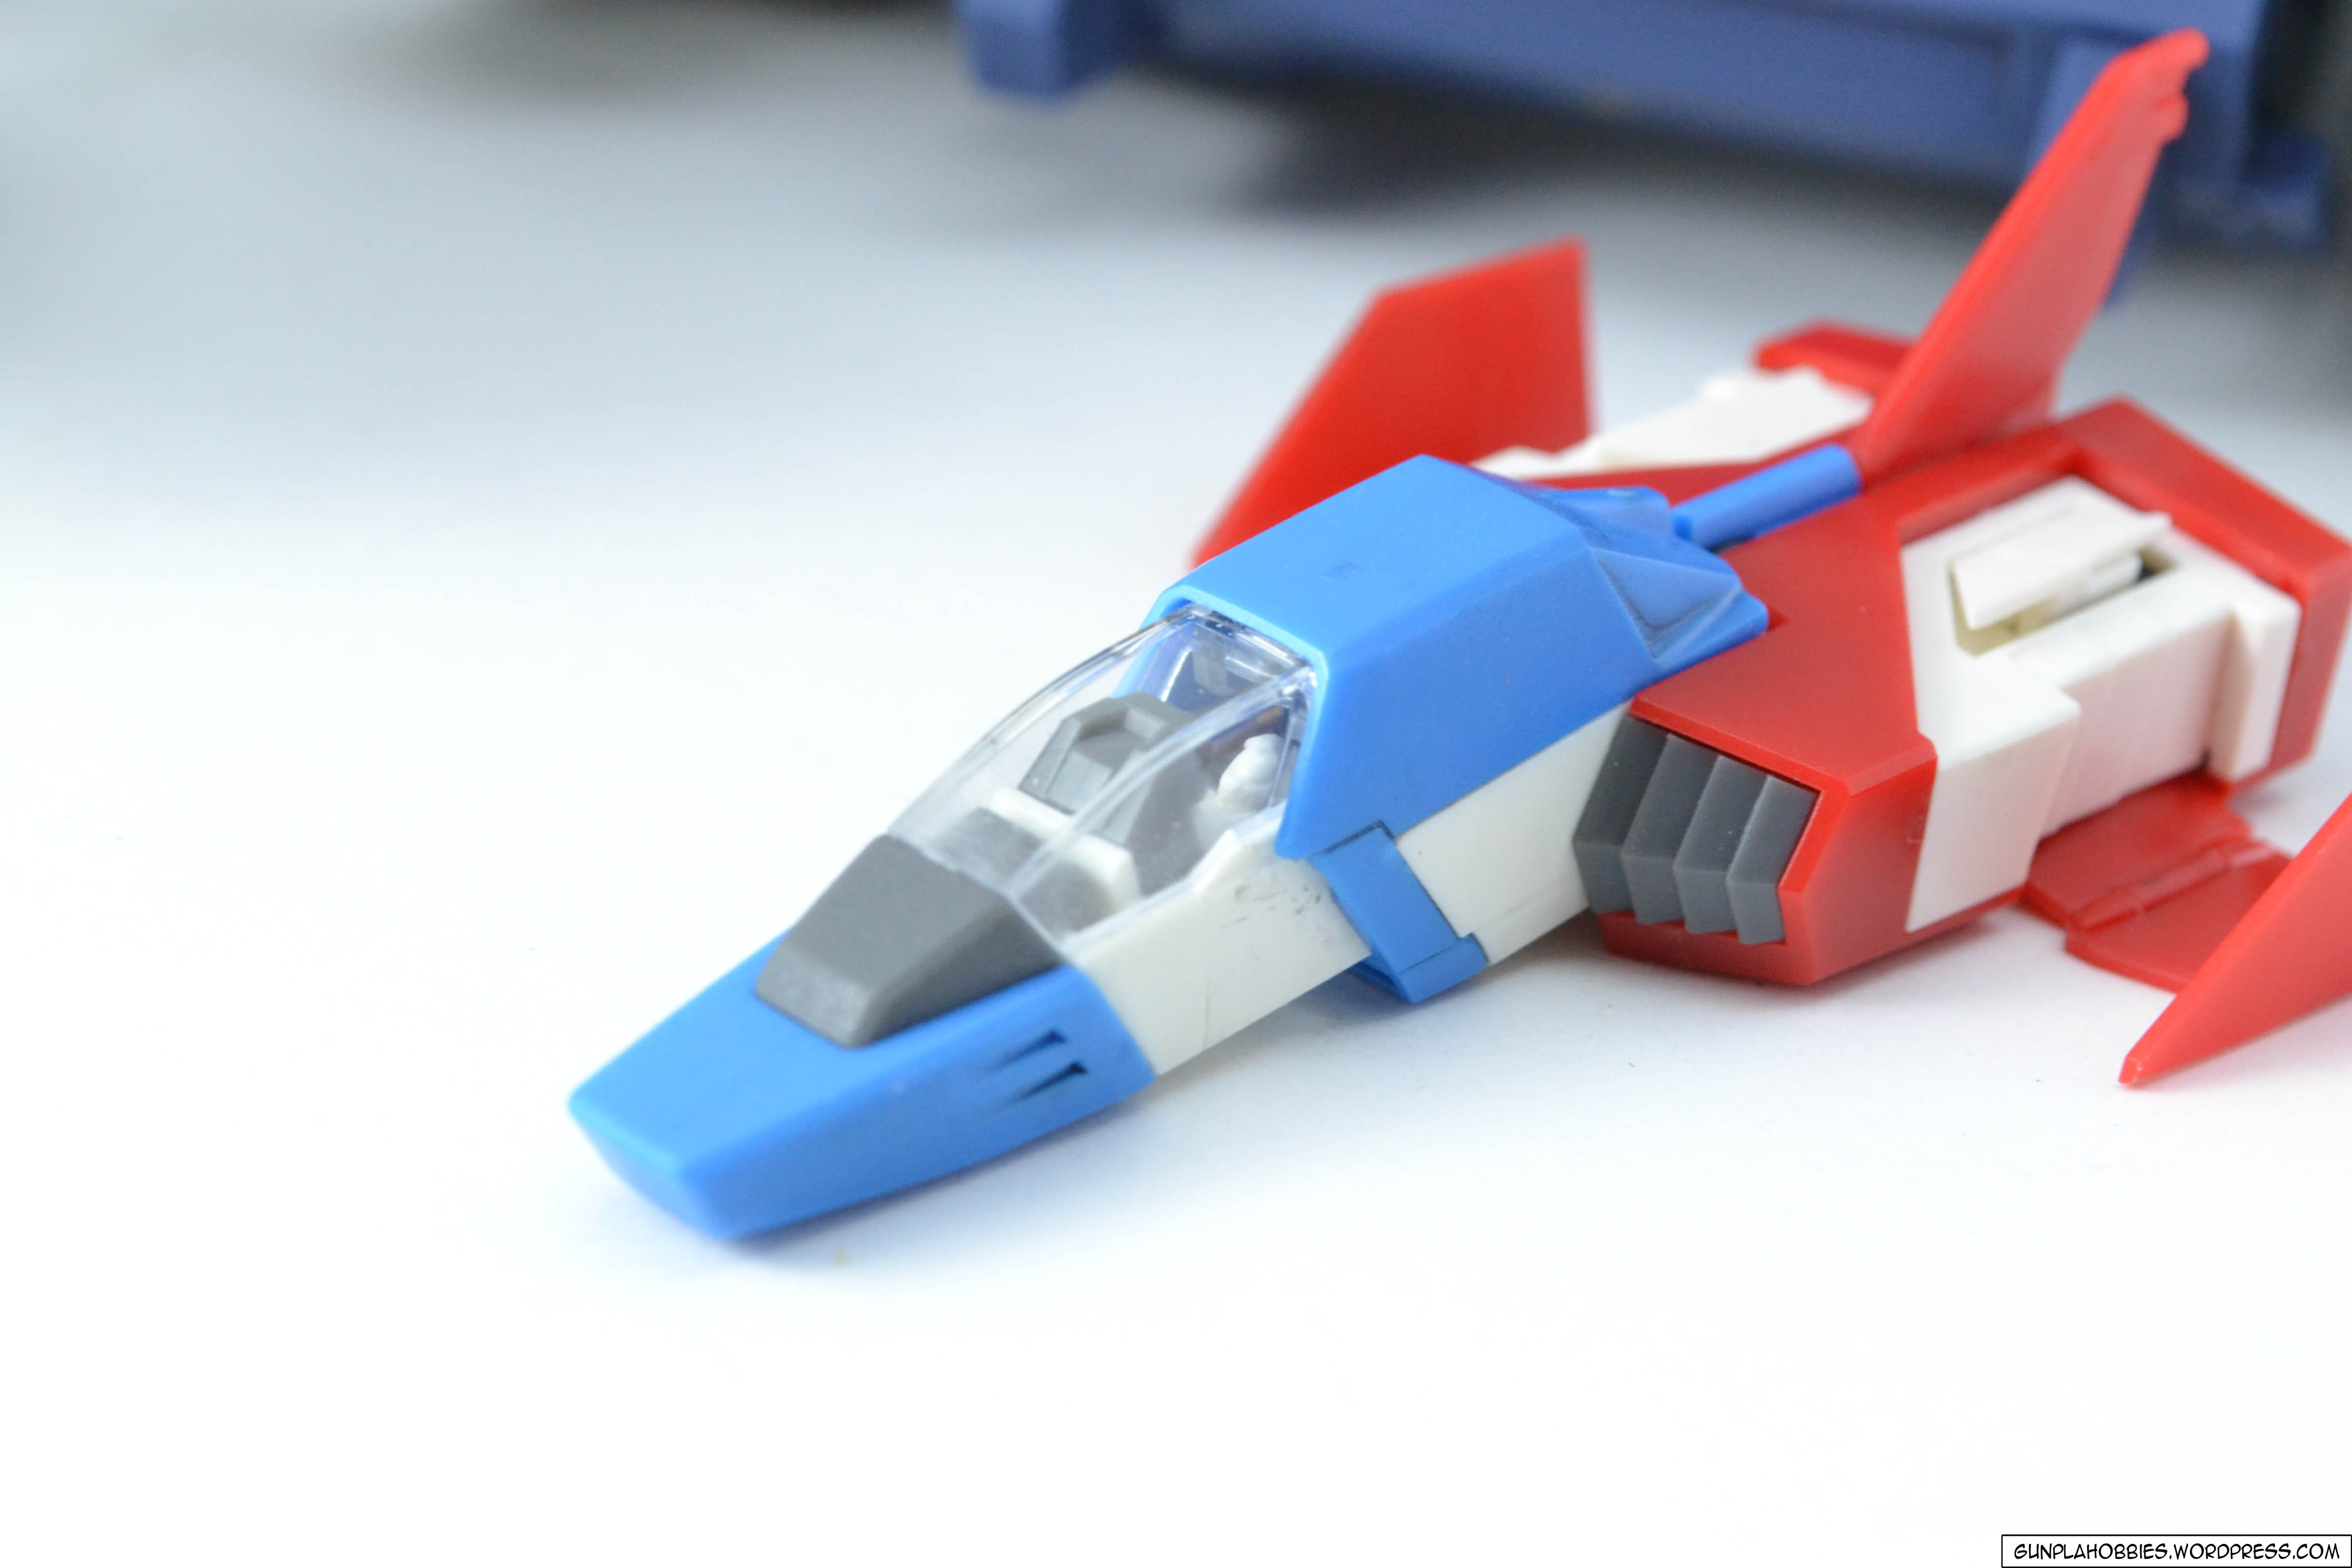
The core fighter:


The back side can be opened:
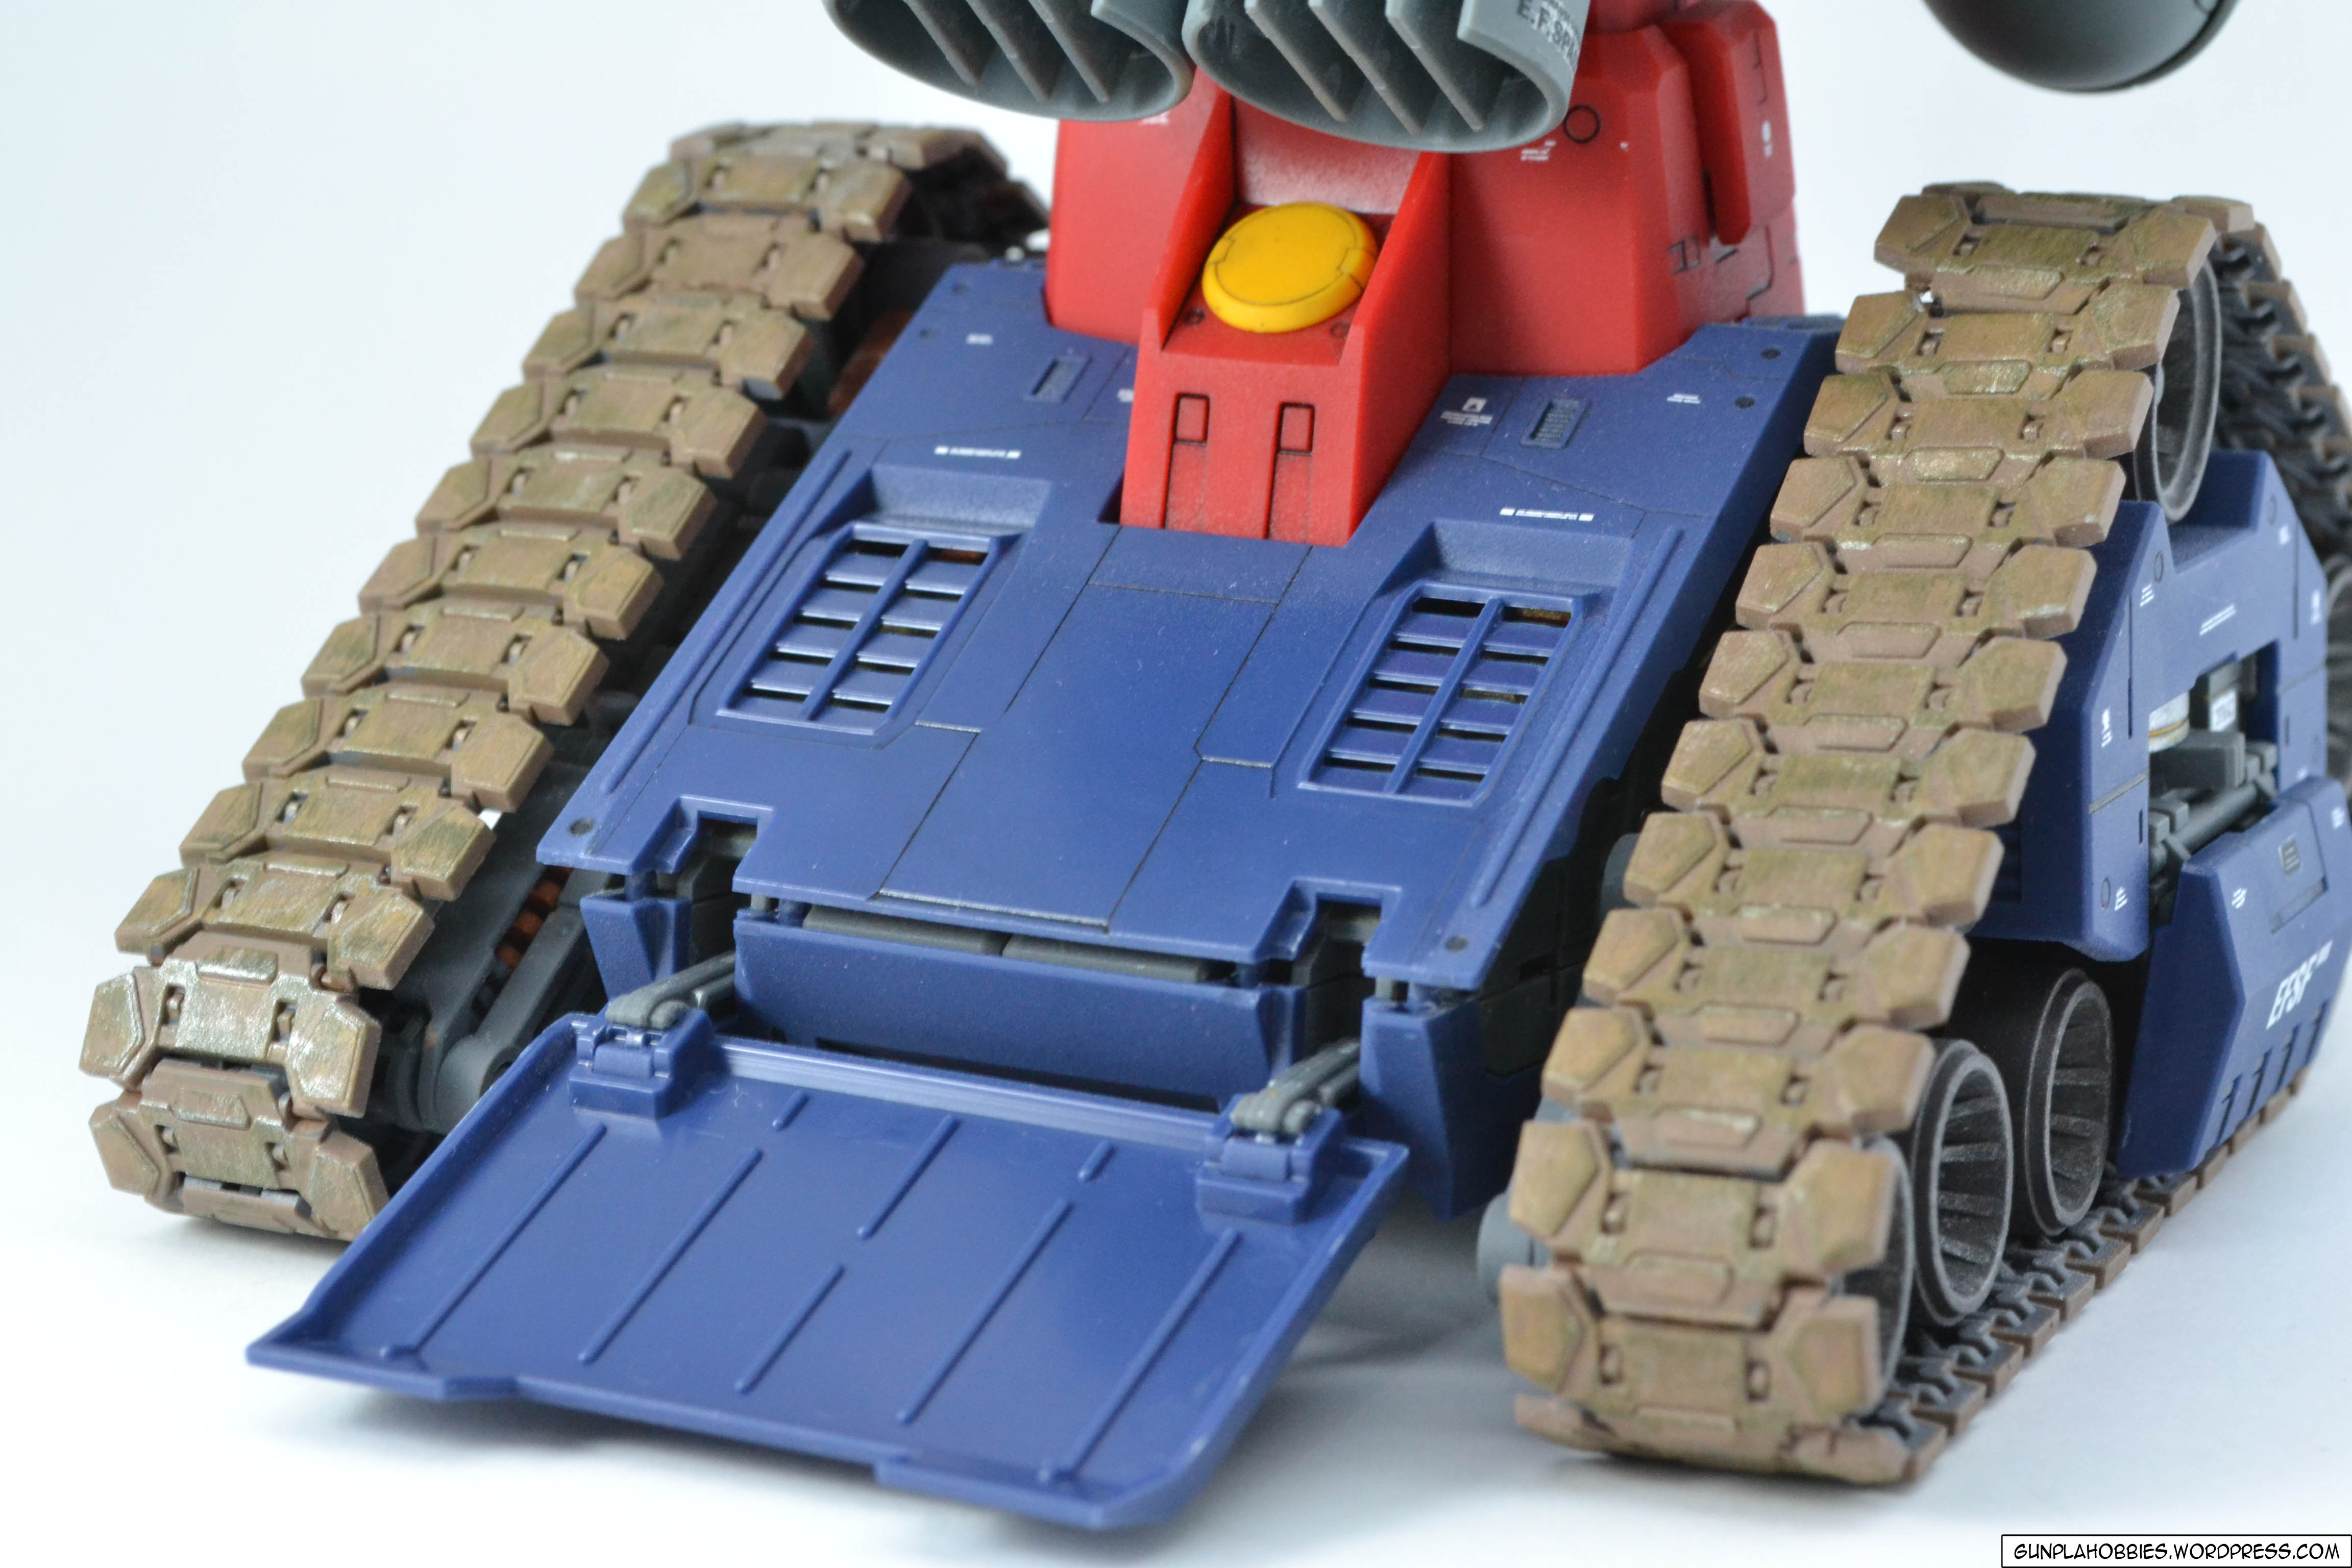


The side armor can also be opened to reveal a switch like thing, what the switch does is that it can expand the wheels or compress them:

See the difference of the switch position here and the effect on the wheel height:


The front side can also be opened:


“The main weapons of the guntank were twin 180mm recoil-less cannons, which were effective at both long and medium ranges. The Guntank’s two arms ended in four-barrel missile launchers instead of hands. These weapons provided good cover fire against enemy tanks and aircraft, but were less effective against enemy mobile suits.
The major flaw in the Guntank is its inability to turn the torso. This means the cannons can’t aim horizontally and is difficult to aim the cannons at moving target as the Guntank must reposition itself.” – Gundam Wiki
The idea of a half Gundam half tank unit seems absurd at the beginning, well I thought so at first, but when I started building him, I have come to appreciate his mechanical design. It’s a nice MG kit to have!
Things I like about this kit:
1. Lots of decals! Though dry transfer ones but then again, he doesn’t have much curved surface so it’s easy enough to apply the dry transfer decals.
2. Fair amount of gimmicks.
3. LED light-up part.
4. The idea of a half-gundam half-tank grew on me, I now like it’s design, especially the inner frame mechanisms and the tank threads.
5. The tank threads are of individual parts, one side is of 38 individual pieces of threads, though troublesome to cut and clean and paint, it adds to the detail of the whole unit.
6. The wheel/threads articulation is amazing such that he can go over on an uneven terrain, even if there is a medium sized boulder on the way.
7. There are 4 extra tank threads in case you broke some.
8. He looks cool on display once you spice him up with decals and some paint.
Thing I don’t like about this kit:
1. The lock mechanism of the threads can be easily broken if handled recklessly, I broke a piece, good thing there are 4 extra pieces.
2. The threads are not sturdy, they can easily come off if mishandled, no fun in that.
I recommend this kit for tank enthusiasts and Gunpla modelers too, he’s a unique one at that! The only major complain I have is the threads! Other than that, the kit is awesome! I’s been a while that I’ve truly enjoyed a kit from start to finish even up to the photo session. I made sure the photos look nice than my previous posts. Next up another MG! =3

especially amazing job on the wheels! :thumbsup:
LikeLike
Thanks! 🙂
LikeLike
Cool, you’ve finally completed it. Nice weathering there
LikeLike
Thank you! I’m glad I’ve completed him, he’s been sitting in my room for a long time. 🙂
LikeLike
Wow! That looks like it was a lot of work. A job well done I must say, and it looks awesome.
LikeLike
Thanks! It took me quite a while to get him done. 🙂
LikeLike
Nice! Really like the detailing you did on the inner frame and the wheels and tracks.
LikeLike
Thanks! Need to develop surgeon’s hands to paint the small details cleanly XD
LikeLike
Looking good! (I’m a sucker for decals)
LikeLike
Thanks! Well me too! Love them decals! 😀
LikeLike
Those threads look really cumbersome to fix up..kinda reminds me of a Zaku’s power conduits..still loved how you made it turn out and it’s a nice clean job! And even though the LEDs are tiny, it’s a cool effect eh =D
LikeLike
They are troublesome, one thing I hate in kits is repetitive parts, something we have to bear. Thank you! It’s my first kit to have an LED light feature, it’s a nice tiny effect. 🙂
LikeLike
Great job! Really love the overall look of this kit
LikeLike
Thanks!! 😀
LikeLike