Introduction
Panel lining is an easy way to make your Gunpla kit more detailed and awesome! Don’t be afraid that you’ll ruin your kit because it is easy to do and I will show you two easy methods that I personally use:
1st Method: Marker (of your choice) Panel Lining with Rubber Eraser
1st thing to do is of-course find a part that we need to panel line:

Materials that will be used are the marker of your choice and a rubber eraser, my personal favorite is the COPIC Multiliner. For the rubber eraser, I like the red rough ones being sold in National Bookstore.

This method is pretty easy, just ink on the panel lines like shown in the photos below, don’t worry about excess ink or lines that go out of the panel lines. The rubber eraser will fix that.


As you can notice, the panel lining is a bit thick and there’s a little smudge at the bottom of this part. Rubbing the lines using the rubber eraser can quickly clean your panel lining neatly.
Extra tip: Rub the panel line using your rubber eraser perpendicular to the line being cleaned. COPIC Multiliners are not quick to dry, so it’s easy to clean mistakes.


And viola! A nice thin panel line! =3 Easy right?
Method 2: Panel Line Accent Color + Enamel Thinner
This method is also known as enamel wash as it involves thinned out enamel paint as the panel lining tool. Before Tamiya produced these Panel Line Accent Color bottles(which are enamel based), hobbyists resort to the original Tamiya enamel paints and thin it with lighter fluid or enamel thinner. Anyway, good thing they made these Panel Line Accent Color so that you don’t need to thin your own enamel paint and these bottles come with a handy applicator.
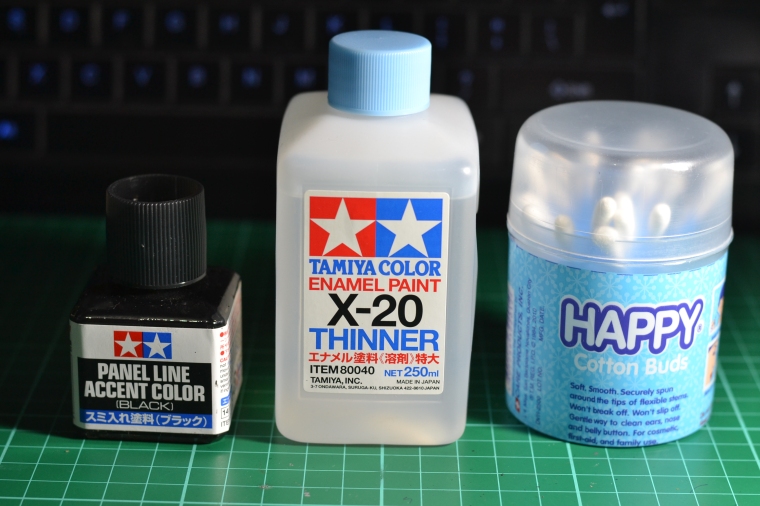
Materials that will be used are the following: Tamiya Panel Line Accent Color, Tamiya X-20 Enamel Paint Thinner, cotton swabs.
Extra info: Tamiya Panel Line Accent Color comes in different colors like grey and brown. I still like black.

This method is also easy! You just have to use the applicator that is attached to the bottle cap and dab it to the panel lining. The concept is that the enamel paint is thinned enough that it will run itself through the lines, all you have to do is dab a small amount of Panel Line Accent Color on any part of the panel line.
WARNING: Do not overdo and put too much enamel paint on the piece! Before dabbing it on the piece, you can remove excess ink from the applicator by just skidding it by the bottle’s opening. If there’s too much ink on the piece, you can quickly clean it using some swabs, don’t worry about smudges as we can clean it later. The reason behind this is because too much enamel paint on the Gunpla’s plastic material can make it brittle and crack. So be careful okay?


The piece will look something like this after Panel Line Accent Color application:

Now we can clean the smudges and ink blots using a small amount of enamel paint thinner on a cotton swab.

Just dab the cotton swab with the enamel paint thinner lightly on the excess ink, don’t press too hard as you can remove the underlying panel lining.


And viola! Beautiful clean panel lining!

That’s it for this tutorial! I hope fellow hobbyists and Gunpla beginners will find it useful. You can ask questions in the comment section below and I’ll glady answer it. 🙂


