Hi guys! Here’s another article that I wrote for fromjapan. Ever finished an MG kit then you saw how massive the amount of decals were? And you were just so intimidated and afraid that you’ll ruin your kit that you did not go through with applying the decals? Well, be afraid not! Because it’s just intimidating but not really hard to do if you get the hang of it! Here’s the article that I wrote about application of dry transfer and water slide decals. Enjoy! And I hope it helps out fellow Gunpla hobbyists out there! 🙂
Tag: gunpla
Gunpla Hand Painting Tutorial
Hi guys! Here is the gunpla hand painting tutorial that I wrote for fromjapan, I can’t post its content on my own site so I’ll just put the link here:
Enjoy! Hope it can help out beginners out there! Maybe I’ll make another painting tutorial when I have the time. 🙂
HGBF 1/144 PF-78-3A Gundam Amazing Red Warrior (Custom Painted)
Hello guys! This is my latest work: a custom painted HGBF 1/144 Amazing Red Warrior from the Build Fighters series. This is actually the product of a Gunpla hand-painting tutorial article I wrote for a private company. Too bad I can’t post the article on my own blog because of SEO concerns. But of-course I will create a new one so that I can post a Gunpla hand-painting tutorial for my own blog.
You can find detailed mobile suit information here: http://gundam.wikia.com/wiki/PF-78-3A_Gundam_Amazing_Red_Warrior
Things I did:
1. Usual nib mark cleaning.
2. Hand-painted all inner frame parts and base coating of weapons using Tamiya Gun Metal.
3. Hand-painted vulcans on the head unit and on the waist unit using Tamiya Dark Iron. Thrusters on the shoulders are also painted using Dark Iron.
4. Hand-painted details using a combination of Tamiya Gold Leaf, Copper and Flat Aluminum.
5. Panel lining using Copic Multiliner.
6. Applied custom water slide and dry transfer decals.
7. Top coated all non-metallic parts with Bosny Clear Dull/Matte spray can.
And viola! Enjoy the photos!
And that’s it, thanks for viewing! till next build! 🙂
The Gunpla Factory – Bandai Hobby Center
And that’s why the kits are expensive. Wish I can go inside in the future just to see operations. Anyone wants to work here? I think I personally don’t want to work at Bandai after seeing the video, don’t really know why but it’s just how I feel. Maybe I expected more. Maybe I’m imagining that work is stressful there because of the accuracy and precision requirements of the work. XD
MG 1/100 RX-93-v2 Hi-V Gundam Ver. Ka Complete
Hello guys! This project was both fun and excruciating! But I’m glad I have completed this kit and I’m excited to show you. More information about this MS are found here: http://gundam.wikia.com/wiki/RX-93-%CE%BD2_Hi-%CE%BD_Gundam
Things I did:
1. Snapfit + nub cleaning as usual.
2. Panel lining using enamel wash method.
3. Water slide decals application (this is the excruciating part).
4. Sprayed topcoat matte.
5. Hand-painted some details/metallic parts using Flat Aluminum and Gold Leaf.
6. Sprayed last layer of topcoat matte.
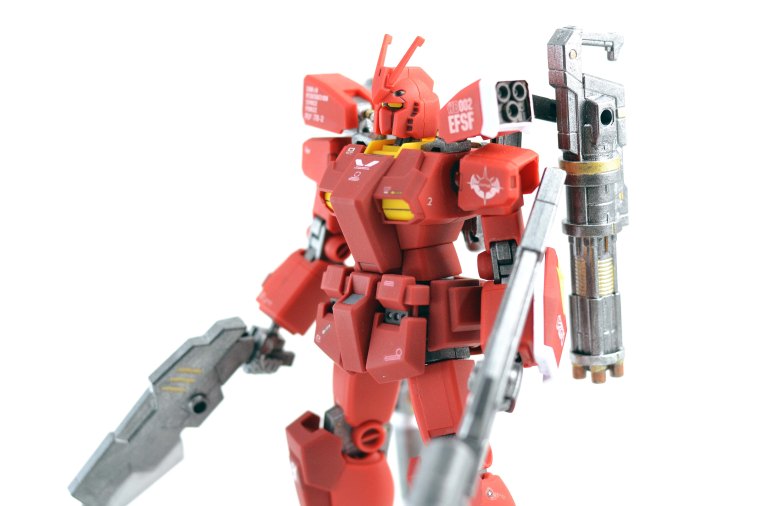
And here he is! Enjoy!


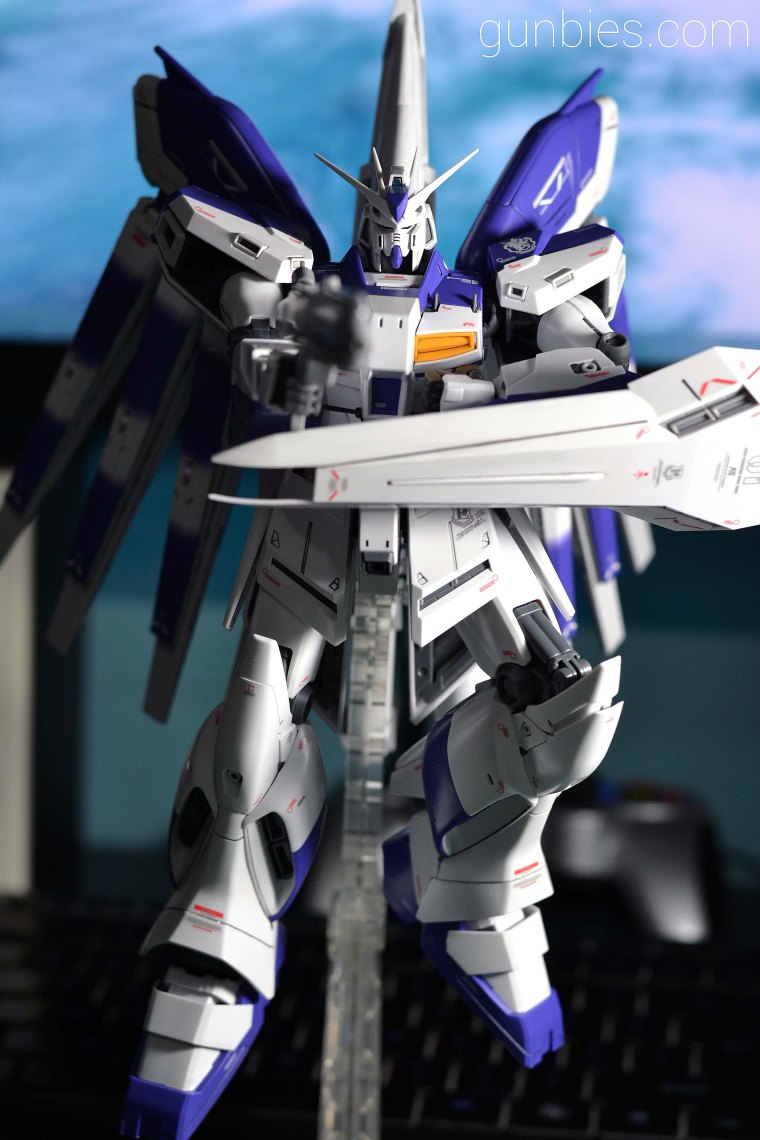
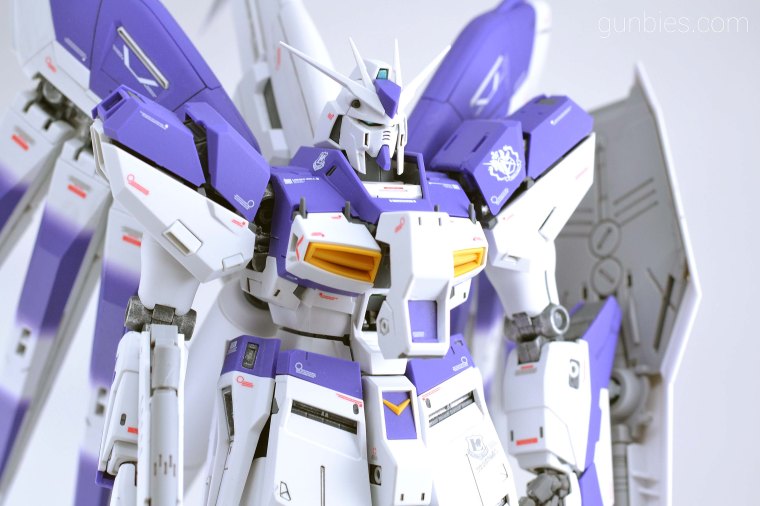
The shoulder armor pieces can be extended and opened:

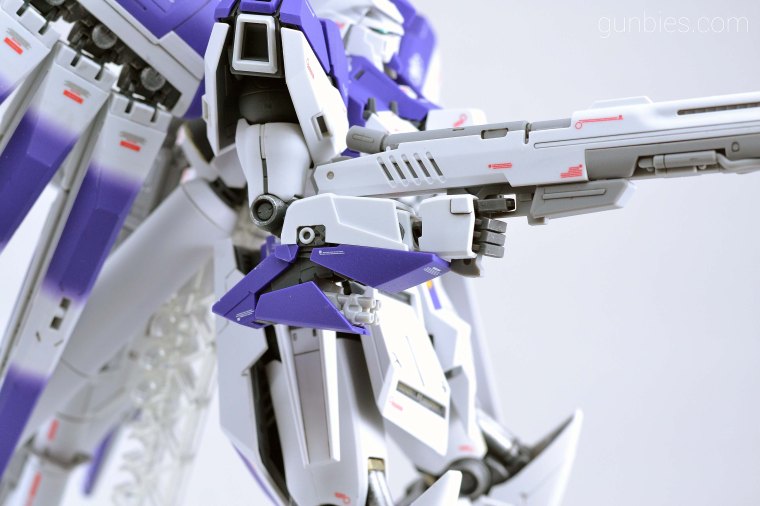
There’s a hidden machine gun on his right arm.


There’s a hidden beam saber hilt on his left arm:


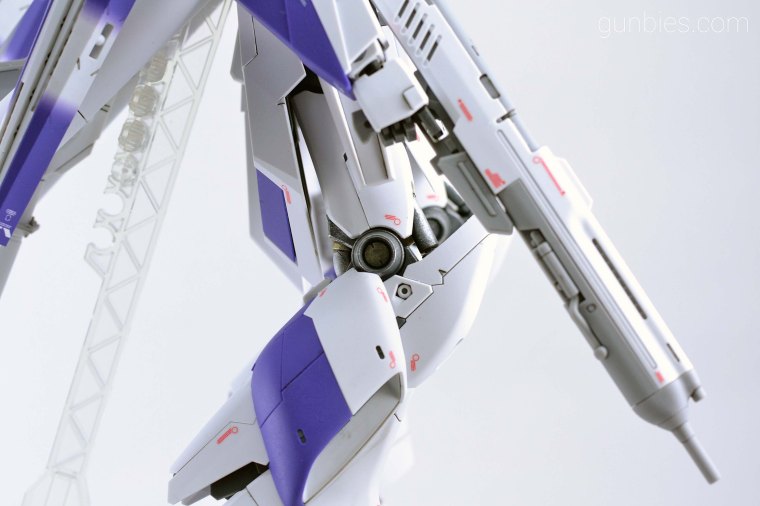
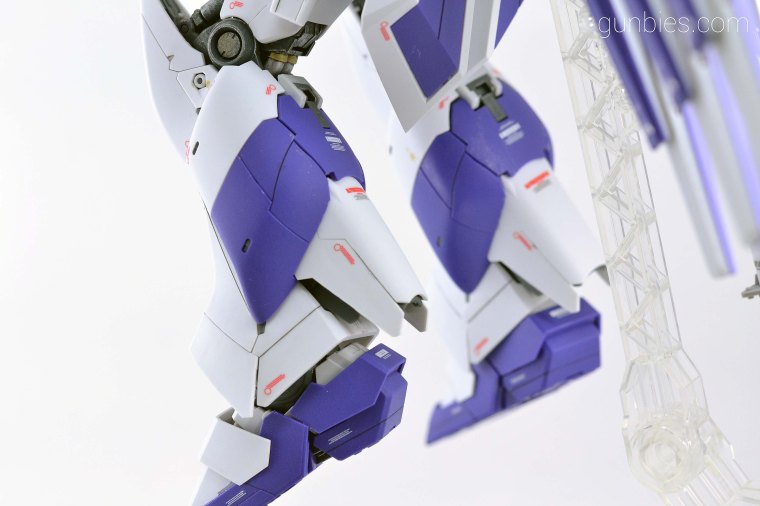
His lower leg armor pieces can also be opened to reveal thrusters:


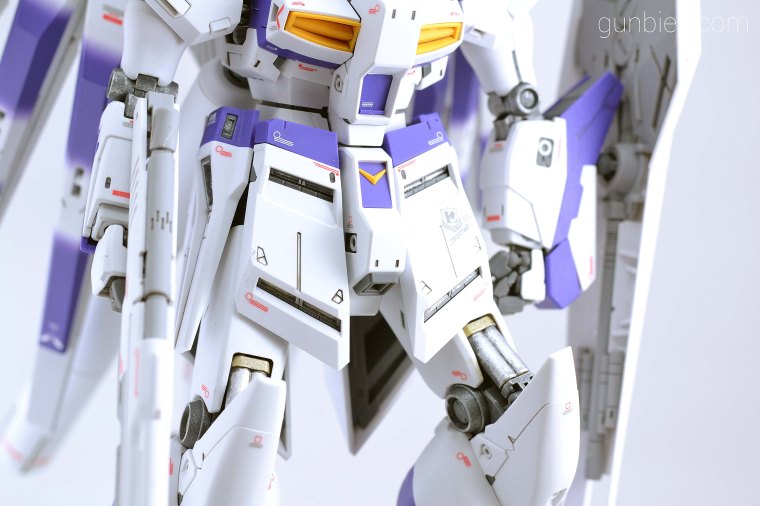
His back skirt too can also be opened:


Two more beam saber hilts are on his backpack fin funnel holders:


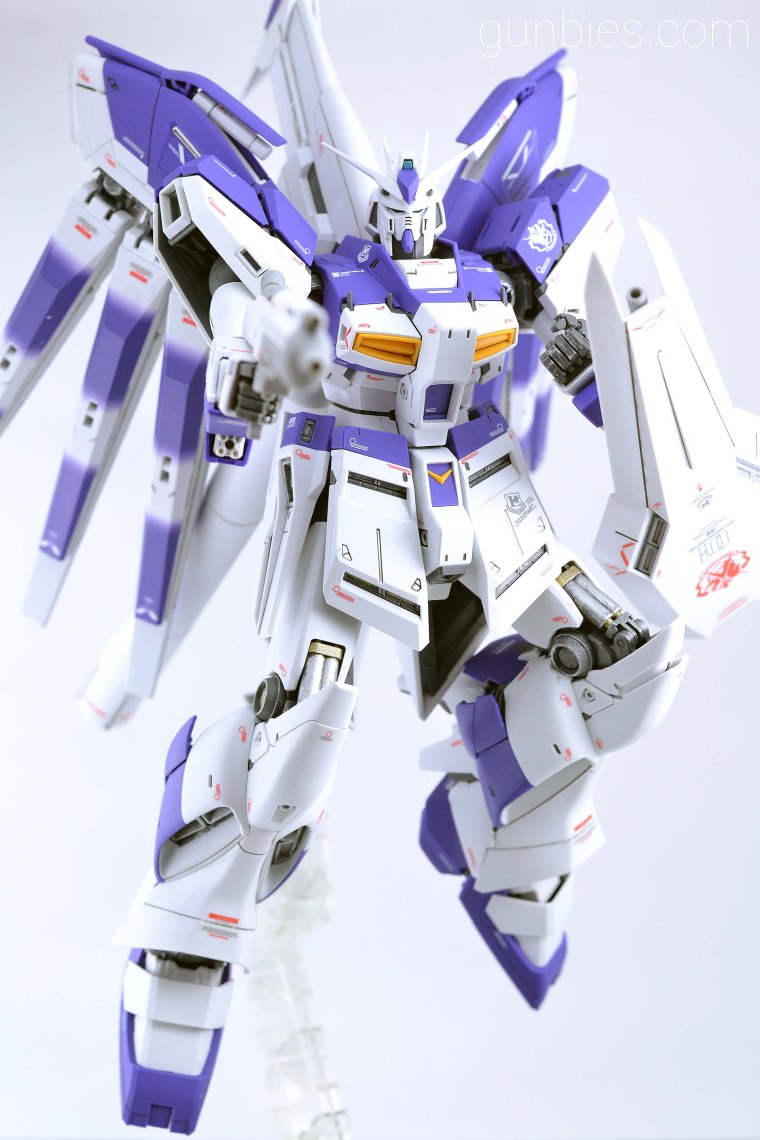
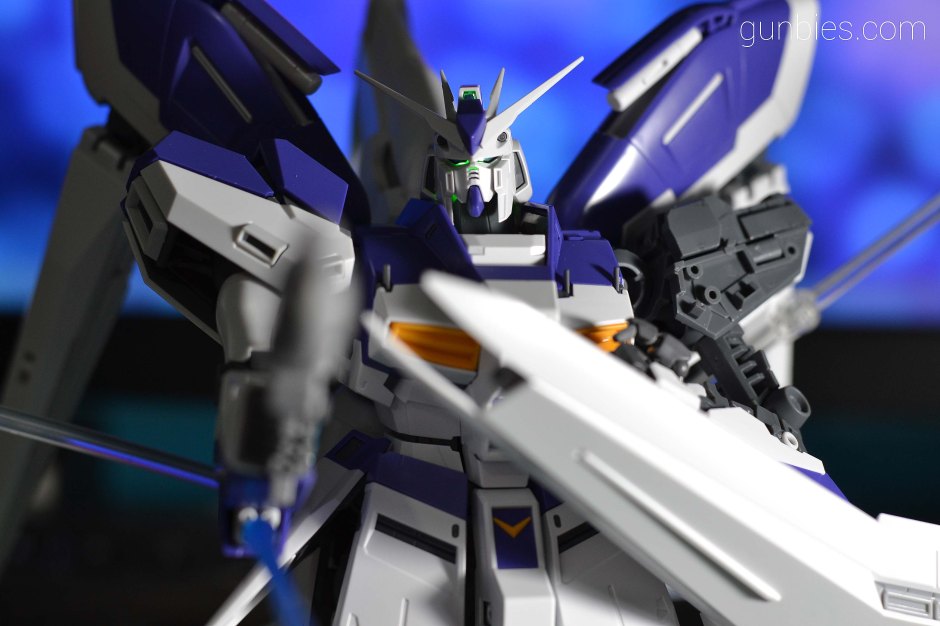
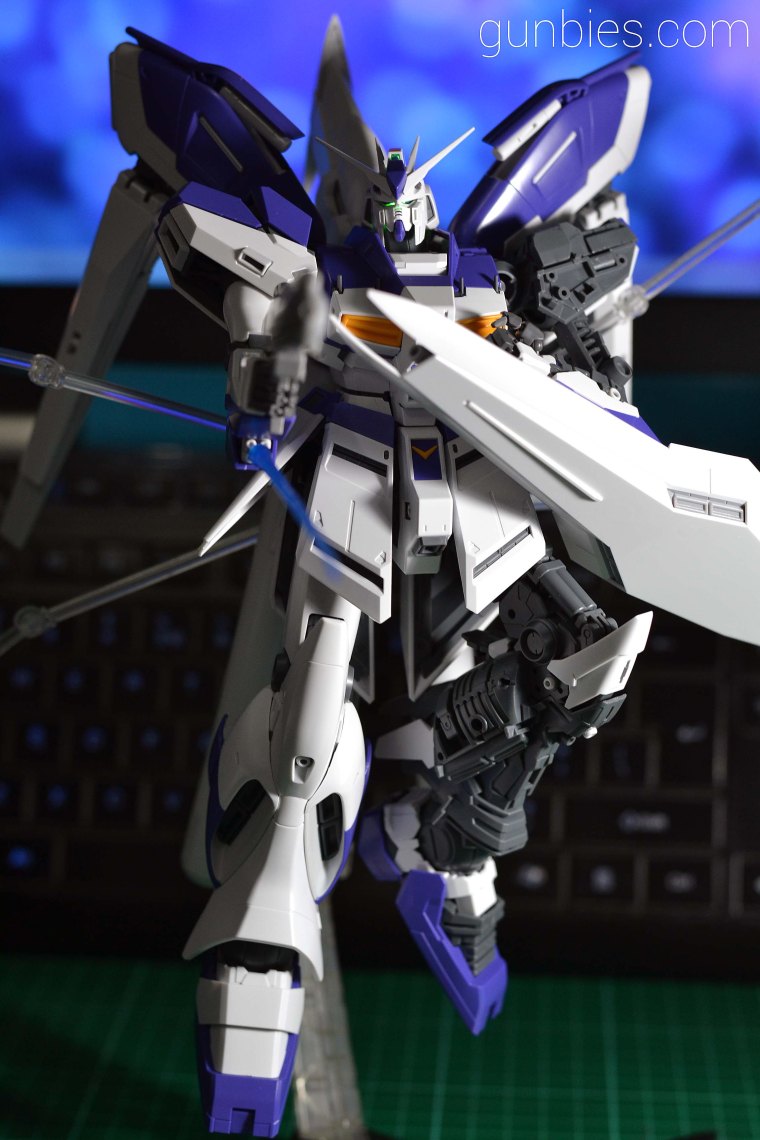
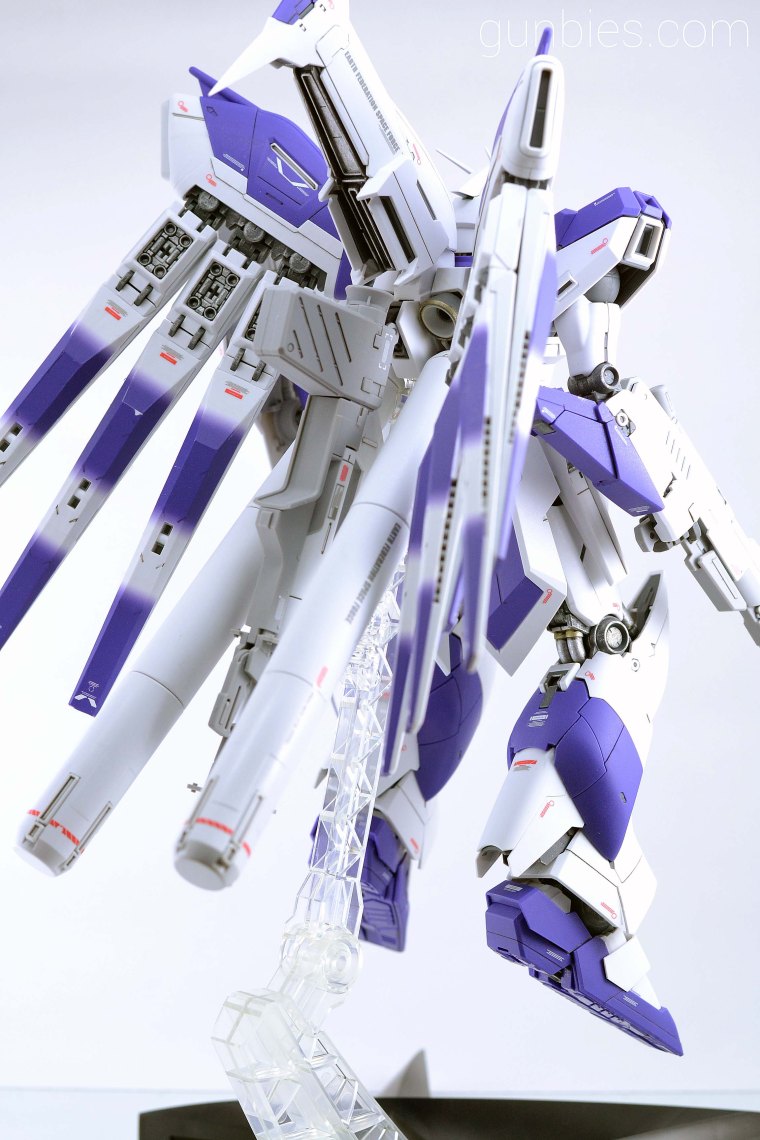
With fin funnels on display:


Things I don’t like about this kit:
1. Big sheet water slide decals for the fin funnels, they are the hardest to apply and to maintain, they are easy to tear if mishandled, certainly requires gentle and graceful hands to apply this large water slide decals, I failed a couple of times and managed to tear some decals. XD
2. Back heavy, but it’s to be expected. You won’t be able to pose him properly with everything attached without the use of the back support (transparent piece that is also used for the stand) provided in the kit.
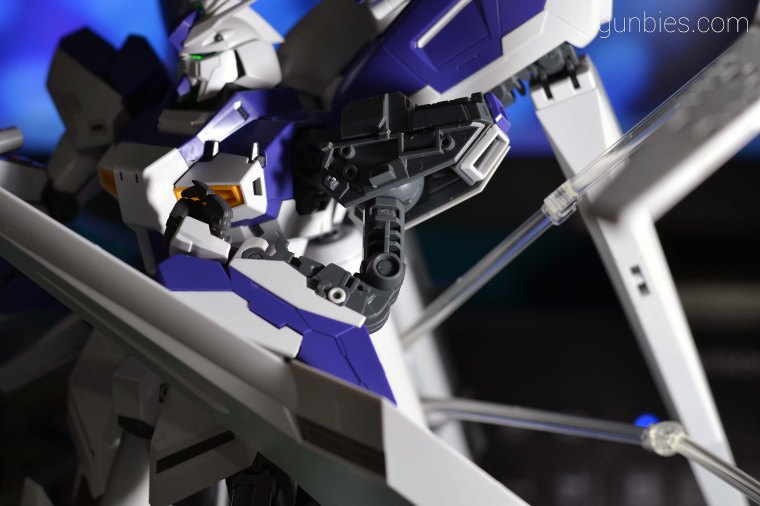
3. The new MG hands are nice in detail and articulation but in exchange, the finger joint can easily be loosened when too much pressure is applied on the fingers and then they fall off by themselves. Increased complexity yields increased faults.
4. The design of the fin funnel display holders are horrible, it’s quite hard to pose the fin funnels for display the way you want them to, took me quite a while.
Things I like about this kit:
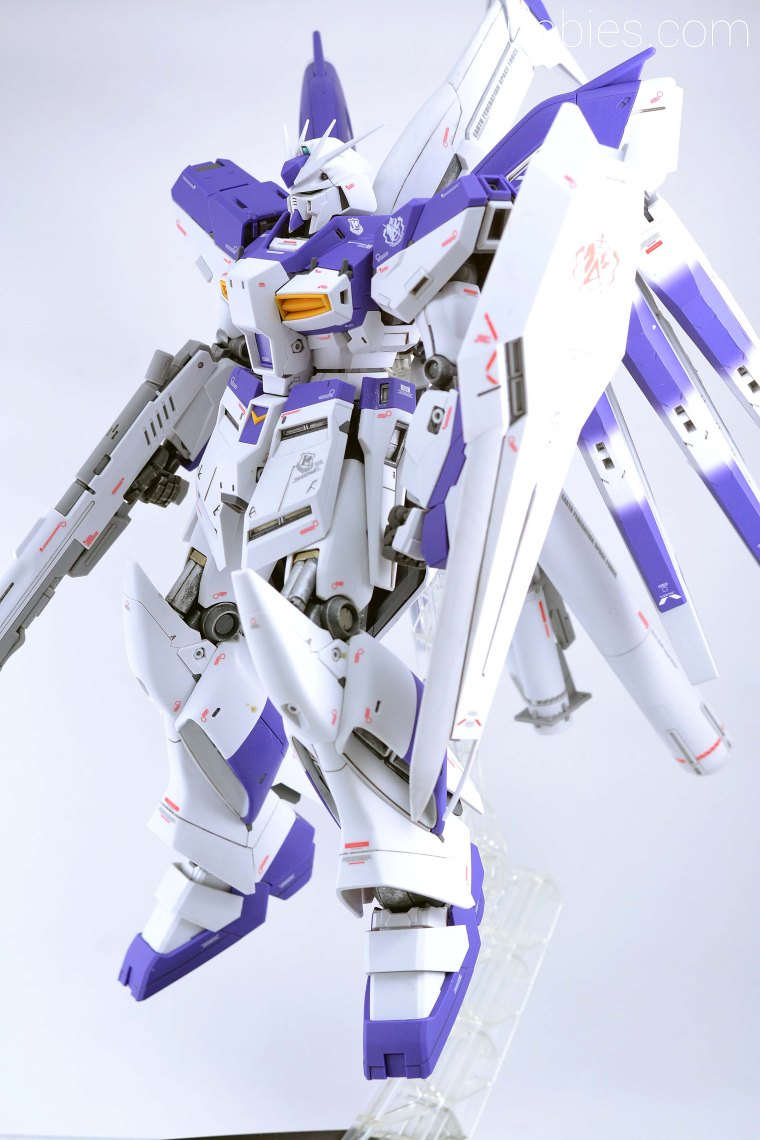
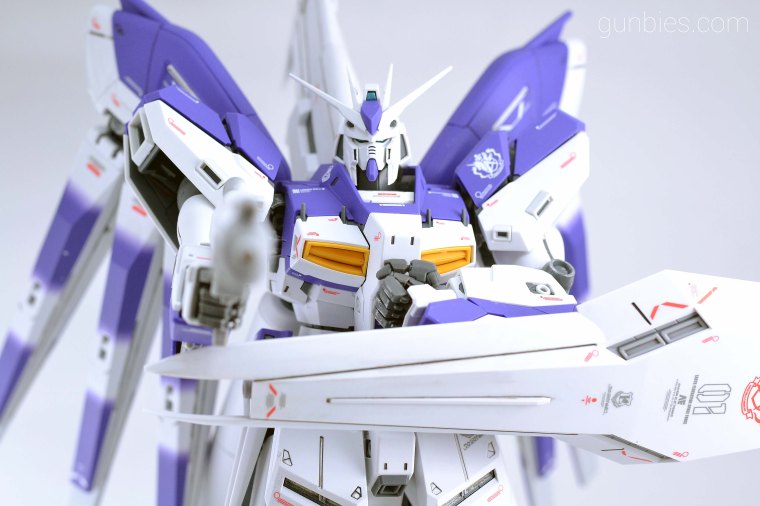
1. Despite the excruciating water slide decal application, the resulting effects of the vast amounts of decals is superb! That’s what you normally expect from a ver. Ka kit. He looks more realistic with the decals applied.
2. Kit comes with a display stand and fin funnel holders for display.
3. MS has lots of gimmicks and parts that can be opened.
4. Fin funnels, nuff said.
5. LED support in the body unit for the eyes to light up if you have an LED unit.
6. Details are superb!
7. I’m liking the purple and white color scheme. Works for me. At first I didn’t like it but I learned to appreciate the color combination. 🙂
And that’s it! Thanks for viewing! Till my next kit! Probably I’ll go back to HG kits, particularly the new HGBF series. MG kits really take a toll on my hobby willpower! XD
MG 1/100 RX-93-V2 Hi-V Gundam Ver. Ka WIP3
Two words. DECAL HELL! This is the hardest water slide decal work I have done in my Gunpla adventure. XD Painting details and topcoat left to do. I can’t imagine going through the same ordeal if I bought an MG Sinanju Ver. Ka.


MG 1/100 RX-93-V2 Hi-V Gundam Ver. Ka WIP2
Hello everyone! Just done with the snap-fit build. Next thing to do would be panel lining, water slide decals and hand painting some extra details. Still got a lot of work to do for this kit. So far he really looks great and you can put an LED unit for his head to light up. Enjoy the preview photos!


